Don’t miss Part 1 and Part 2 of our Doll Quilt Sew-Along from Alissa.
From Alissa: Welcome back to the doll quilt sew along! Here in part 3, we will be quilting our quilt “sandwich”. I think for new quilters, sewing into their pretty quilt top can be scary. But really this is the BEST step!
It’s now that your quilt top will become even prettier than it already is. Some people like to quilt by hand, but I’ll be focusing on machine quilting. There’s a great tutorial on hand quilting if that’s what you’d prefer to do. I decided to quilt my top with both straight lines and free motion quilting, so I’ll be covering both options.
Part 3: Quilting
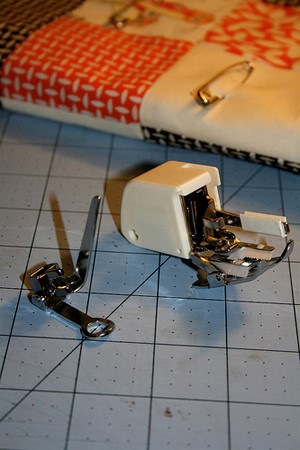
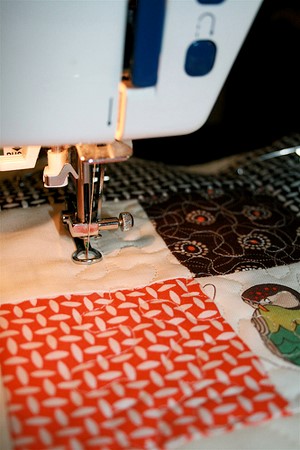
For machine quilting, you’ll need a walking foot for straight lines. It feeds all layers of your quilt sandwich through the machine evenly. If you don’t have one, on a quilt this small a normal foot could work fine, but you wouldn’t want to try it on a larger quilt.
If you plan on quilting more and don’t have a walking foot, I’d suggest buying one. In this photo, it’s the bigger foot with the white plastic. For free motion quilting, you’ll need your darning foot. It’s the one in this photo that is metal with a hole in the middle of it.
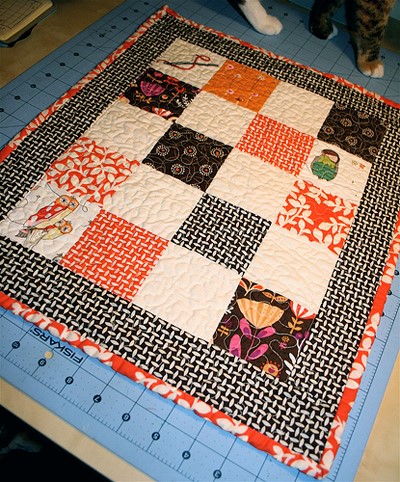
First, I attached my walking foot and I sewed a straight line along all of my borders. Sewing right in the seam like this is called “stitching in the ditch” and is a good way for a beginner to quilt. But maybe you want to sew diagonal lines? Or a square spiral that starts in the center of your quilt? The options are limitless! Think about what will showcase your fabrics. Be creative and have fun!
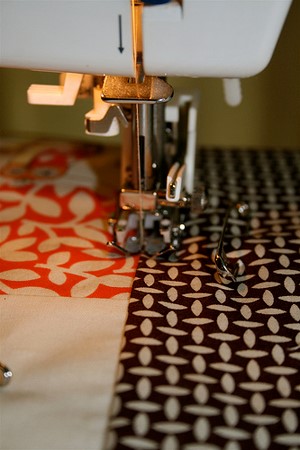
Be sure to set your sewing machine so that the needle stops in the down position. This way you can stop and start as much as you’d like. You’ll also be stopping and starting to remove your basting pins as they get in your way.
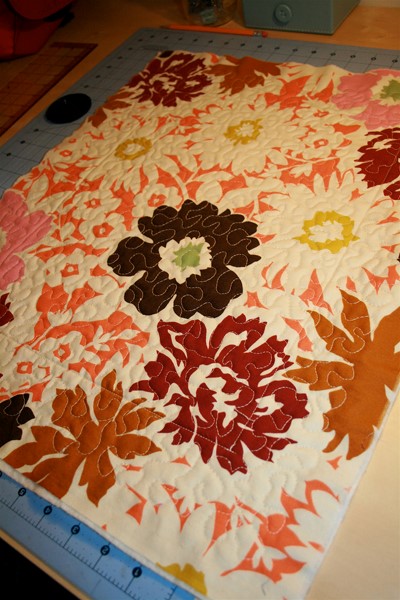
Next, I filled in the rest of my quilt with free motion quilting. The pattern I did is called stippling and it’s a very basic all over pattern that’s perfect for first time free motion quilting.
My single biggest tip is to practice on scraps of quilt “sandwich” before you dive into your pretty top. With some practice, it’s not tough to get the hang of it! Attach your darning foot, put your feed dogs down (don’t forget that step or you’ll struggle to move your quilt around) and go!
Be sure to mind your embellishments as you quilt. You wouldn’t want to sew over some pretty embroidery or break a needle on a button!
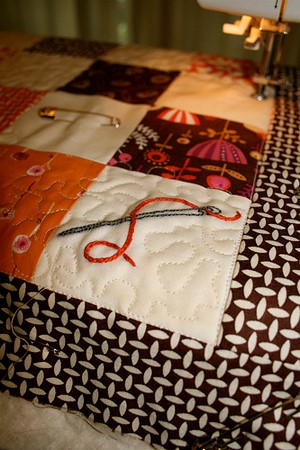
Once you have finished quilting, stop and look at your amazing work. Isn’t it exciting how the quilt comes together when you sew all the layers like this?

See you back here for part 4 when we will bind our quilts and be all finished!