Amanda got right to work with her version of the Patricia Tunic, and her review will help you feel comfortable with this Sis Boom. We’ve seen Sis Boom’s Jennifer Paganelli at Quilt Market wearing beautiful versions of this tunic, in her bright & cheerful prints. We also have many additional Sis Boom PDF patterns available in the shop, so check out the Molly Peasant Dress, Sophie Tunic, Emily Bell Sleeve Tunic, Meghan Peasant Dress, Shana Bell Sleeve and the Carly Baby Bubble Romper. You can learn more about Amanda in her introduction and you can visit her online home at Sasikirana Handmade.Patricia Tunic Pattern Review
Patricia Tunic Pattern
Patricia Tunic, a Sis Boom Pattern
Description
This is a tunic pattern with a contrast fabric facing option. You could make the tunic in different lengths ranging from 24″ to 36″. The sleeve options are straight sleeves with different lengths from cap sleeve to 25″ long or a long bell sleeves. The first time I opened the PDF pattern I was so surprised to see there’s 285 pages of it! It’s a good thing the designer has a table to show which pattern pages to print according to your size.
Materials
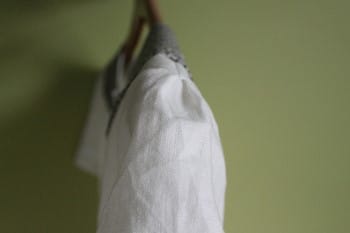
The pattern stated that you could use light to medium weight fabric. I used white linen for the main fabric and a quilting weight fabric from Denyse Schmidt’s new Hope Valley collection.
One thing that I think is not satisfactory is the yardage requirement. For example, for size small I would need 3 yards of main fabric. Because I didn’t make the longest option available, I didn’t need that much yardage. My suggestion is print and assemble the pattern pieces first and lay them out on the floor so you could measure the exact yardage you need accordingly.
Fabric Recommendations
Any summery fabric would work well in this pattern, just make sure that the main fabric and contrast fabric are similar in weight. I would love to make this again in Anna Maria Horner’s voile.
Overall Design
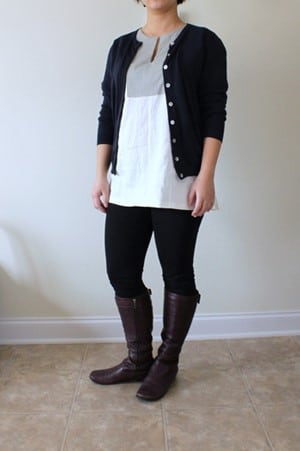
The tunic is nice and loose like the description, but way too loose for my taste. Next time, I would go down a size like the designer said to get a more form fitting tunic. For now, I would wear the tunic with cardigans, leggings, and boots. Later on in summer, with shorts and sandals.
Written Instructions
The instructions are nice and clear but I was more helped with the diagrams and pictures.
Diagrams / Images
There’s a diagram or photo for every step so you really feel like there’s someone to guide you in every step.
Pattern Pieces
There’s 6 pieces of pattern that you have to cut out and assemble together using glue, tape, or staple. I don’t have any trouble putting the paper pieces together. The designer clearly labeled each piece to show which one overlaps which. The pattern is easily printed again if you did something wrong with it the first time, or if you want to make it in a different size. For this PDF pattern, it’s not multiple sizes printed on one pages, instead it’s only a single size for each page you print. So for my size small and short sleeve option, I used 20 sheets of paper to print it out. For bigger sizes or longer sleeve options, you would certainly need more paper. Those pages didn’t include the instruction pages, I skipped them because they are around 70 pages long. I just put my laptop next to me while I was sewing.
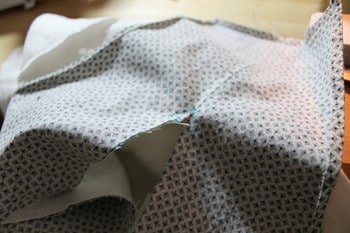
Back placket.
Overall Level of Difficulty Intermediate
I would suggest this pattern for an intermediate sewer. I sewed this tunic here and there in a few nights. You could surely made it in one weekend.
Tips + Modifications
• I would make the sleeves fit closer to the body since it’s hanging very widely at the hem.

• The instructions told you to cut the neck opening before sewing it, but I sewed it first before making the cut. I didn’t find any measurements to the actual cut that you should make. I’m not sure if I missed it somewhere in the instructions but I just eyeballed it on myself and mark it on the fabric. And I only marked my facing fabric, instead of both facing and main fabric like the instruction stated.
• The seam allowance is only 1/4″ compared to 5/8″ for the usual commercial pattern so you would have to cut the pattern precisely because there’s no wiggle room.
• I didn’t miss much from the usual commercial tissue pattern, except for notches, which you can easily mark and cut yourself.
Conclusion
I love the idea of a this pattern, you could print out only the sizes that you need and there’s plenty of options to make this tunic in a bunch of different styles. I’m seeing myself making it into a dress with the longest length option.