Kelli shows you how to make some pretty fabric flowers for weddings, headbands, party decorations. She also shows you how to turn these basic flowers into beautiful boutonnieres below.
How to Make Fabric Flowers
Materials Needed
• About 1/8 yard of drapey fabric or any other thin fabrics will also work
• Matching thread
• Scissors
• Needle
Step 1
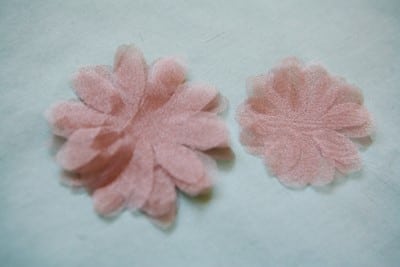
Cut 6 squares of fabric the desired width of your flower and pin together.
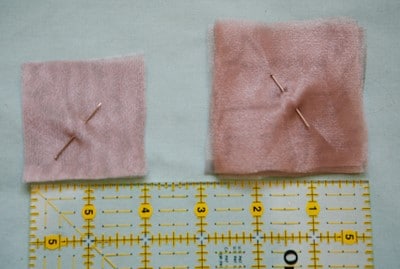
Cut 4 squares of fabric about 1/3 smaller than the above stack and pin together.
Step 2
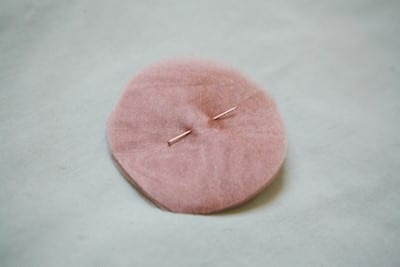
Take the larger stack and cut off the corners so that it forms a circle. Repeat for smaller stack.
Step 3
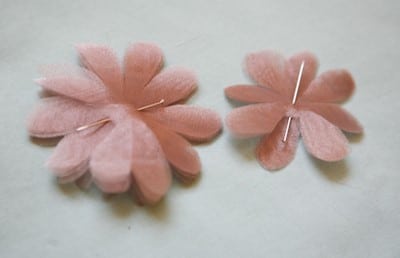
Now cut our the desired shape of your petals. I like to free hand this part, but if you want a pattern Martha Stewart has some nice ones.

Unpin the stack and turn the fabric so that the petals don’t match up with one another and pin back together. Repeat for smaller stack.
Step 4
Thread your needle and knot the end.
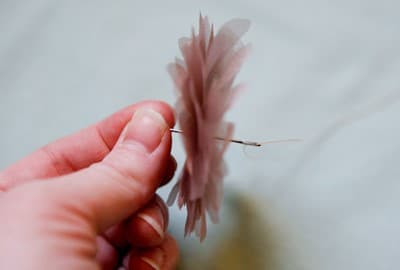
Put the smaller stack on top of the larger stack.
Starting at the back, sew through all layers of fabric and tack the middle of the flower a few times to secure all layers together.
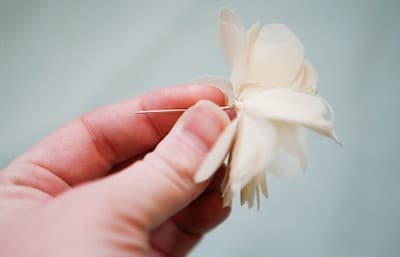
Step 5
Fold the flower in half and make a couple of small stitches in the back of the flower to help it to stand up. Fold the opposite way and repeat.
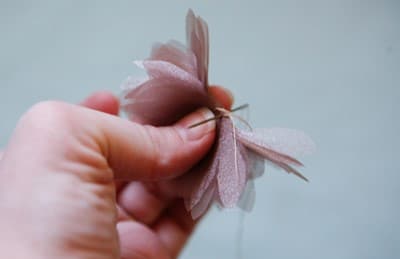
Secure the end of the thread and cut.
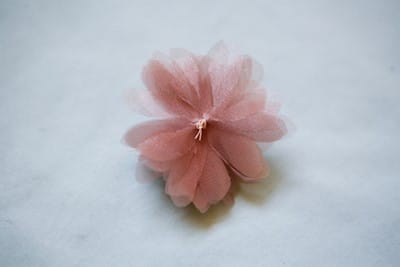
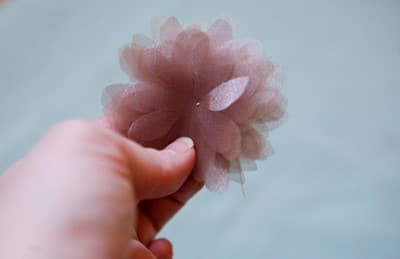
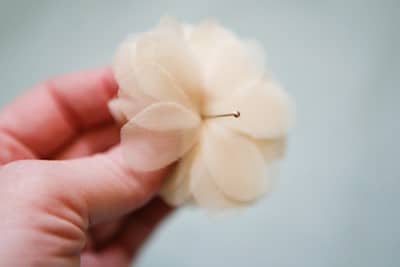
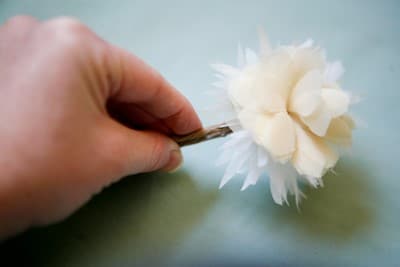
Fluff and separate the petals until they look how you want. Your flower should look something like this on the front…
And like this on the back:
How to Make Fabric Flower into Boutonniere
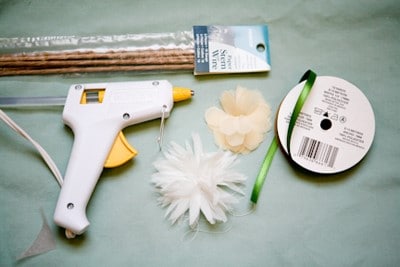
Materials Needed
• Fabric flower(s) made using the above tutorial
• Scissors
• Glue gun
• Ribbon
• Straight pins
• Needle and thread
• Paper stem wire
Step 1
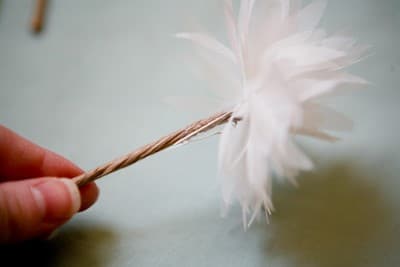
Starting at the top of the flower, stick a straight pin through the center top and into the back of the flower.
Step 2
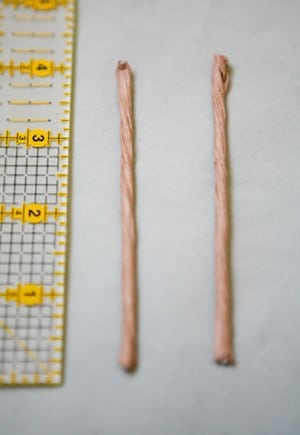
Cut stem wire to desired length of stem – about 4 inches tall (you can trim this later) – you will need one for each flower.
Step 3
Use glue gun to attach the straight pin (attached to flower) to each stem. Glue stems together.
Step 4
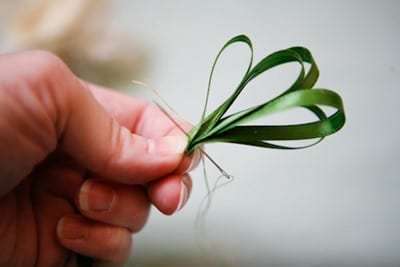
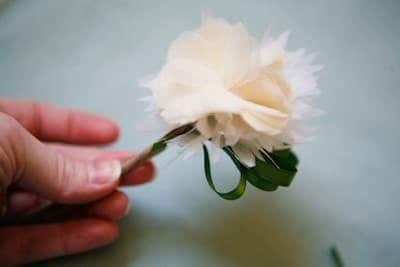
Create “leaves” by looping your ribbon several times and to desired length. Use your needle and thread to secure the bottom loops together.
Step 5
Glue to the back or side of the stems.
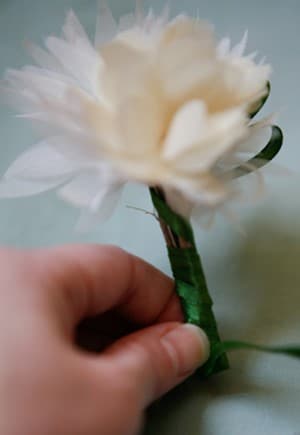
Step 6
Starting at the base of the flowers in the back, glue the end of the ribbon to the stem and wrap diagonally down the stems and then back up the stems, ending where you began. Glue to secure.
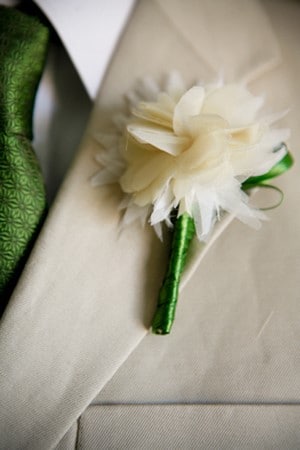
Now you are finished! – Pin to the lapel of the groom/groomsmen’s jackets.
Other ways to use your fabric flowers at a wedding:
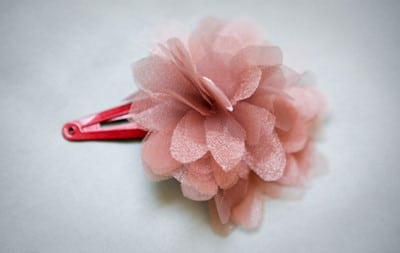
Glue to a barrette or headband for a flower girl.
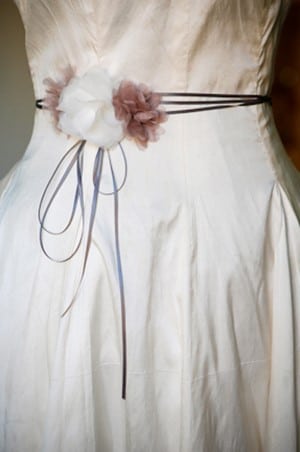
Sew a grouping to a ribbon to form a sash for a bride.