Pattern
Ella Carry-all from Grand Revival

Ella Carry-all
The Ella Carry-all is pretty and practical, the perfect size for a beach bag, diaper bag. Or fill it with PJs and toothbrush for a sleepover at grandma’s. The bag has two exterior open pockets and a third pocket with a velcroed flap. A key tab inside keeps your car keys or baby’s binky handy. With a drawstring and cord stop closure, it’s easy to open and close. (From the pattern envelope.)
Materials
Quilter’s cotton, upholstery fabric, old or new bark cloth, etc. Nylon could also be used for lining.
This is a great pattern for using up fabric in the stash; a mix and match chart is included with measurement of each cut piece for quick reference when choosing fabrics.
Notions call for twill tape or ribbon for the facing, shoelace, cotton cord, or ribbon for drawstring and 8 1/4″ grommets.
Fabric Recommendations
Anything in your stash really! I think twill and canvas would work for lining, bottom, or outer bottom panel to make the print fabric on the pocket pop. I used a set of fabric from Anna Maria Horner’s Lollipop Shop and flannel for the interfacing. I have a small drawstring bag that I made out of the fabric that I have been using for small knitting projects and when I saw this pattern I knew it would be great for larger knit projects!
Overall Design
This is a great functional bag that can hold lots and folds up small. The outer pockets can hold water bottles or a stack of legos. The strap is a great length for carrying on the shoulder or in hand (no dragging the bottom of the bag on the ground).
Written Instructions
I am overall very pleased with the instructions. I often have a habit of deciding the written instructions are lacking or make thing way to difficult and just finishing the project however I decide is easiest. I actually followed all of the directions with this pattern. Most steps were explained clearly; the only part I had a problem with was the attachment of the key tab and the twill tape on the inside rim.
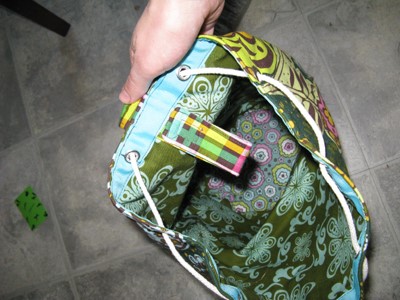
The one side of the hook and loop tape would have been covered by the twill tape, making the Velcro feature useless. I just moved the hook and loop tape down on the key tab so it is below the twill tape. Also, the pattern asks for hand basting the interfacing to the main fabric… I am incredibly lazy when it comes to hand basting and machine basted instead.
Diagrams / Images
All of the steps are shown clearly.
Pattern Pieces
Printed on heavy weight paper and each piece is marked very clearly for cut line, stitch line, attachment of Velcro and grommets, and notches for matching. Each piece is also marked with numbers and cut fabric 1, 2 or lining to make cutting (and mixing and matching fabric) easier.
Overall Level of Difficulty
The circular bottom can be tricky for beginners but the directions and diagrams are very clear on this step. Pin the heck out of it and be sure to check for puckers when sewing!
Modifications + Tips
I had a moment of confusion at the fabric store as the 1/4″ grommets called for in the pattern are called eyelets at the 1/4″ size. I really don’t know why they have a different name as they look and function exactly the same as larger sized grommets.
Be sure to match up the side seams on the top and bottom sections.
Use the toe of the iron to open up the seams on the right side of the turned and top stitched straps, then press the strap flat; this makes the seam lay nicely and is much easier to sew when top stitching. If you use a plaid like I did, cut the pieces individually if slightly wonky plaid lines bother you.
I think snaps would also work in place of the Velcro for the key tab and outer pocket closure. A double layer of bias tape made from coordinating fabric would be a nice alternative to face the bag top if twill tape or ribbon isn’t handy. Also, buttonholes might work for the grommets if one doesn’t have grommets on hand. There are no inner pockets, which doesn’t bother me at all, I always forget stuff in pockets on a big bag, but adding pockets might be handy for some.
Conclusion
A fun pattern to sew with a useful and pretty end product. The directions are very simple to follow and the project can be completed in one long sewing session. The carry-all would make a great I-need-something-tomorrow-morning gift. And did I mention that it holds a lot?! In the picture I have 10 skeins of yarn stuff in the carry-all! But it doesn’t have that way too big feeling. This is a pattern I will definitely sew again… I think Isaiah might like a sock monkey bag!