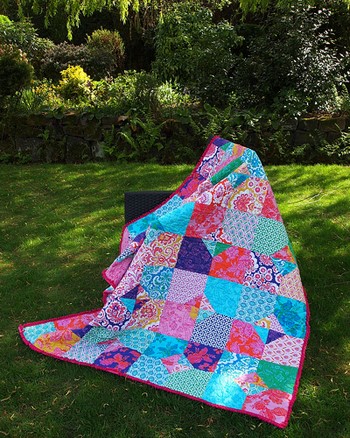
Katy Jones has a new Picnic Quilt tutorial for you today! I’m totally honored to have been invited to share a tutorial with you guys and as Spring seems to be finally creeping in where I am in the UK, what better way to celebrate through sewing than with a picnic blanket made from the gorgeous jewel toned Honey Child fabrics. It’s the Royal Wedding this coming Friday, and this picnic quilt is fit for a Princess with pompom trim and beautiful, bright colors!
To Create Fit for a Princess You will need:
- 20 different fat quarters
- 4 ½ yards fabric for backing (or piece together small pieces to make one piece 70×80”)
- a piece of batting measuring 70×75”
- ½ yard fabric for binding
- (optional) 8 yards pompom trim
- rotary cutter
- cutting mat
- pencil for marking
- quilter’s ruler
Things to remember: Seams are ¼” unless otherwise stated, and press seams to the darker fabric as you go. Read the instructions fully to make sure you understand them before making a start. Measure twice, cut once!
- Finished block size: 15”
- Finished quilt size: 60×75”
Instructions
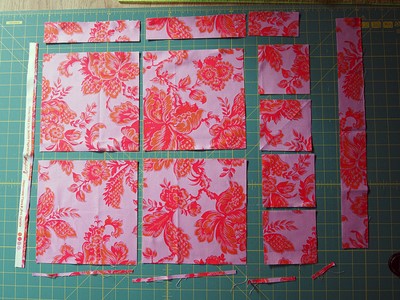
- Cut each fat quarter into four 8” squares and four 4” squares.
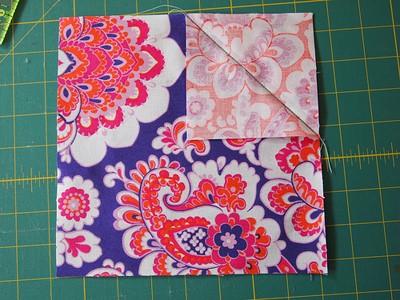
- Lay a 4” square right side down in the corner of a contrasting 8” square and, using a ruler and pencil, mark a pencil line diagonally across from corner to corner of the 4” square.
- Sew along the marked line.
- Repeat with all of the squares.
Trim away the excess using a rotary cutter and ruler. Be careful to cut 1/4” away from the sewn line.
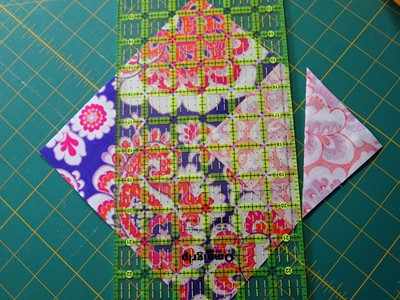
Press the new corner out to make the block square again.
Arrange your blocks in sets of four with the new corners meeting in the middle and forming a diamond. Be careful to keep the fabrics mixed up and don’t put two of the same fabrics together.
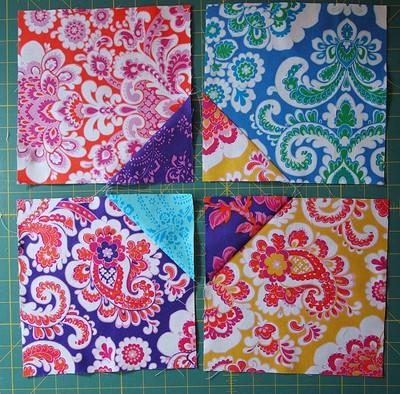
Sew the blocks together to make a total of twenty blocks.
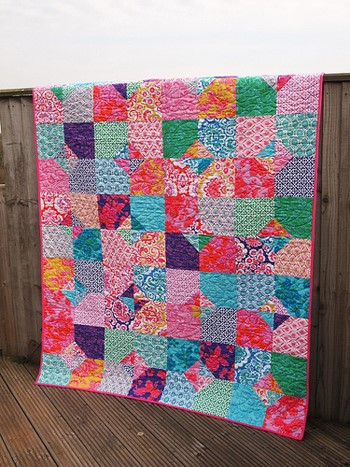
On a clean floor or design, wall lay out your blocks in five rows of four. Move your blocks around until you have a layout that pleases you.
Sew the rows together one by one. Only move one row to the sewing machine at a time, leaving the others in place until you are ready for them.
Piece together your backing fabric, press it well and you are ready to baste and quilt.
I chose to send my quilt to the long-arm quilters and she quilted in a paisley design to compliment the fabrics. Long arm quilting isn’t always as expensive as you may think and is well worth the price.
Baste Your Quilt
If you decide to quilt yourself you will need to baste your quilt first.
- Lay your backing right side down on a clean floor and smooth out the wrinkles from the center out. Using painters tape fix the quilt backing to the floor. Take care not to pull the fabric too tight or stretch it, as it will distort.
- Lay your batting onto the backing, leaving an even amount of backing visible all the way round. Smooth from the center out again.
- Finally take your finished and pressed quilt top and lay right side up on the batting.
- Again, ensure you have an even amount of batting and backing peeking out all around the edge of the quilt top.
- Baste in your preferred way, using curved safety pins or hand stitches. Space your pins approximately a hand space apart from the next and start at the center of the quilt, working your way out to the edges in a grid pattern.
- Carefully remove the tape from the floor and move to the sewing machine ready for quilting.
Quilting & Binding
You can find some great resources for quilting here on Sew,Mama,Sew! just follow this link which also has binding resources too, so I won’t go into details here on how to bind.
Pompom Trim
When you have quilted and bound your quilt you can add a pompom trim to the edge by hand stitching it on. You can machine stitch it, but I’m not sure how the pompoms will hold up over time with lots of use and washing, so I felt it would be more sensible to have it as easy to unpick as possible.
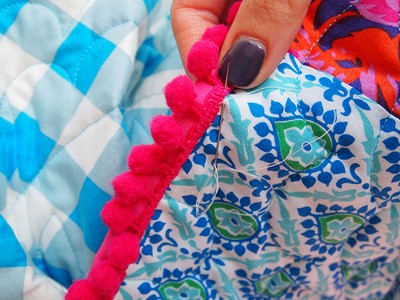
I found it easier to use my hand to hold the trim in place instead of pinning it. Start close to one corner and hold the trim very close to the inside edge of the binding on the right side of the quilt. Using a matching thread (I’ve used white in the picture to show the stitches better for the purpose of the tutorial) make tiny stitches along the edge of the pompom trim, just as you would if you were hand-stitching the binding to the reverse of a quilt. Continue all the way round, following the corners (you don’t need to do anything special here, just follow the edge) and when you get to where you started, tuck the raw edges under and finish off.
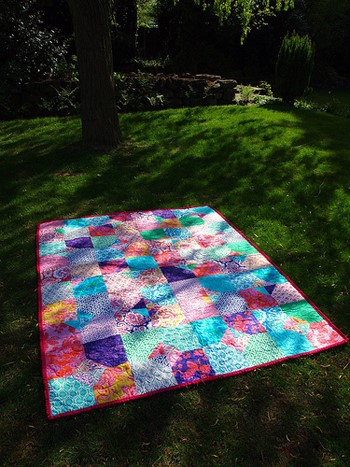
Give it a good shake, lay it on the nearest patch of grass and get ready for a picnic!
I hope you enjoyed the tutorial today. If you make your own Fit for a Princess Quilt we’d love to see it!