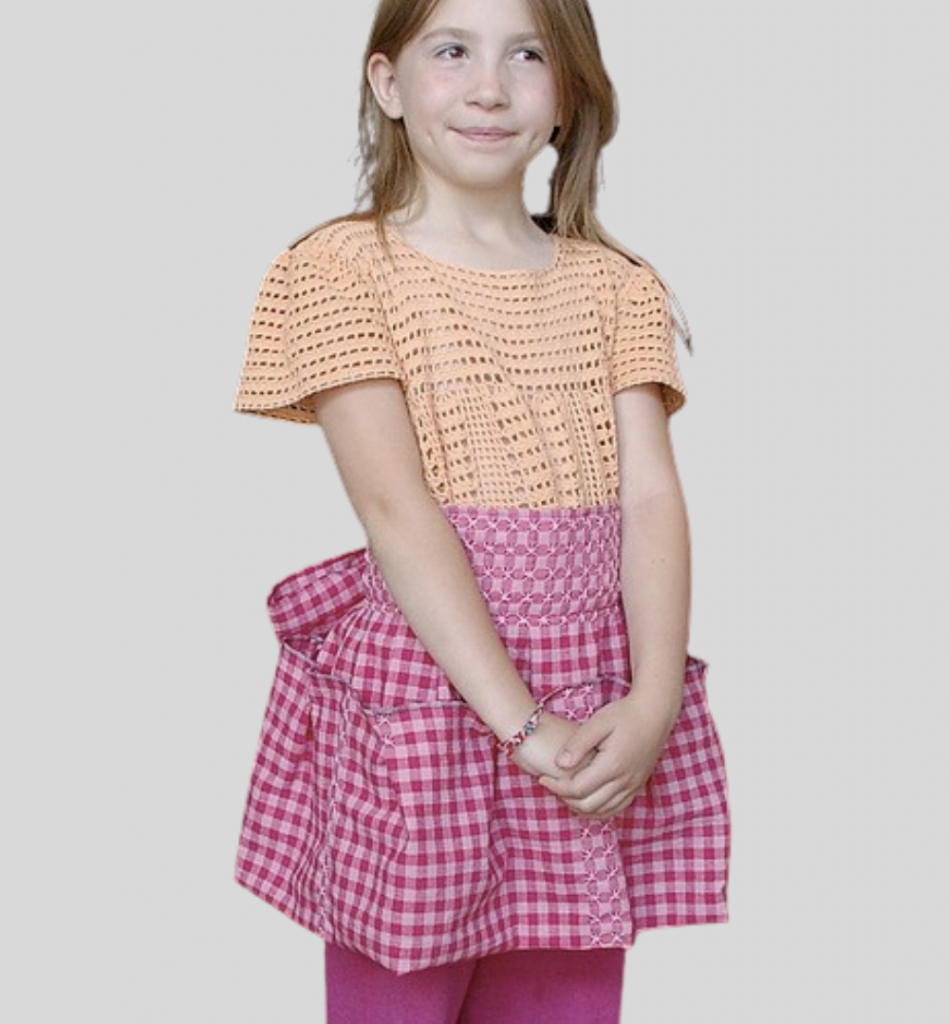
Child’s Hold-it-all Apron (can also be used as a clothespin apron for adults)
My youngest daughter likes carrying blocks all over the house and is always using her shirt to hold them. I figured there had to be an easier way of little children carrying large amounts of items around; since their hands are so small I figured an apron with big pockets would work. Once I had the body done I figured it would also make a good clothespin apron bag for adults. I made the ties extra-long so as the child grew the apron would still be useful to them. When the child is little you can either tie big loops for the bow or you can tie it in front instead of the back.
Supplies Needed
• Scissors
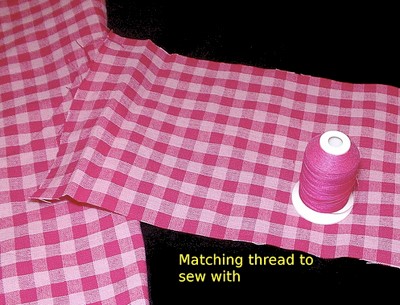
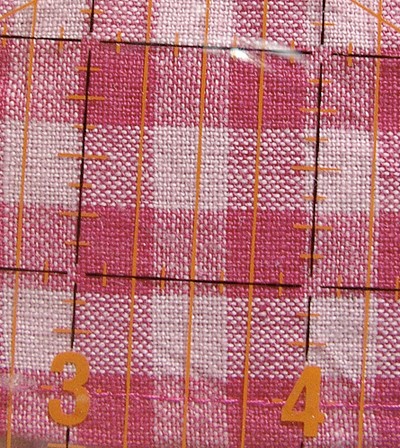
• Gingham fabric (that has a 3 x 3 grid per square inch, see photo above)
• embroidery thread or size 10 crochet thread
• Sewing thread to match fabric
• size 24 crewel needle for embroidery and a sharp needle for hemming
• straight pins
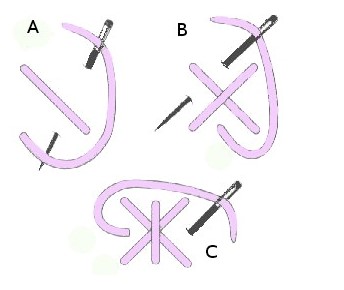
Here’s the diagram for a basic chicken scratch stitch:
This tutorial has three main parts: ties, apron top & apron pockets (which are a full panel that extends the width of the apron).
Prep work:
Cut gingham fabric into three pieces: one that measures 150 blocks long by 74 blocks, two that measure 150 blocks long and 17 blocks wide.
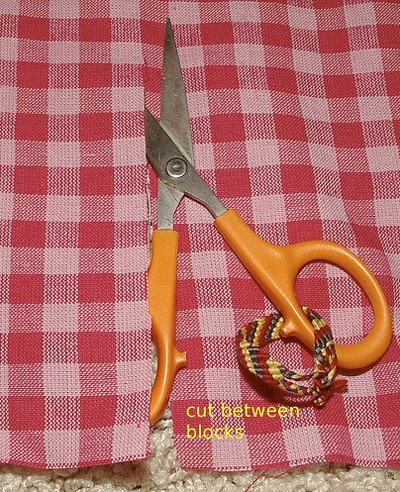
When cutting make sure to do this between blocks to keep everything nice and straight.
Tie construction
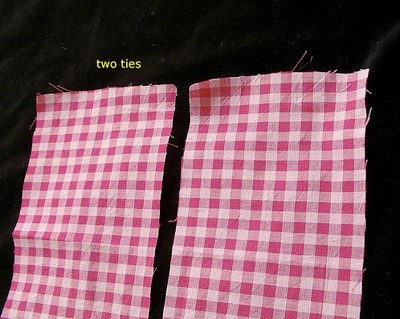
Your 2 strips that are 150 blocks long and 17 blocks wide are your ties.The length of the ties is long so it can be tied in front and grow with the child. If you do not want them this long just shorten the stripes.
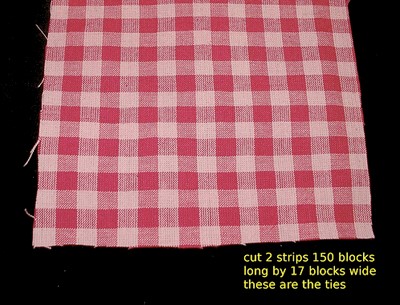
Cut 1 that is 150 blocks long by 74 blocks. Use salvage for the long part of this measurement (bottom part of apron body). This salvage will save a seam on the pocket (apron body).
Construction of ties
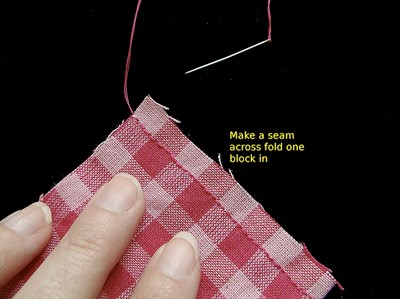
Fold ties in half length wise

Make a seam across the fold on one end (one block in).
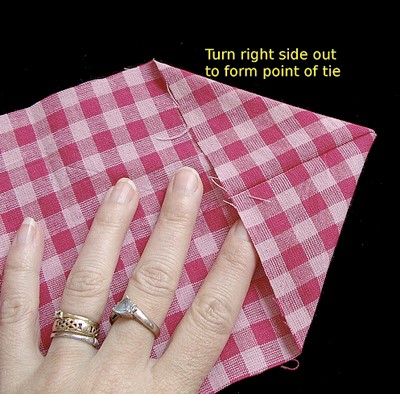
Turn right side out and line up center seam with center of tie. This forms the point of the tie.
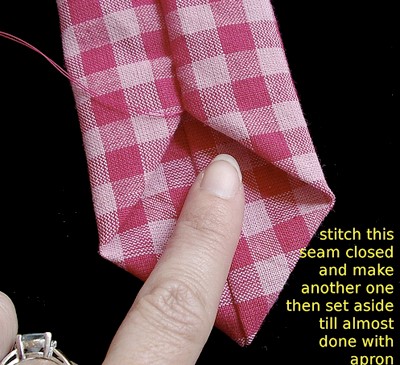
Fold again (see photo) and sew 1 block in from edge.
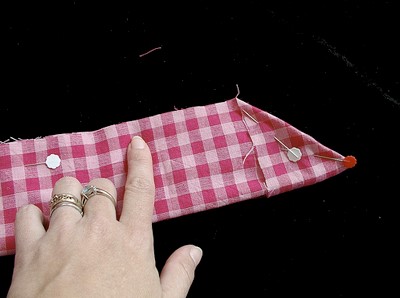
Turn right side out and hand stitch opening closed (do this for both ties and set aside till later).
Construction of apron body
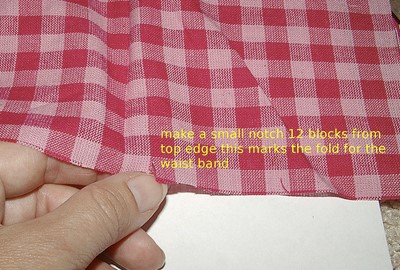
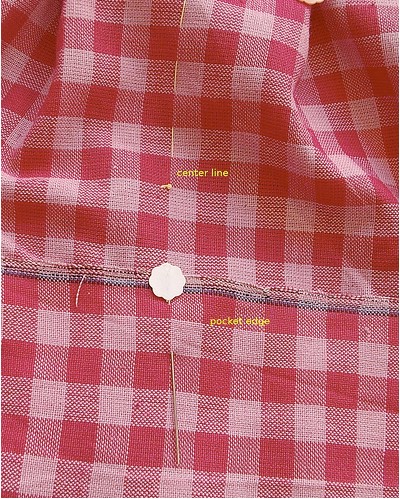
Make a small notch on the apron body to help you find where to fold the top of the apron over once you have embroidered it. This notch is placed 12 blocks down from the top of the apron. This is on the two short sides of the apron, farthest from the selvage.
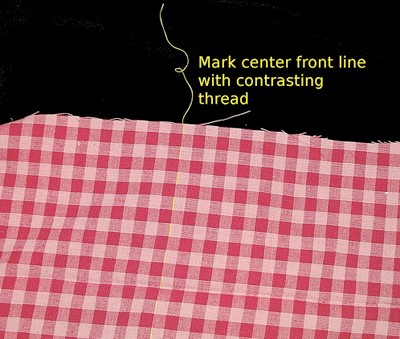
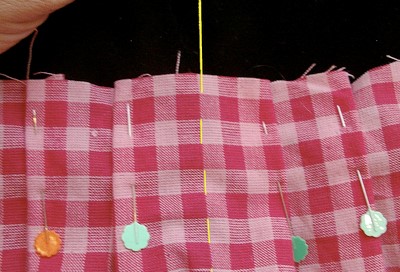
Mark center of apron with a contrasting thread.
Fold selvage end of apron up and line up blocks with their rows. Pin edges.
Making the waistband pleats
There are 38 columns of chicken scratch and 11 rows (1 row ends up in the seam allowance when you flip the hem so you can skip that one if you want as no one will see it).
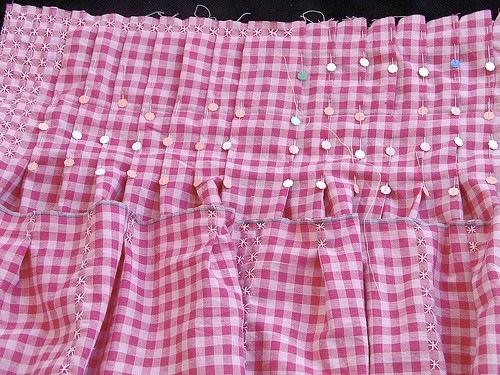
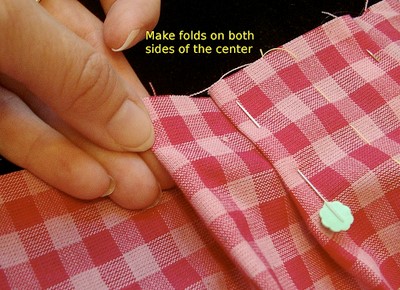
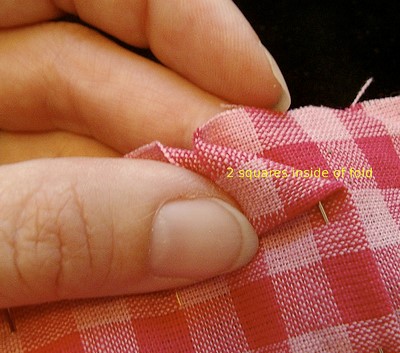
There are also 18 pleats total. There are four squares on each side of the center fold, followed by a pattern of four squares seen, then four hidden (two back & two forward). There are nine folds each on each side of the center.
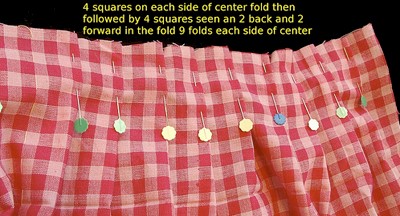
You make the folds outwards on both sides of the center..
Like so!
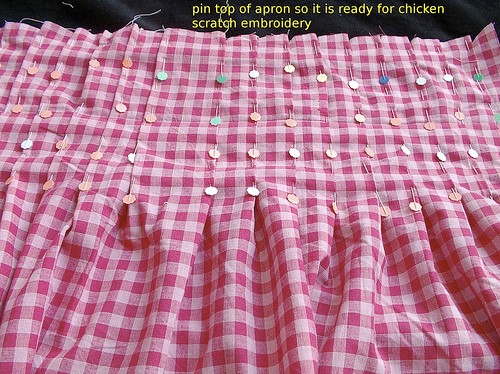
At this point you should have the top of the apron pinned so it’s ready for your chicken scratch embroidery.
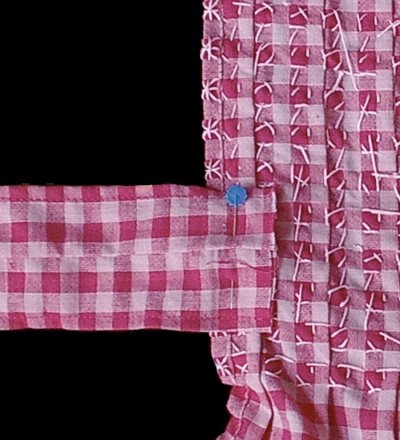
How to make pockets:
The pocket section goes across the entire bottom portion of the apron. Your pocket should be 24 blocks tall.
With apron facing you and right side up we are starting on the left side. Fold placements of pockets. Fold pockets as per arrows on first graph.
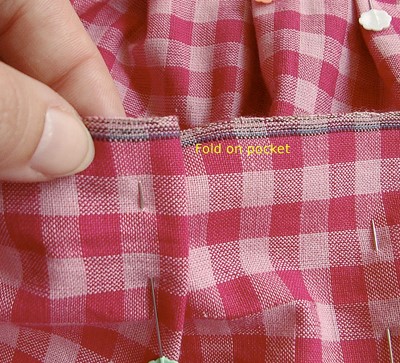
Four squares show on the front of the apron after each fold.
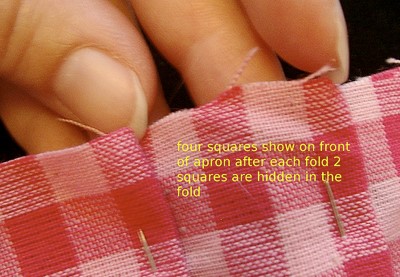
Two squares are hidden in each fold.
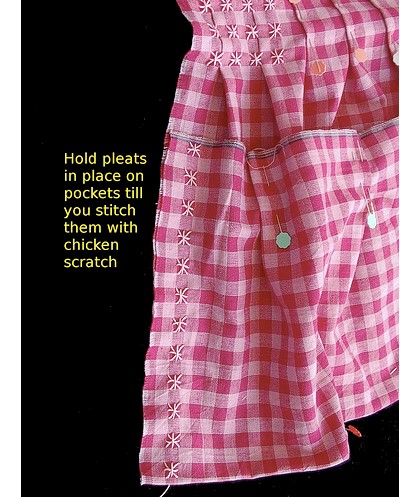
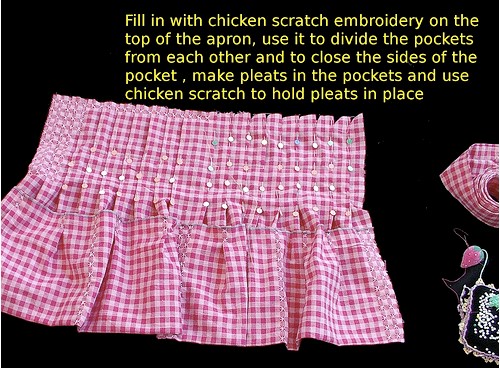
Pin folds for the pocket section in place and stitch with chicken scratch. Do not go through back of apron with your chicken scratch on the inside pocket folds or you’ll sew the pockets closed.
Folding the pleats.
The chicken scratch on the edges and that chicken scratch that divides pockets go through all layers.
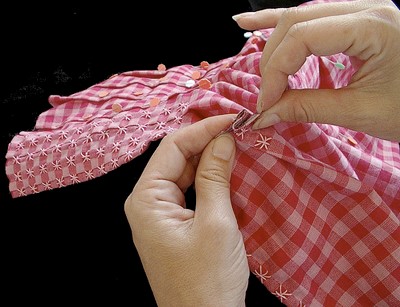
Fill in with chicken scratch embroidery on the top of the apron. Use your chicken scratch to divide the pockets from each other (sewing through all layers this time) and to close the outer sides of the pocket.
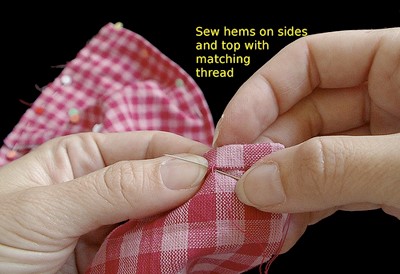
Hem sides and top:
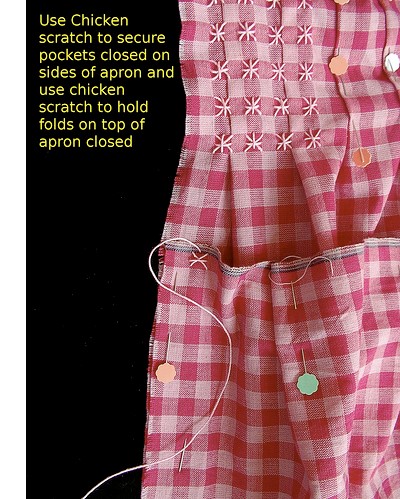
Use your chicken scratch pattern to secure pockets closed on the sides of your apron. Use chicken scratch to hold folds closed on the top of the apron.
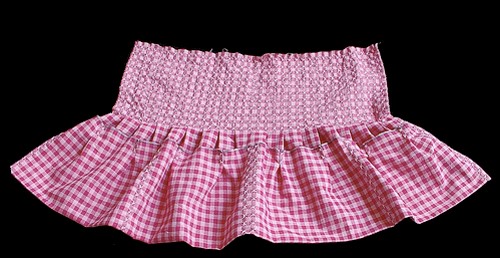
Here’s what it looks like when you’re done with the chicken scratch:
Fold over one square then another for hems on sides and top.
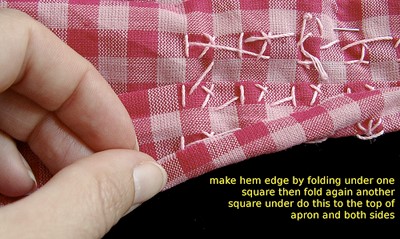
Use a matching thread and a blind hem.
Add ties:
Attach ties at the point where the notch was 12 blocks down from waist band, then flip the band down. You should only see 5 rows of chicken scratch on the front of the waistband and 5 rows on the back. This hides all the backs of the threads in the waistband. This thickness also gives the waistband strength to keep its shape. One row is in the flipped hem so that things lay smoothly.
Now your apron is all done!