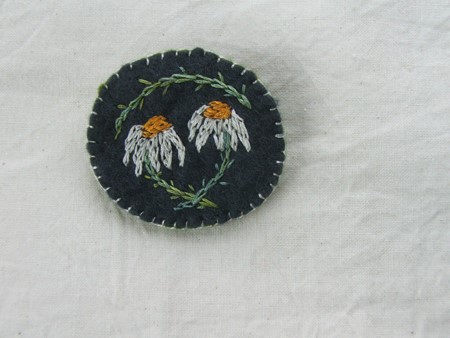
Melissa have been enjoying making these little pins by hand, late in the evening while listening to music. You don’t need much to create one, just some scraps of felt, some embroidery thread and a needle. Here I’ve included some guidelines for making a brooch with a hand-embroidered daisy design.
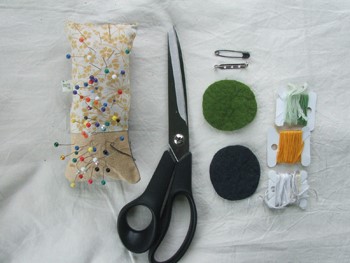
Materials Required
• Small pieces of felt- I like to use a wool-blend variety. I find the thicker the fabric, the better the brooch will wear.
• Embroidery floss – (to make the daisy design, I used white, golden yellow and leafy green thread on dark grey felt.)
• Embroidery needle and scissors
• Brooch back or small safety pin
Cut a circle of felt with a diameter of about 2″. Cut another circle with which to ‘back’ your brooch- you could use the same felt, or a different color. Here I’ve chosen a slightly oval shape, because I thought it was a better match for my design.
Decide on your design
I think it’s best to start with something fairly simple for your first brooch. Also, think about the color of your felt and which thread colors would stand out well together. My favorite things to embroider are plants, but it’s also quite fun to make a geometric design… Or think of it as a miniature embroidery sampler and try out a few new stitches!
If you’d like to make a daisy pin like the one above, here is a rough stitching guide that might help if this is your first time trying ‘free-form’ embroidery. The little loops in my drawing represent the chain stitch I used
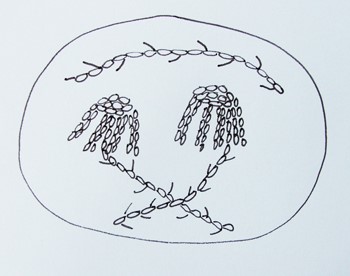
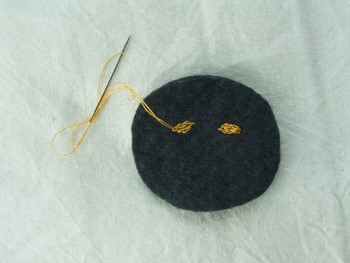
I started with the yellow centers, and then worked the petals separately, before working the stems and little vine at the top.
Here is a picture of some of my embroidered pins, a couple of geometric designs, a pine branch and some daisies:

I don’t use patterns or transfers for any of my embroideries, and I encourage you to just start stitching and see where your thread takes you.
For a quick reminder about chain or other embroidery stitches you can print it.
When you’ve finished your embroidery, you might need to trim around the edges of your felt circle, if it’s been stretched out of shape. You can use your backing circle as a guide. Next, place the backing circle over the brooch front and use a small blanket stitch to join them neatly together.
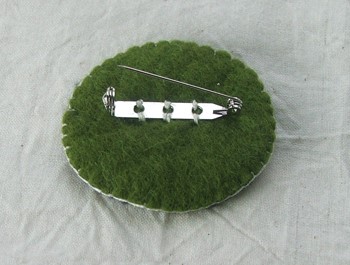
Finally, securely sew your brooch back or safety pin to the back of your brooch, making sure it’s lined up the way you want your brooch to sit when worn.
Pin your finished brooch to your coat, bag or cardigan and admire your handiwork!