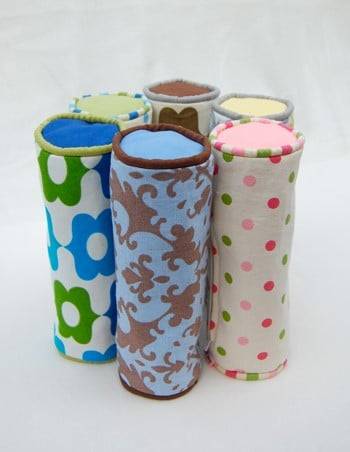
LiEr and her ikat bag are continuously brimming with fresh and exciting ideas and sewing projects for children. Today, she’s sharing her Back to School Pencil Case, which is suitable for students in kindergarten to college! The use of piping adds a unique touch to this project. Learn more about LiEr in her introduction, and visit the ikat bag blog for further information (be sure to check out the “Most Visited” part on her left sidebar, as well as her designs).
School Pencil Case
According to LiEr: For my pencil cases, I chose home decor weight fabric and/or duckcloth/canvas–both of which provide a strong result. However, if you are not accustomed to manipulating in several layers and around tiny circumferences, it might be challenging. Additionally, you may use thinner fabrics with the required interfacing (if preferred).
What you need (All pieces have a 1/2-inch seam allowance):
For the Outer Layer:
- One rectangle 9.5″ x 10.5″ in outer fabric
- One rectangle 9.5″ x 10.5″ in heavy sew-in interfacing
- Two circles 4″ diameter in outer fabric
- Two circles 4″ diameter in heavy sew-in interfacing
- One 7″ zipper
- 19″ (approximately) of 1/4″ piping cord, cut into two equal pieces
- Two rectangles 10.5″ x 1.5″ piping fabric
For the Lining Layer:
- One rectangle 9.5″ x 10.5″ in lining fabric
- Two circles 4″ diameter in lining fabric
Also needed:
a sewing machine with a standard presser foot, zipper foot, matching sewing thread, hand-basting needle, and seam ripper
MAKING THE LINING LAYER
Step 1
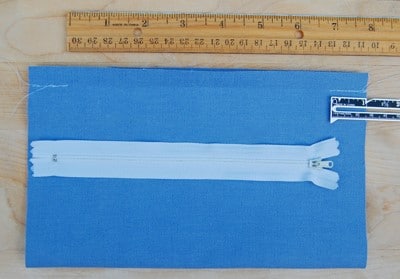
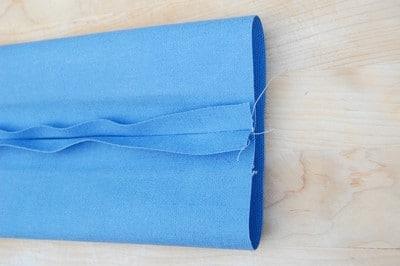
Right sides together, fold the lining rectangle in half so the shorter side is on the fold. You’ll get a 9.5′′ x 5.25′′ folded rectangle. The fold is visible near the bottom of the photograph.
1′′ from each short side and 1/2′′ from the top of the rectangle, sew a line with back-stitching as indicated. You’ve created a sturdy tube with a (about) 6.75-inch opening for the 7-inch zipper, joined just at the ends. For reference, a zipper is displayed.
Step 2
This zipper opening’s seam allowance should be pressed open.
Step 3
Snip/cut 1/4′′ – 3/8′′ along the seam allowance on both ends. The notch is only visible in the picture for the sake of clarity. Don’t go all the way to the stitching line while cutting (shown in purple ink dashes).
Step 4
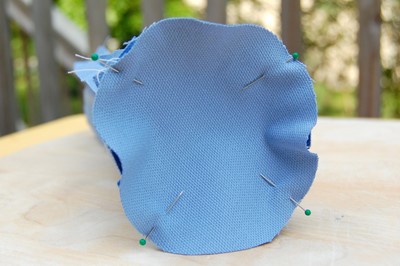
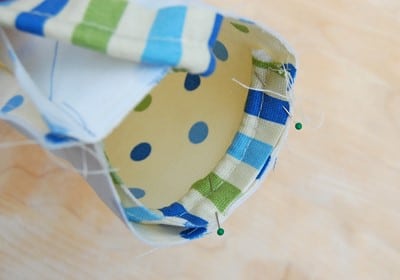
Pin one lining circle to one of the tube’s open ends, with the right side of the circle facing the tube’s right side (inside surface).
Step 5
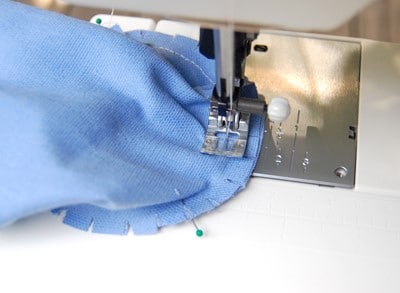
Sew the circle to the end of the tube using a 1/2′′ seam allowance, as illustrated, with the circle on the bottom and the tube on top as shown. As you stitch, smooth the tube’s trimmed seam allowance around the diameter of the circle.
Repeat with the other end of the circle and the other circle.
Step 6
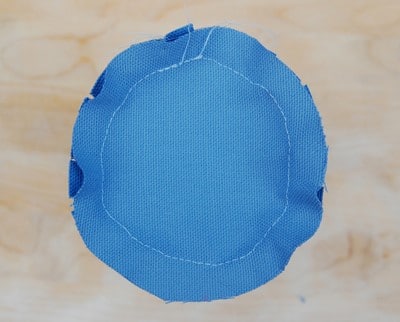
This is the view from the tube’s round end. It makes no difference whether the stitching line is slightly crooked or wavy. To decrease bulk, trim the seam allowance to 1/4′′ now.
The pencil case’s lining is now complete. Set it aside.
MAKING THE OUTER LAYER
Step 7
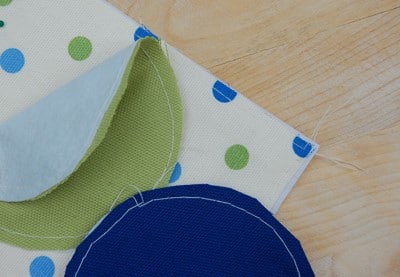
Sew the interfacing pieces to the wrong sides of the appropriate outer fabric pieces as illustrated. Sew near to the edge (approximately 1/4′′ or less) so that the stitching line is covered inside the seam allowances when the pieces are put together to make the pencil case.
Step 8
To build a sturdy tube with a zipper opening, repeat Step 1 with the outside fabric rectangle (shown again for reference).
MAKE THE PIPING:
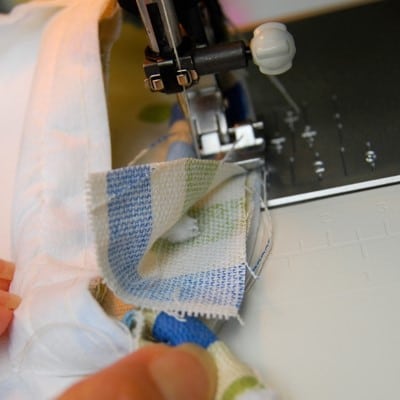
Step 9
The zipper foot should be used instead of the ordinary presser foot. Place the needle at the furthest position.Line up the long edges of one piece of piping fabric with the long edges of one piece of piping cable. Hug the piping cord with the edge of the zipper foot as shown, then sew tight to the cord to enclose it inside the fabric, using a long stitch length (you’ll be unpicking a few stitches afterwards). Do not back-stitch after sewing all the way to the end of the cloth.
ATTACHING THE PIPING
Step 10
Pin in place all around the circle the seam allowance of one open end of the tube with the seam allowance of the piping.
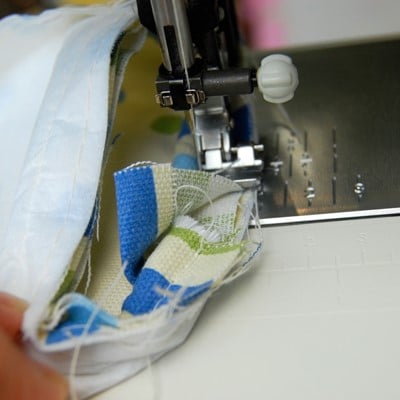
Step 11
Sew close to the piping cord using a standard stitch length and starting approximately 1′′ from the end (hereinafter referred to as the “head end”) of the piping to connect piping around the diameter of the tube’s open end.
Stop with the needle in the down position about 1.5′′ from the other end (hereinafter referred to as the “tail end”) of the pipe.
Step 12
Unpick the lengthy stitches (that you sewn in Step 9) in the remaining 1.5′′ of piping with the seam ripper to reveal the cord. Trim away enough cord so that it (the cord) just meets the head end of the piping (shown pulled away) and does not overlap. Do not trim the piping fabric – this WILL be overlapped and needs to remain uncut.
Step 13
As seen, fold about 1/2 inch of the piping fabric in.
Step 14
Disconnect the piping’s head and tuck it into the tail end as indicated. The cord’s ends should touch and not overlap.
Step 15
Fold the tail end’s piping fabric over the head end and continue stitching to secure the piping to the tube’s open end.
FINISHING THE OUTER LAYER
Step 17

Snip the seam allowance in the same way as in Step 3.
Step 18

Sew one of the outside circles to the tube’s open end, right sides facing, in the same manner as in Steps 4 and 5. The zipper foot enables tight sewing to the piping cord. You may sew right on top of the visible stitches from Steps 11-16.
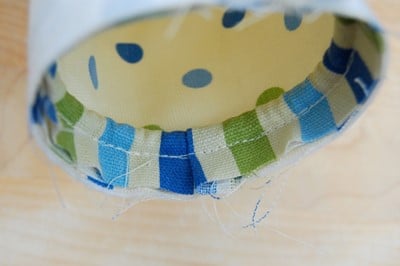
Step 19
Reduce bulk by trimming the seam allowance to around 1/4′′ and turning right side out to ensure that the piping is stitched neatly.
Step 20
Repeat Steps 10-19 for the remaining outside circle and tube open end.
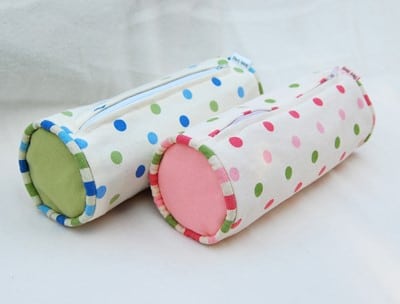
The pencil case’s exterior layer is complete!
ATTACHING THE ZIPPER
Step 21
Line up the ends of the zipper opening by inserting the lining from Step 6 (wrong side out) into the outer layer from Step 20 (right side out).
Step 22

Insert one side of the zipper (right side up) between the two layers as illustrated. Zipper coils should be flush with both layers’ folded edges.
All around the zipper opening, hand basting the zipper in place.
Step 23
Invert the whole pencil case and leave the zipper fully open. Adjust the needle setting and adjust the zipper foot as necessary and, starting in the center of the pencil case (not the ends), stitch about 1/4 inch from the coils of the zipper to secure all around the zipper opening. Take your time, especially if you’re working with heavy materials, pausing often to flip the cloth and always with the needle in the down position.
Step 24
Remove the basting stitches and flip the zipper right side out.
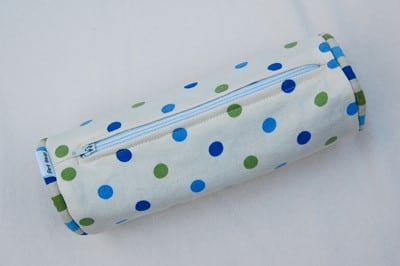
The pencil case is completed!