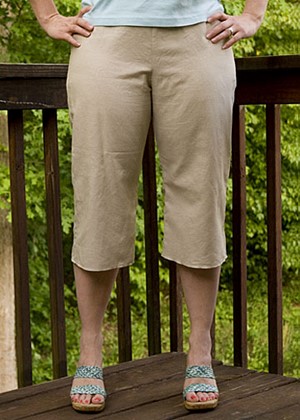
Today Mary shares techniques and insight into making a muslin to get just the right fit (the first photo with brighter colors is her “muslin” and the linen blend pair is the final product):
I think I’m like a lot of women when I go shopping: I need to try things on, sometimes multiple sizes of the same garment, until I find the right fit. Even then, there might be something that’s just not working for me. The waistband gapes in the back. The upper arms are too snug. The chest is cut in a way that assumes things that were true 20 years ago but not so much these days.
One of the reasons I have added sewing clothes for me to my repertoire (instead of just for my daughter) is so I can have things that reflect my style and tastes– and fit perfectly. Unfortunately, sometimes sewing clothes from a ready-made pattern can be just as exasperating as buying ready to wear.
While there’s a certain element of customization in many garments (especially anything with an elastic waist), I’ve found that most patterns don’t take into account the specifics of my body type. So, what’s a girl to do?
How to Make Muslin

Muslin is a cotton fabric but it’s also the term that refers to a draft garment. You can make a muslin out of muslin, but you also can use whatever fabric you wish. I like to stock up on $1/yard fabric to use for making muslins, although I also buy muslin on sale for the same purpose.
I don’t sew a muslin every time I make a garment. I think most skirts are pretty forgiving and rarely make a muslin of those. More fitted items– pants, dresses, fitted tops– I often plan to make a muslin before cutting into my nice $9-a-yard designer fabric.
Yes, it essentially means that I’m going to sew something twice. But if the end result is a garment that fits perfectly and makes me feel great about how I look when I’m wearing it, then I think it’s worth the time and effort.
I look at the measurements on the pattern envelope to figure out what size I should make, then I measure the pattern pieces and compare them to my measurements. All patterns include a certain amount of ease, and you need to take that into consideration when you measure your pattern pieces.
Hips, thighs, biceps, shoulders and upper back/chest need extra room (ease) so you can actually move in a normal manner while wearing a garment (remember Morticia Addams and her mincing walk?). If my measurements are pretty close (taking into account that ease), I may gamble that it will fit.
If it looks like I’m right on the verge of needing to size up or down, or if I could fit into different sizes in different areas of the pattern (i.e., a medium waistband but a large pants leg), then I grab some waste fabric and get started on a muslin.
A product like Swedish tracing paper or Pattern Ease is indispensable for making a muslin. I trace off each pattern piece and copy down all the relevant information and markings from the pattern, and then use those pieces to make my alterations after I’ve made my muslin.
A traditional muslin is sewn with the seams on the outside but I don’t always do that, especially if there’s a chance I could wear it when I’m finished. (Why ruin another pair of jeans when I can paint the hallway while wearing the world’s ugliest pants?)
Key to checking the fit of a muslin is trying it on as you assemble it. Try on a top or dress when the bodice is done but before you set in sleeves. Pants should be tried on before you sew on the waistband. Move around in the garment. Look in a full-length mirror. Make notes about what needs to be changed and even pin and pinch the muslin to get a better fit.
Most of the changes I have had to make have been minimal, and I’ve found what works for me through a little bit of trial and error. I’m not above measuring and examining the insides of ready-to-wear garments I own that fit well and adapting some of those techniques to the items I sew for myself (especially darts in the back of pants to reduce some of that gaping).