Jenny took some time out of her very busy schedule to give us a little set-in sleeve help (she’s an obvious pro!). Jenny’s Set-In Sleeve Tutorial below gives you just one more tool in your Women’s Clothing Month collection to create some beautiful clothing of your own:
How to Attach Sleeves
Step 1
Before setting in the sleeve, sew the underarm seams of the sleeves and the side seams of the main body of the garment. Finish sleeve seam allowance and then hem the bottom edge of the sleeve.
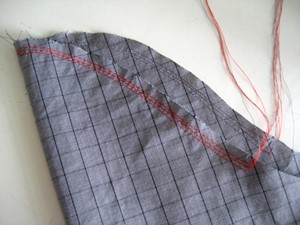
Beginning at one notch and ending at the other, machine baste just inside the seamline around the top of the sleeve cap, leaving the loose threads long. Repeat basting twice. Each row of stitching should be 1/16th” to 1/8″ apart. Turn sleeve right side out.
Step 2
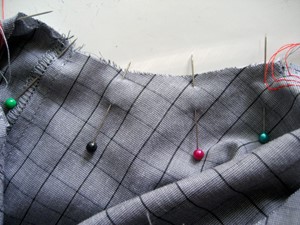
Turn body of the garment inside out and place sleeve inside armhole, right sides together. Working on the inside of the sleeve, line up underarm seams and place a pin. Pin sleeve to garment on both sides of first pin, stopping at notches.
Step 3
Match shoulder notch on sleeve to shoulder seam of garment and pin.
Step 4
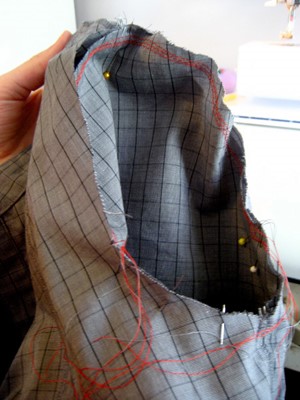
Pull bobbin threads of basting to gather sleeve cap until it fits into the armhole perfectly.
Step 5
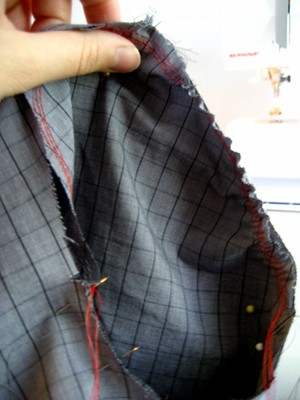
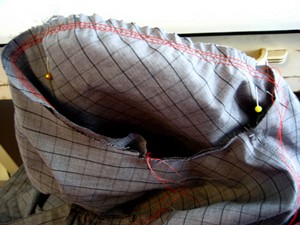
Shape sleeve cap with your fingers by spreading the fullness equally over the length of the basting until there are no pleats. The shoulder of the sleeve will start to take on a full, rounded shape.
Step 6
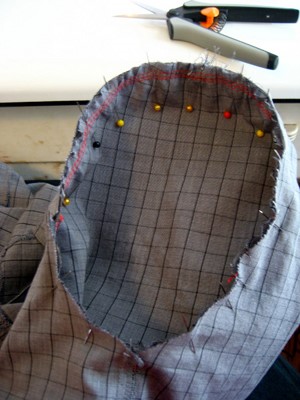
Pin sleeve cap in place and tie loose threads, clipping ends.
Step 7
Machine sew sleeve to garment body from the inside of the sleeve (wrong side) in order to control the fullness as you sew, making sure there are no pleats in the sleeve cap. Every now and then, lower the needle and pull the bottom layer of fabric smooth to avoid creating pleats in the body of the garment as well. Back tack at beginning and end of stitching.
Step 8
Remove all basting threads and press seam allowance toward sleeve using a sleeve board or tailor’s ham.
