Terri enjoyed the Lola Apron pattern from Sew Liberated, especially the clear instructions and opportunities for embellishment.
Pattern
Lola Apron by Sew Liberated
Description
This mother-daughter apron duo will bring a flirty, retro flair to your kitschy kitchen! Inspired by a handmade vintage find, the Lola Apron is a sure-fire way to get you cooking up a storm in style. The Lola’s customizable fit assures a flattering apron for all sizes and body types. Make one for yourself, your daughter and grandma too. (From the package.)
Materials
For the Lola (adult) apron:
• 1-1/2 yards of 44” wide mid-weight cotton or vintage twin-sized bed sheet (I used quilter’s cotton fabric from my stash)
• 2-1/2 yards medium width (1/2”) rick rack
• Double fold, ¼” bias tape: 12 yards of main color and 2-1/2 yards of secondary color
For the Lolita (child) apron:
• 1 yard of 44” wide mid-weight cotton
• 1 yard medium width (1/2”) rick rack
• 10 yards bias tape in main color for large and 8 yards for small, 2 yards of secondary color
Fabric Recommendations
For both the adult Lola and child Lolita aprons you will need mid-weight cotton. I used the Graphic Mum fabric in the opal/vanilla colorway from Heather Bailey’s Fresh cut collection because, luckily, it was in my stash and it matches the valance, tablecloth and napkins I made for our kitchen.
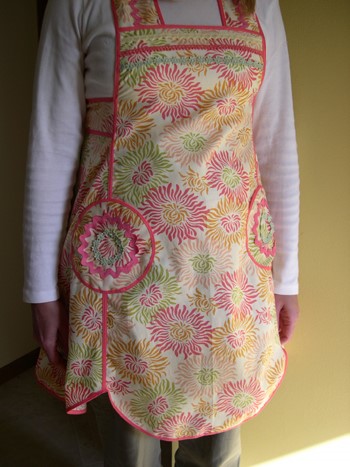
Overall Design
The design of this apron feels feminine, pretty and dressy. This will be fun to wear, especially for baking parties and tea parties. Kind of like getting dressed up for your kitchen!
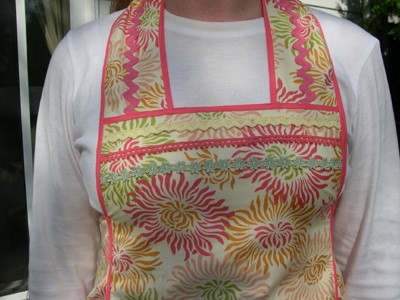
I liked the creative openness in the pattern for embellishing the apron. The instructions provided a guide to make the model apron pictured on the pattern cover, but also gave encouragement to do your own thing as far as adding trims, rick rack and bias tape.
Written Instructions
The instructions were in plain English without any jargon, making them easy to follow. We sewers hear this all the time, but the bias tape steps can get tricky so it’s very important to read the instructions at least once before starting. There are extra hints to pay attention to in italics or bold text, and the pattern notes provide good tricks for working with bias tape and trimmings.
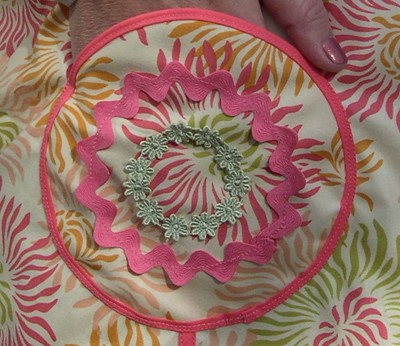
In the general embellishment section, the pattern provided a suggestion to skip around when adding the rick rack and binding by doing one color at a time so you don’t have to change thread colors and bobbins at each step. For instance, when I added the green flowers, I added them on the pockets and the bodice at the same time, so I didn’t have to keep changing thread. Great tip!
When attaching the waist straps to the side panels, there is a suggestion to be patient with the bias tape on the curved edges. Simple, but good to remember throughout the project!
Diagrams / Images
There are a lot of details to this pattern, and diagrams and illustrations were provided for each step, which I found to be helpful as a guide to keep me moving.
Pattern Pieces
I love patterns that provide pattern pieces rather than giving you the dimensions to make your own pieces! The pattern pieces for this apron were just right for my size and taste. The instructions gave a diagram for laying out the pattern pieces on the fabric, which was a perfect layout.
The pattern also offered instruction on how to customize the fit of the apron, with steps to measure your bust and adjust the size of the front panel piece. This is handy so you don’t cut a smaller size in the pattern and end up wanting to make a larger size in the future.
Overall Level of Difficulty
The package says this pattern is suitable for advanced beginning to intermediate sewists. I would definitely agree with that. Customizing the fit and working so much with bias tape and trimmings require intermediate sewing experience.
Modifications & Tips
I wouldn’t change a thing on the instructions for this apron. Seriously, I never had to rip out a seam!
One suggestion I would give is to read through the instructions first, and underline places where the pattern says wrong sides together, or wider edge of bias tape on top, and so on. Another tip that was helpful for me was to write in pencil next to the sketches with labels “RS” for right side or “WS” for wrong side.
Conclusion
This pattern was very well thought out and well written. I did not get confused for one moment. Because the pattern was put together so thoroughly making it easy to follow, I would also try other patterns by Sew Liberated (formerly Montessori by Hand). I would make this pattern as a gift for my friends and family.