Alissa designed an easy and fun Sew-Along for Fat Quarter Month. Welcome to Part 1 of our Sew,Mama,Sew! Doll Quilt Sew-Along. Today we’ll cut and piece our quilt tops. If you have any questions throughout the sew-along, let me know.
From Alissa: I hope you’ll join us in this simple doll quilt sew along!
Doll Quilt Sew-Along
If you’ve been wanting to tackle quilting, this is a perfect first project to learn all the steps. If you’re a seasoned quilter, perhaps this is an opportunity to try something new. What about using a color combo you don’t usually turn to or trying out a new quilting technique?
The sew along will be broken down into four posts over the course of two weeks. You’ll have plenty of time to keep up and make a cute doll quilt along with us!
Fun!

Breakdown of the sew along
• Part 1: Cutting and piecing your quilt top
• Part 2: Embellishing your quilt top, making your quilt “sandwich”
• Part 3: Quilting your doll quilt
• Part 4: Binding your doll quilt
The finished quilt will measure 16” x 19”.
Materials Needed
• Variety of fabric for patchwork front – no piece is longer than 16.5”, making this the perfect project for fat quarters!
• 1 fat quarter for back
• 18” X 22” of batting
• 80 inches of binding, or the fabric to make it (about an 1/8 of a yard or half a fat quarter)
Tools Required
• Rotary cutter and mat
• Basting pins or spray
• Optional: Walking and/or darning foot for your sewing machine
Part 1: Cutting and piecing your doll quilt top

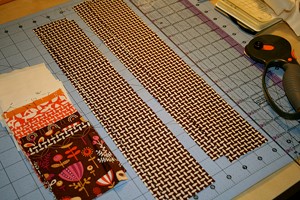
Cut
• 20 3.5” square blocks of different fabrics – choose as many or as few different fabrics as you’d like
• 2 side border strips of 2.5” x 15.5”
• 2 top & bottom border strips of 2.5” x 16.5”
Okay now that it’s all cut out, let’s start sewing it all together! While piecing the entire quilt top, always sew with a 1/4 inch seam allowance.
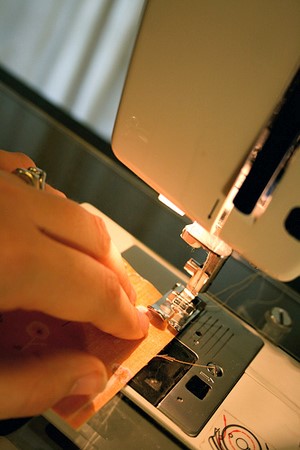
Sew the first two blocks, right sides together.
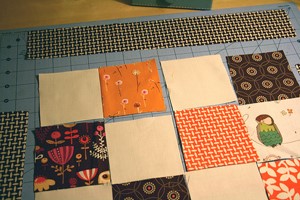
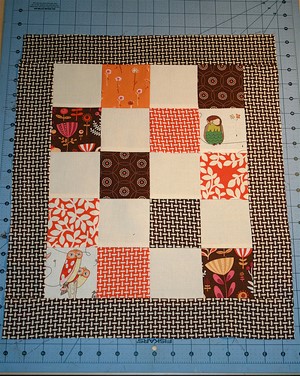
Continue sewing blocks into 5 rows.
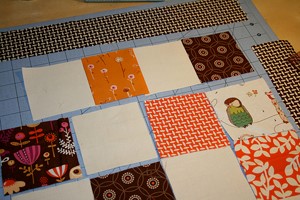
Press all of the seams open.
One by one, sew the 5 rows together, taking care that your seams line up, to make up the center of the quilt top. Press all of your seams well.
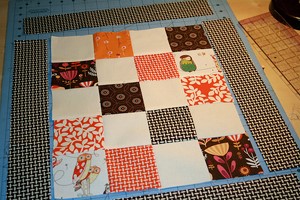
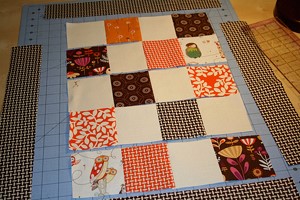
Sew on the side borders, (the 2 15.5” strips) and then the top and bottom borders (the 16.5” strips).
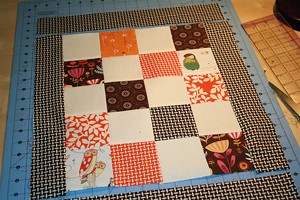
Again, press all of your seams and you have a completed, cute doll quilt top!
Check back in later this week for the next step: embellishing your quilt top, and making the quilt “sandwich.”
See you then!