From Ashley: I tend to save all my scraps, and they seem to multiply, so I’m always looking for new ways to use them. This is a quick and easy project; which you could adapt to any size scraps you happen to have.

I love using cloth napkins. Not only is it a great way to go green, but being a huge fabric lover like I am, I love to have another chance to admire my favorite fabrics! Usually I just make them out of one fabric, but I was thinking about it recently and thought that it would be fun if I added in some of my scraps to add some color and interest. I’ll show you two variations here, and like I said, you could certainly use this same method and simply change up the measurements to account for any size scraps you have on hand.
How to Make Napkin at Home
Fabric requirements (for 6 napkins, approximately 16″ square):
A variety of scraps
1 yard solid fabric
1.5 yards solid white fabric for backing
Patchwork Napkins, version 1
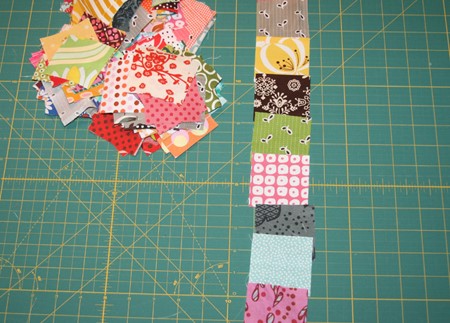
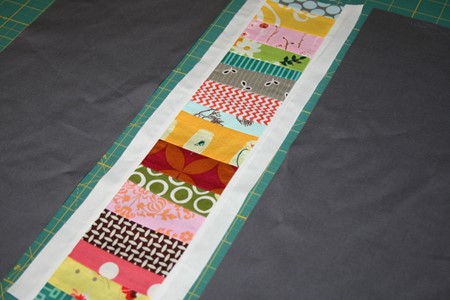
In this first variation, you’ll need to pull out scraps that are at least 2 1/2″ square (I used 2 1/2″ squares I had left over from my recent 9 patch quilt, but if they’re not already cut to size, trim them to 2 1/2″ square). You will need 8 squares for each napkin.
Arrange your squares in the order you like.
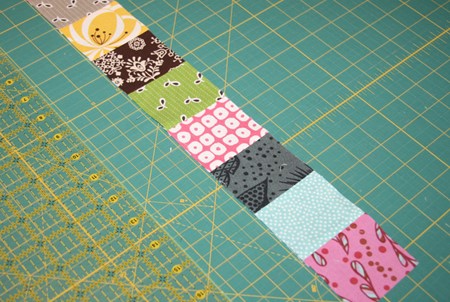
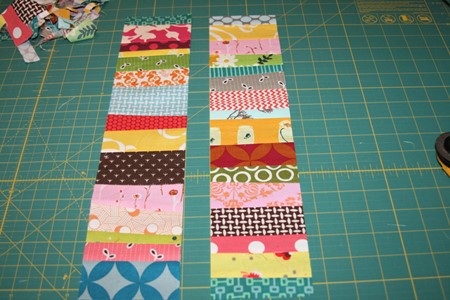
Sew together into one strip, using a 1/4″ seam allowance. I press my seams open so it lays nice and flat.
Once ironed, it should measure 2 1/2″ x 16 1/2″.
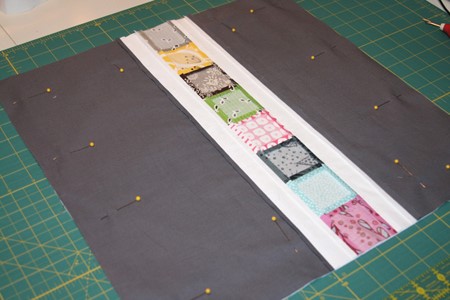
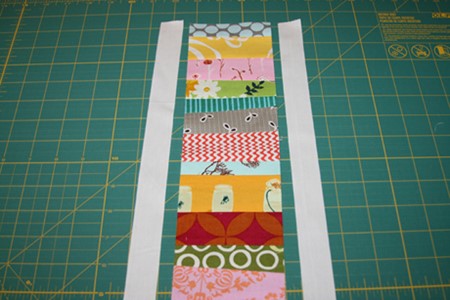
Next, cut 2 strips of a solid white fabric each measuring 1 1/2″ x 16 1/2″. Sew one white strip to each long side of the patchwork strip.
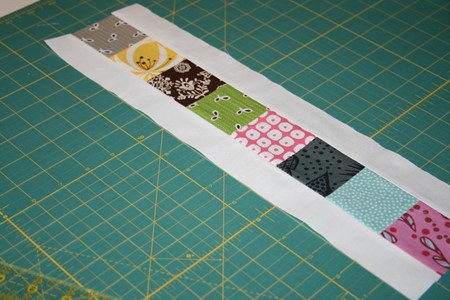
This resulting strip should now measure 4 1/2″ x 16 1/2″.
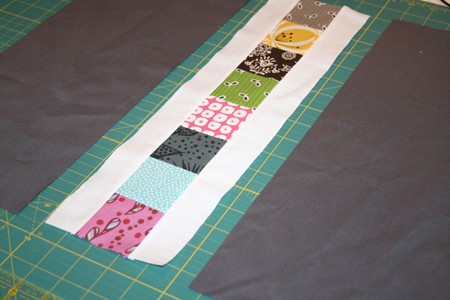
Now cut two pieces of your favorite solid color, each measuring 6 1/2″ x 16 1/2″. I love this Kona Coal, and I selected it primarily for its dark color (it’ll hide those stains!), but you could pick whatever solid you like best – or even a corresponding print would be fun.
I use a white solid for the back of the napkins. On this set, I used a Robert Kaufman bleached muslin. It’s fairly inexpensive and it comes in a variety of widths. (If you plan on using this type of fabric, I recommend prewashing it as I’ve found it tends to shrink more than other fabrics).
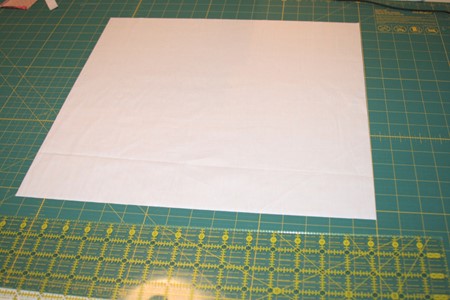
Cut one 16 1/2″ white square for each napkin.
Place the front and back of the napkin together, right sides together. Pin and sew.
Leave an opening of approximately 4″ to allow you to turn the napkin right side out. Snip the corners and turn right side out.
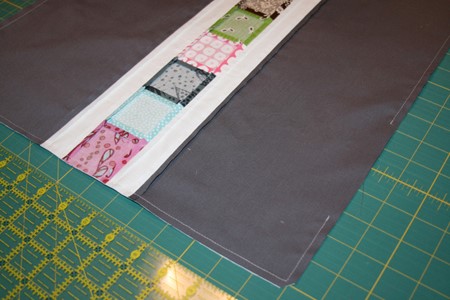
Use a point turner, or some other gently pointed object (I opted for a chop stick) to get your corners nice and pointed, then iron flat, ironing in the section you left open. Top stitch around the perimeter, 1/8″ to 1/4″ from the edge. This provides a nice finished edge and closes the turning opening. I used a decorative stitch on mine, but a straight stitch would work just as well.
I fold them in thirds and then in half. This way your patchwork strip ends up right in the center of the napkin.
And now onto the second version! I designed this so both napkin variations would work well together — the width of the center section is the same on both, so they can be perfectly matched, yet not!
Patchwork Napkins, version 2
This variation uses scraps of a slightly different size. This is good for those skinnier strips, pieces that aren’t square, or even slightly larger scraps — whatever look you’re going for!
To start, select scrap pieces that are at least 4″ in length. Any width is fine, providing it can hold a seam. And if you don’t mind crooked and wonky, then you don’t even have to make sure the edges are perfectly straight.
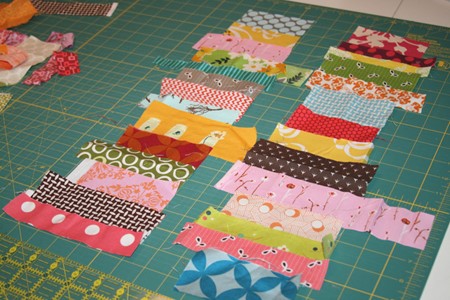
Again, arrange them in the order you like and then sew together into a strip. Iron the seams and trim to 3 1/2″ x 16 1/2″.
Cut two strips of solid white at 1″ x 16 1/2″. Sew one strip to each long side of the patchwork strip and iron. Your resulting strip will be 4 1/2″ x 16 1/2″.
Cut two pieces of your solid fabric measuring 6 1/2″ x 16 1/2″. Repeat the steps from the first variation to complete the napkin.
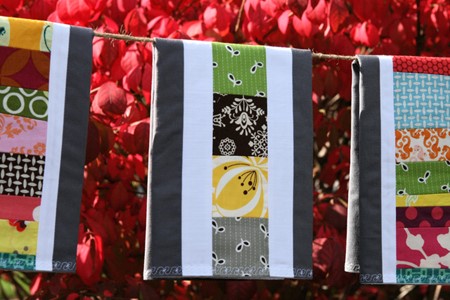
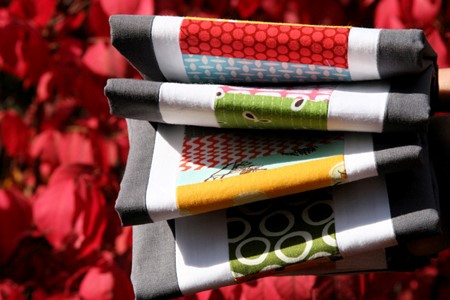
And now set the table and admire your lovely new napkins!
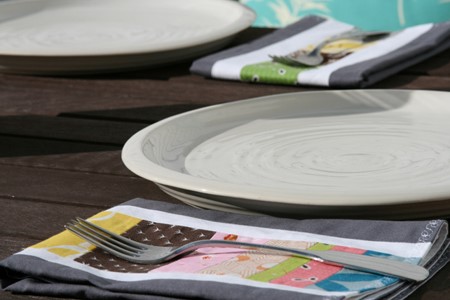
These make wonderful everyday napkins, or they also make perfect gifts! Don’t need napkins? You could use this same technique to make some stunning pillow covers!