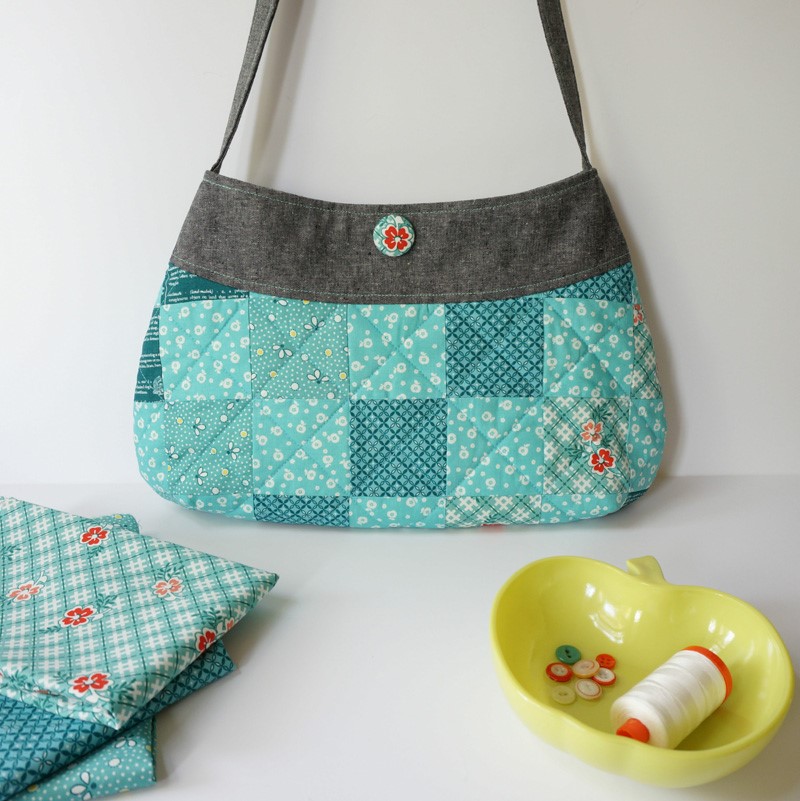
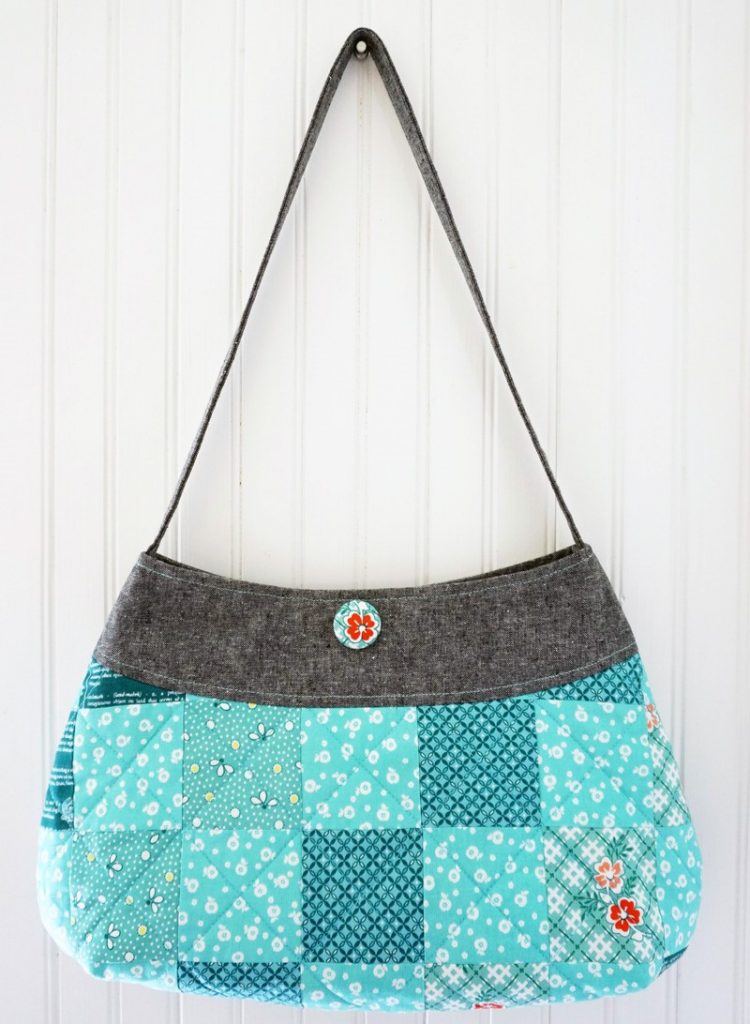
Charise Randell is already working on your next project. This large Springtime Patchwork Purse is easy to create! Charise’s most recent creation is made up of vibrant materials with a linen border and strap. There’s also an interior pocket with a magnetic closing.
Patchwork Purse Tutorial
The patchwork body of this Spring purse is made with vibrant materials. The purse is a roomy 10 3/4” x 17”, and inside details include a magnetic closure and inside pocket. It features prints from “One Room Schoolhouse” by Brenda Ratli for RJR Fabrics.
Fabric + Interfacing (44/45” width)
- 2/3 yard Print Cotton for Lining
- 1/3 yard Linen
- 1/4 yard Apple Print
- 4 each – 1/8 yard: 4 different blue prints
- 1/3 yard Batting
- 1/3 yard Muslin
- 5/8 yard Heavy Weight Interfacing or Canvas
- 1/4 yard Lightweight Fusible Interfacing
Other Materials:
- Sewing Machine
- Sewing Machine Needle Sizes 14 + 18
- Walking Foot (optional)
- Scissors
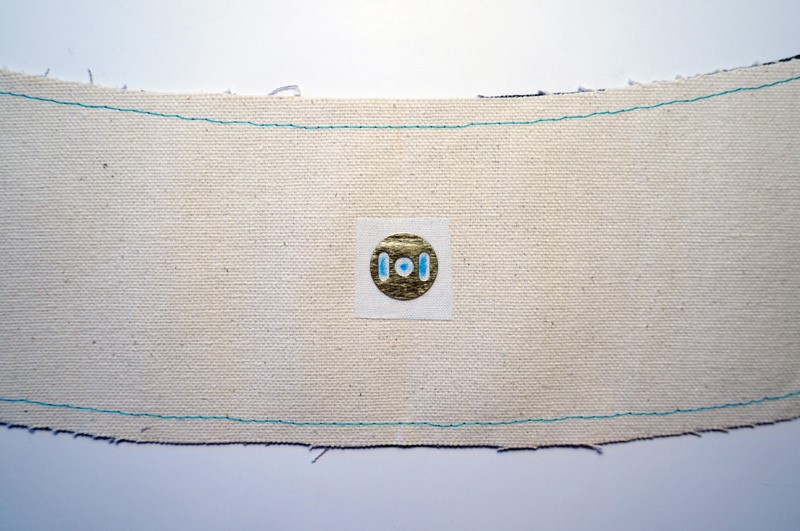
- Magnetic Clasp
- 1 1/8” Self Covered Button Kit
- Matching thread
- Contrast thread
- Pins
- Chalk or Fabric Marking Pen
Cut Print Lining Fabric:
- Mark notches on all pattern pieces.
- 2 – B – Purse Body
- 1 – 8 1/2“ x 10 ½” print fabric for lining pocket
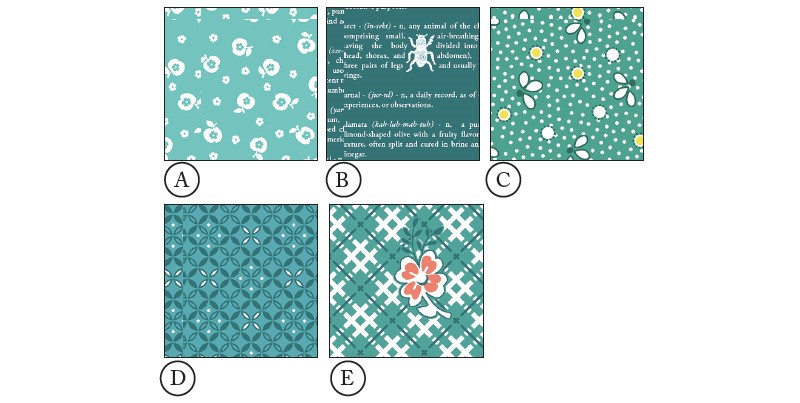
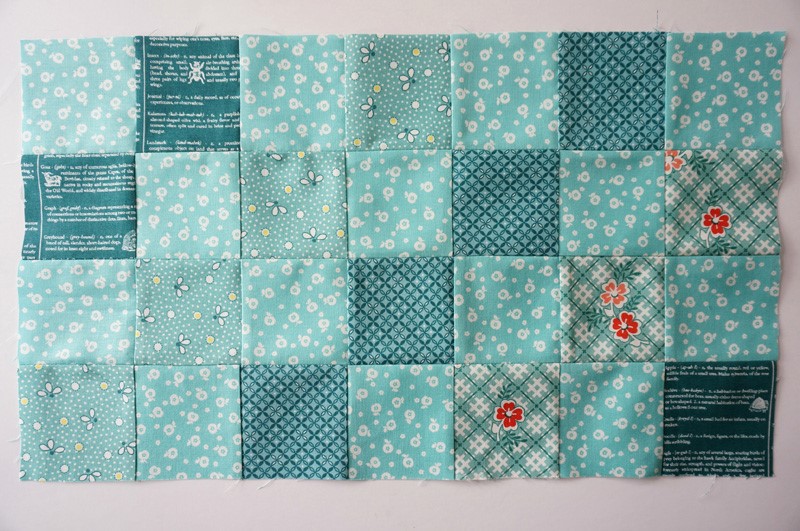
Print for Outer Patchwork Panels 3 1/4” squares:
a) 28 “Teacher’s Pet” Apple Print
b) 6 “Dictionary” Text Print
c) 8 “Loves me not” Yellow Floral
d) 8 “Eyelet” Print
e) 6 “Daydress” Floral
Linen:
- 4 – A Purse Bode
- 1 Strip 3 1/2” x 28 1/2” (handle)
Batting:
- 2 – B Purse Body
Heavy Weight Interfacing or Canvas:
- 2 – B Purse Body
- 4 – A Purse Border
Lightweight Interfacing:
- 1 Strip 3 1/2” x 28 1/2” (handle)
- 2 – 1” squares
Apply the Interfacing/Canvas:
Apply the heavy weight interfacing or canvas to the wrong side of the Lining Purse Body A and the Linen Purse Border B.
Apply the lightweight interfacing to the wrong side of the Linen Strip Handle.
If using fusible interfacing, follow the manufacturer directions. If using canvas or non fusible interfacing, baste the canvas to the fabric pieces 1/4” from the raw edge along the perimeter.
Sewing Instructions
Make the Patchwork Purse Panel
Arrange the 3 1/4” squares in 4 rows of 7.
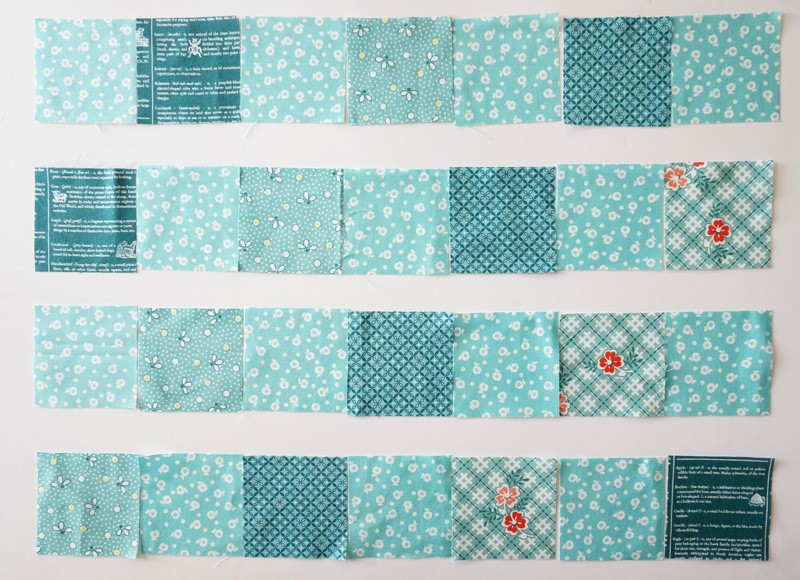
With a 1/4” seam allowance, sew the rows together. Per row, press the seams in opposing directions.
(Top row – press seams towards the left, row 2 -press the seams towards the right, etc.)
Stitch the rows together. Press seams open.
Place the Body Purse Pattern B on top of the patchwork panel, centering the pattern on the patchwork panel. Trace around the pattern. Cut out the panel. Repeat #1-3 for the other side.
Make a quilt sandwich: Place Muslin Body Purse Pattern B on bottom. Place the batting Body Purse Pattern B on top. Place the patchwork panel on the top, right side facing you.
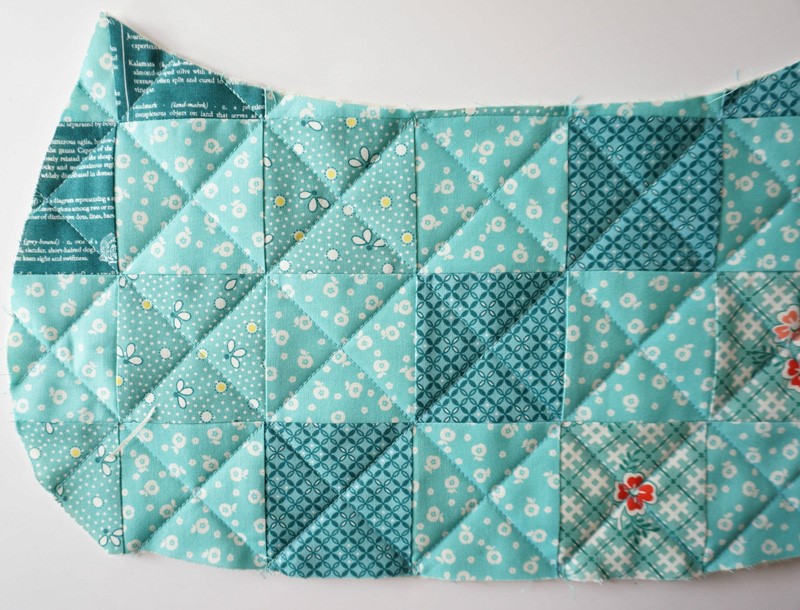
Baste the layers together with your preferred method. Mark the quilting lines diagonally from corner to corner of each patchwork square. Attach the walking foot on your machine and stitch each quilting line. Repeat for #5 and #6 for the other side.
Pin a Purse Border A to the top of a quilted Purse Body Panel B with right sides together. Match notches and pin in place. Back tacking at ends, stitch the seam with a 3/8″ seam allowance. Repeat for the other side.
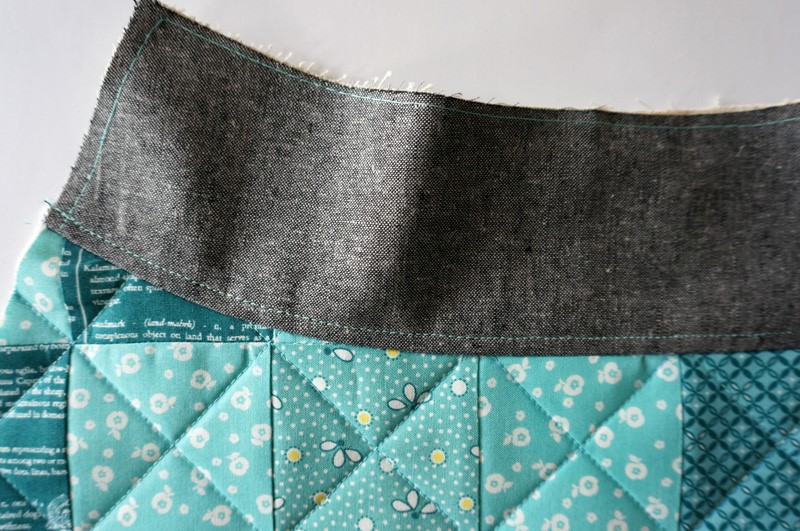
Top stitch on the border 1/4“ from the seam that attaches the Body to the Border.
Stitch the darts in the bottom of both Purse Body Panels.
Place the purse panels right sides together matching the seams and darts. Pin in place. Stitch around the perimeter with a 3/8” stitch back tacking at ends. Press seam open.
Make the Lining Panel
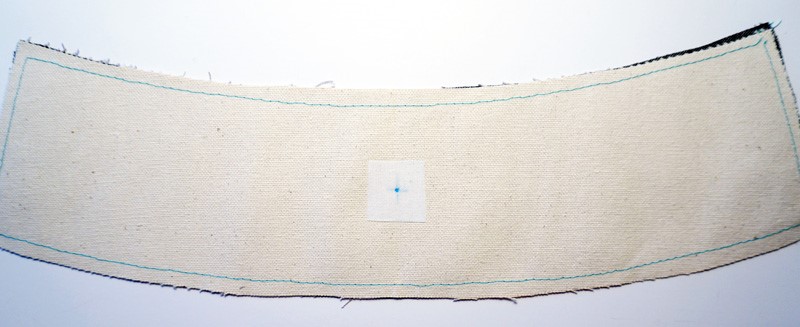
Attach the magnetic snap: Fold the Border A, in half along the long side, to the center of the top border. Measure 1 3/4” down from top edge on the wrong side. Mark the spot. Fuse a 1” square lightweight interfacing on the wrong side centered on the marking. Repeat for the second border piece.
Place the back of the magnetic snap on the marking. Mark the opening for the prongs.
Using a seam ripper, cut the slits for the prongs. Attach the snap to the border. Repeat for the other side.
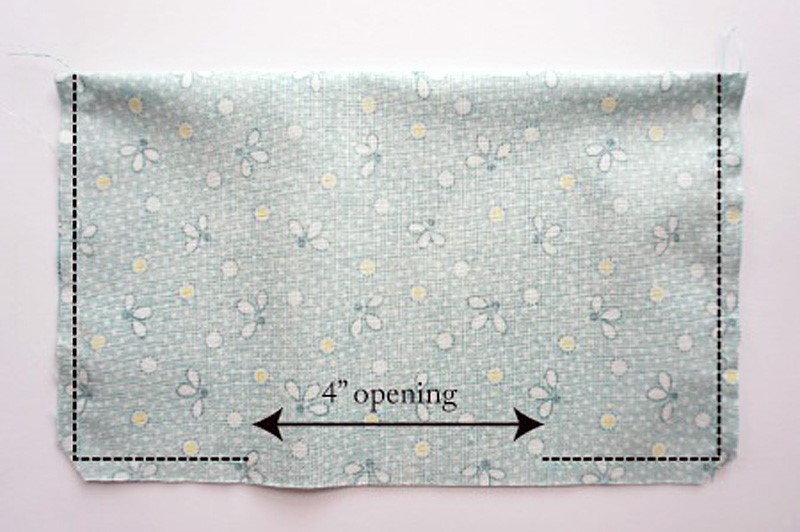
Make the lining pocket: Fold the 8 1/2” x 10 ½” square in half along the 10 1/2” side, right sides together. The‑e folded edge will become the top of the pocket. Stitch ¼” along the unfolded edges leaving a 4” opening at the bottom. Clip corners. Press Seams open. Turn right side out, press.
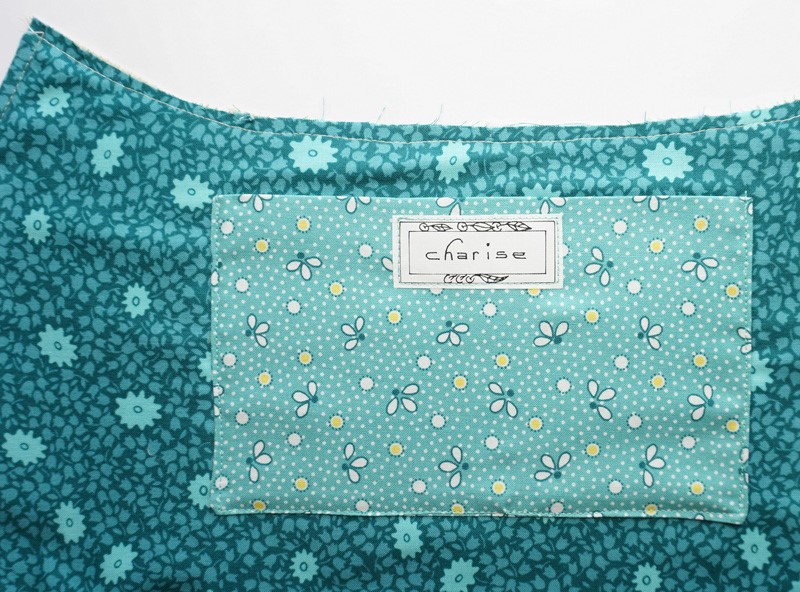
Center pocket on lining – 1” from top edge. Edge stitch around the pocket sides and bottom.
With right sides together, pin Purse Border A to the top of a Lining Purse Body Panel B. Match notches and pin in place. Back tacking at ends, stitch the seam with a 3/8″ seam allowance. Repeat for the other side.
Top stitch on the border 1/4“from the seam that attaches the Body to the Border. Repeat for the other side.
Stitch the darts in the bottom of both Purse Body Lining Panels.
Place the lining panels right sides together matching the seams and darts. Pin in place. Stitch around the perimeter with a 3/8” stitch back tacking at ends leaving a 4” opening at the bottom. Press seam open.
Make the Straps
Attach the size 18 needle to your machine. With the wrong side facing you, fold the strap in half along the long edge. Press. Open the strap and fold the long edges to the center crease and press.
Press the strap. Edge stitch the long edges of the strap.
Attach the strap to the purse body: Center the strap on the side seam of the purse, matching raw edges.
Pin. Baste in place. Repeat for the other side.
Attach the Body to the Lining
With the body right side out and the lining inside out, place the body inside the lining, right sides together. Match side seams and notches. Pin in place. Stitch around the top edge with a 3/8” seam allowance. Turn right side out and press.
Around the top edge, top stitch with a 14″ stitch. Hand slip stitch or edge stitch the lining opening closed.
Make + Attach the Self-Covered Button
Make the self-covered button following manufacturer directions.
Hand stitch the button to one side of the border, 1/4” down from the top edge.
