Today’s post is about Sweet Baby Sleep Bag pattern and tutorial. You can download the pattern here so that you can understand better.
Baby Sleep Bag Pattern
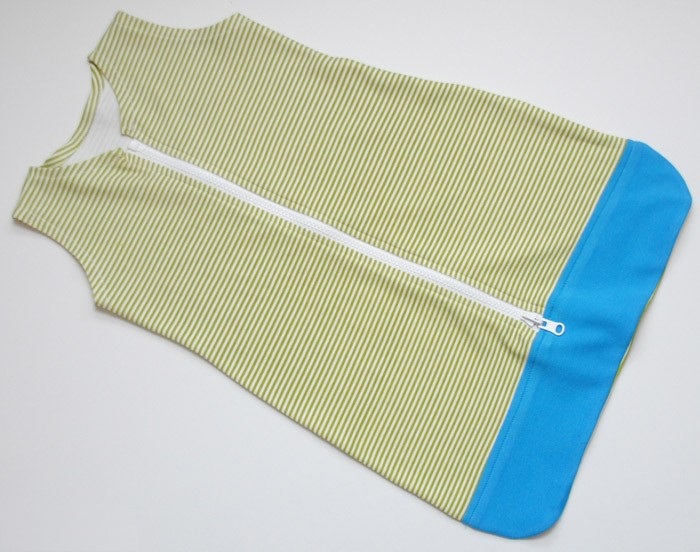
Hi, there! This is Bonnie, I am so excited to get to share this great baby basic pattern with you. This is one that new moms will love, and it makes a perfect baby shower gift! The Sweet Baby Sleep Bag fits sizes newborn to about three months.

Before you get started, you’ll need to download which I have already shared. Before printing the pattern pieces, check your printing options to be sure that you’re printing “actual size” and the “auto portrait/landscape” option is chosen under orientation. There is a 2 ½” box on the pattern. Be sure to measure this box to check that you’ve printed correctly. To aid with page alignment, each page is labeled with a row number and a column number. All pages will overlap 1″ on each side and ½” seam allowance is included.
Fabric + Notions
- ¾ yard of main knit fabric (A sturdy cotton interlock works best, but other cotton and cotton blend knits are acceptable, as well.)
- ¼ yard of trim knit fabric
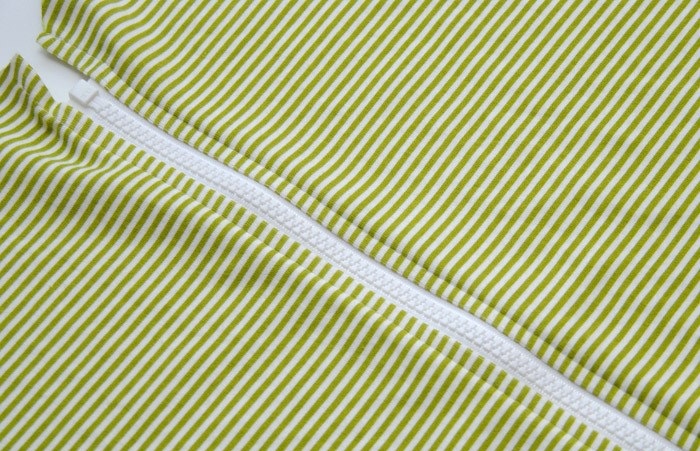
- 1 separating zipper at least 18” long
Knit Tips
A few tips for sewing with knits before you get started:
I do the majority of my knit sewing on my serger, but there’s no reason that you can’t sew knits with your sewing machine. In fact, as you’ll see with this pattern, you’ll need to use your sewing machine instead of your serger on occasion.
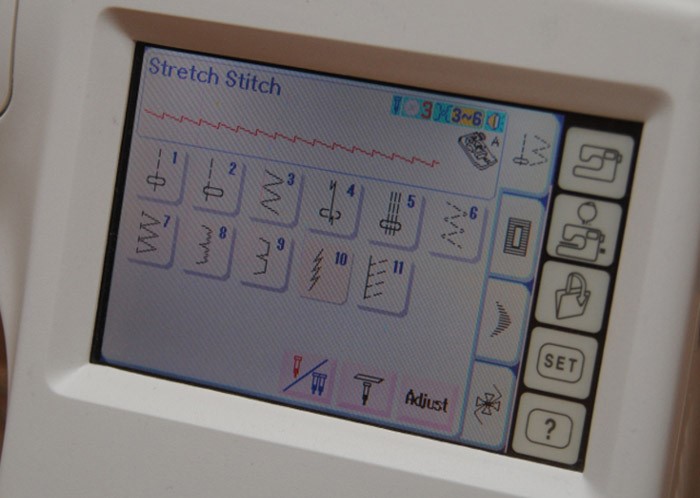
When you’re sewing knits with your sewing machine, it’s a good idea to choose a stitch with some stretch built into it. Most people prefer to use the “stretch stitch” which looks a bit like a lightning bolt. This stitch has a tiny bit of a zig-zag to it, but when you use it for seams that zig-zag is not noticeable from the right side.
There are many handy tools that I use when sewing knits. I prefer to use a ball point or stretch or jersey needle when sewing knits. A Sharp needle can use to cut through the knit loops on your fabrics and leave the fabric with small holes. Without hampering the fibers quality, you can use ballpoint needed which actually designed to glide through the loop.
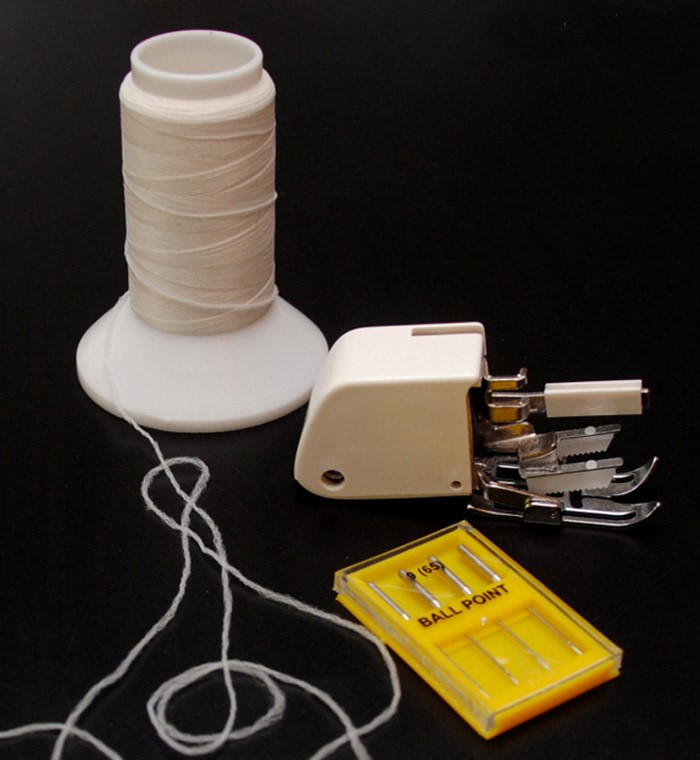
If you use walking foot, then it will give you much nicer output when sewing knits. While the needle sews, your machine includes “teeth” that guide the bottom of the cloth under the foot. The teeth of walking foot grip the top of the fabric which leads the top and bottom pass through the machine evenly.
Finally, my special secret is use of nylon thread in the bobbin. That will give you extra stretch.
Cut out your pattern pieces
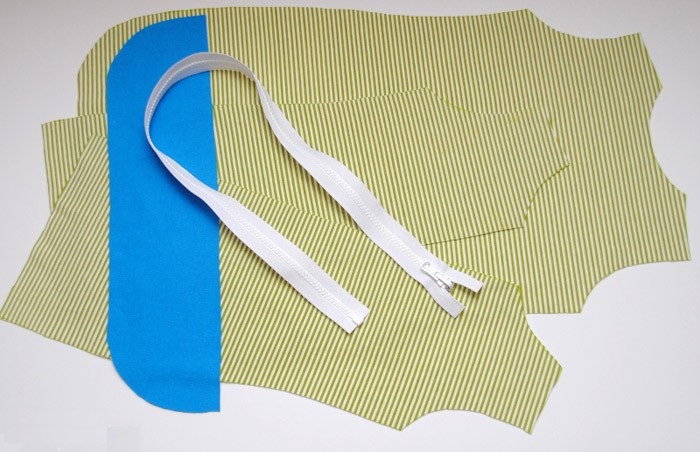
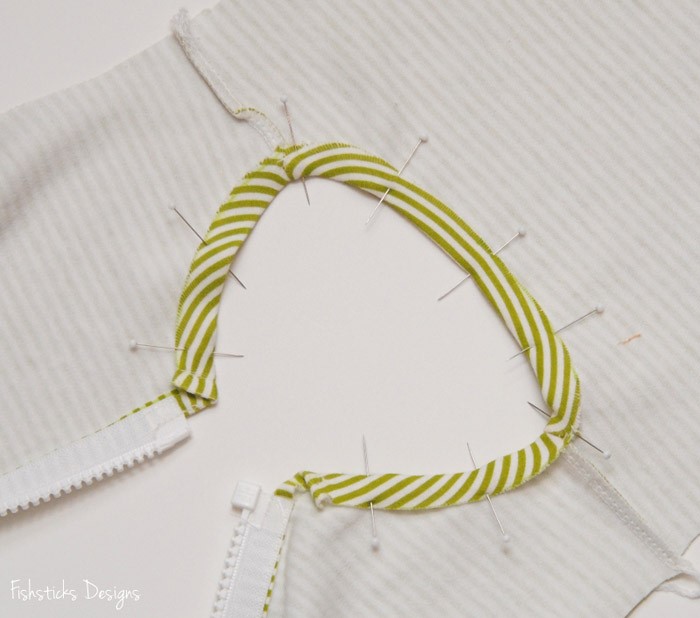
When the sleep bag is assembled place the front piece that will be to your left. Place the zipped zipper on the inner edge with the bottom zipper-stop 1” below the neckline (The zipper will look as if it’s upside down). Slide the zipper pull all the way down past where the zipper and fabric line up. Pin the zipper on with pin heads facing away from the neckline.
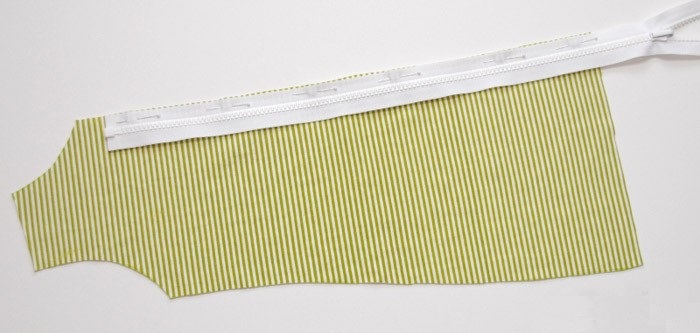
On your sewing machine Install the zipper foot. Place the needle so that it drops about 1/8″ from the edge of the zipper teeth. Removing pins and sew this side of the zipper.
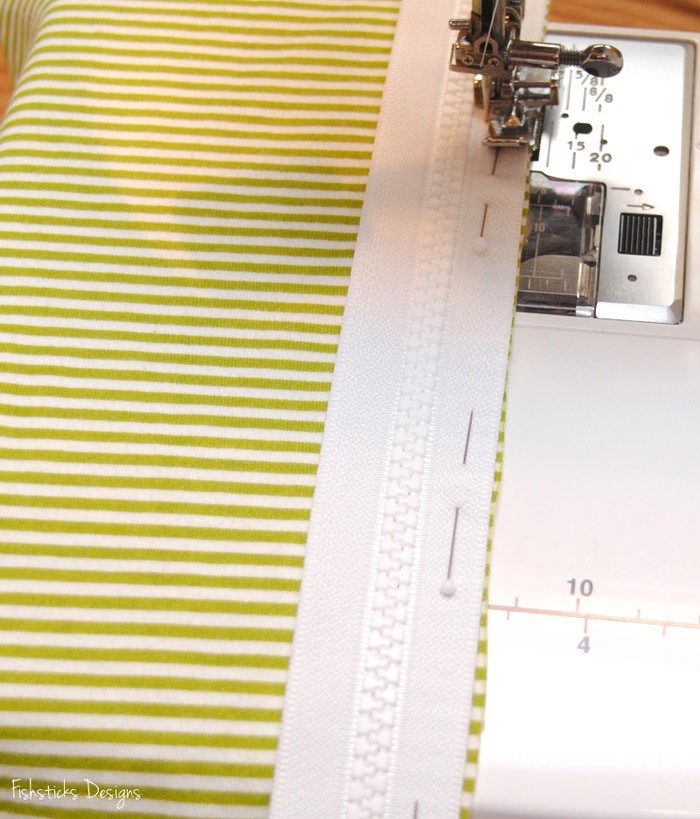
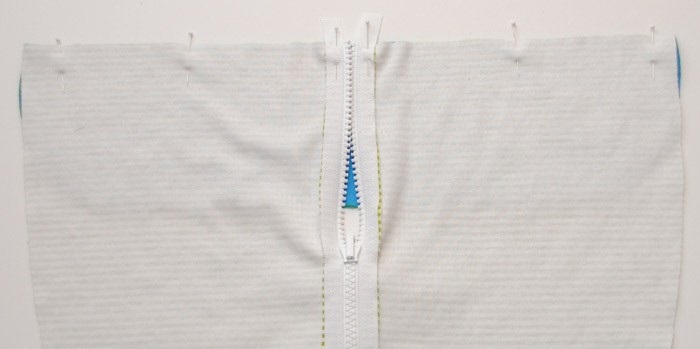
After flipping the zipper away from the left front piece, you can see the right side. Now, right sides together, position the left front piece with the attached zipper on top of the right front piece. Align the remaining raw edge of the zipper with the right front piece’s inner edge. Place the bottom zipper-stop 1″ below the neckline and make sure the right and left front bottom sides are aligned. Pin the front parts together with the pin heads towards the bottom edges.
Follow the steps above to sew this side of the zipper.
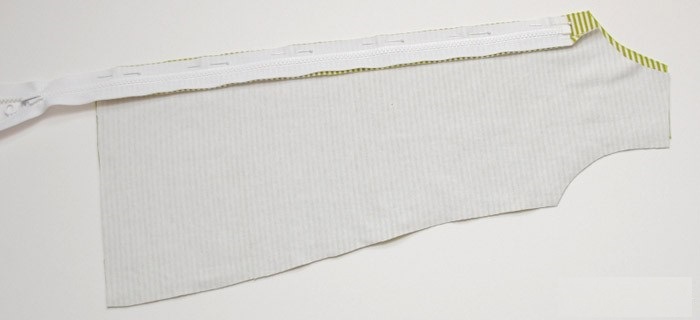
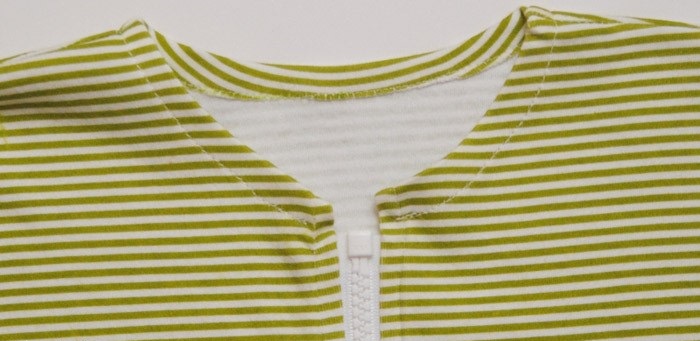
Use your fingers to press the fabric away from both sides of the zipper. Topstitch ¼” from the edge of the fabric on both sides, going all the way up to the neckline.
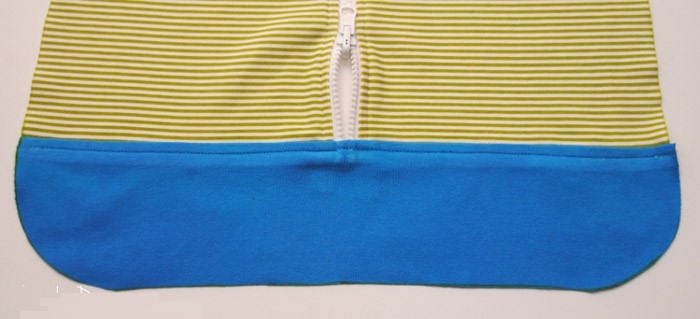
Slide the zipper pull up towards the neckline so that it is above the bottom edge of the fabric. Trim the excess zipper away, leaving about 1” below the front bottom edge. Trim the teeth from that bottom 1”.

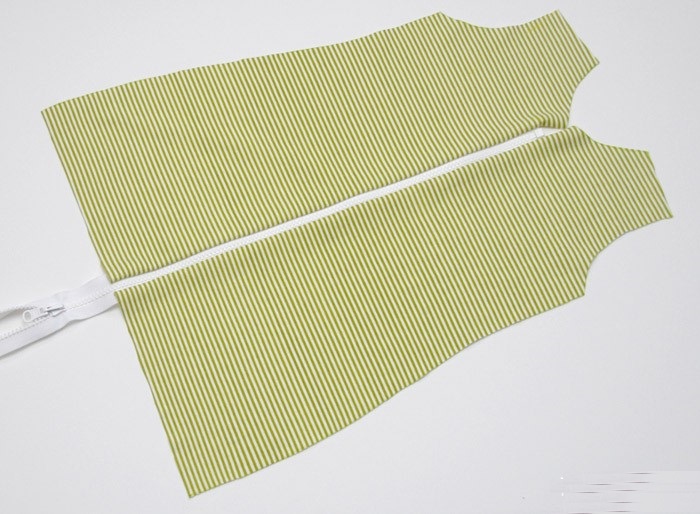
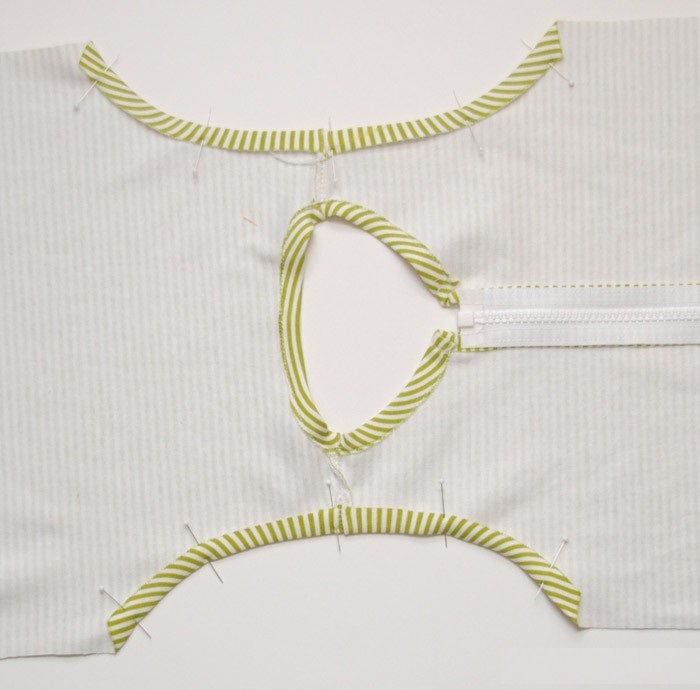
With the right sides facing, pin the bottom front piece to the bottom edge of the two front pieces, as shown. Because your zipper will be open at the bottom, make sure to pin the two sides together tightly. Sew all the way across. (It’s best not to serge here because you’ll be going across a zipper.) Move your needle up and down manually when you reach the zipper to keep your needle from breaking.
Flip the bottom piece away from the two front pieces and topstitch it ¼” below the seam.
Sew or serge the fronts to the backs at the shoulders, right sides facing.
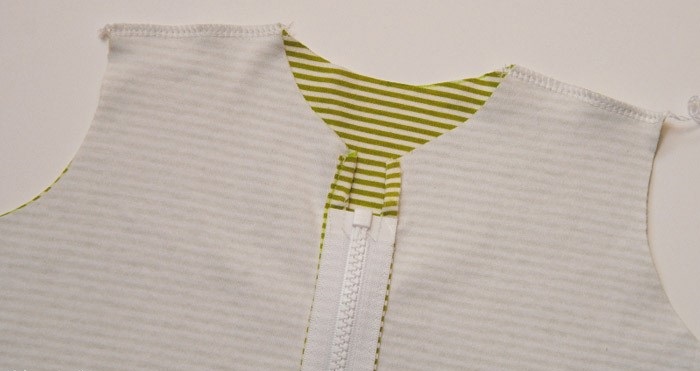
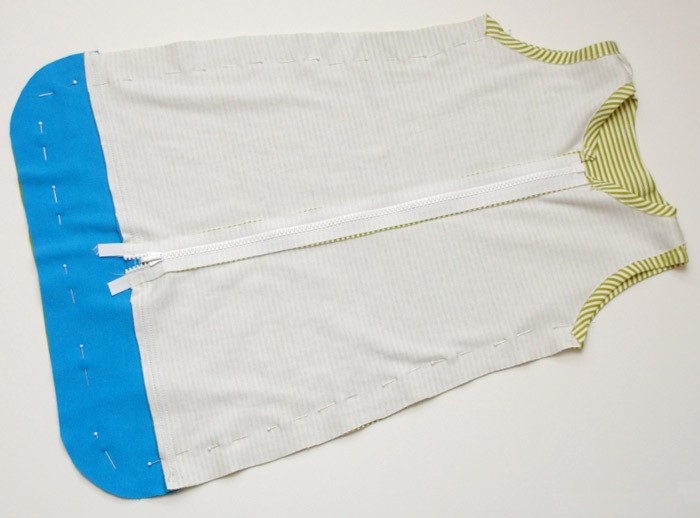
Unzip and separate the zipper. Fold the neckline into the inside ½” and press well. Pin and sew. (Notes: Knits don’t fray, so there’s no need to fold under twice or overcast the edges. Also, it is much easier to get a nice finish here if you sew on the inside. Just note that your bobbin thread will show on the front that way.)
Press well.
To complete the arm openings, repeat the operation.
Flip the completed front and back pieces over so the right sides are facing. Pin both sides and the bottom together. Sew or serge. To secure your stitches under both arms, tie off your serging or backstitch.
You’re done when you turn your baby sleep bag right side out!