This tutorial was created by Rachel. Hopefully you will enjoy her Cut Out Curtains tutorial below.
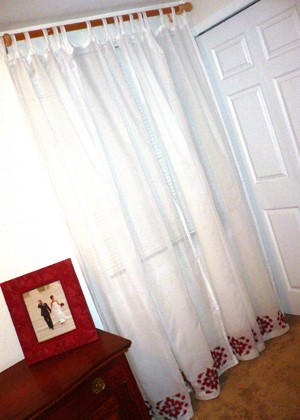
This is a fun way to jazz up plain panel curtains. I’ve done a repetitive design, but you could also try a monogram or another simpler design.
You will need
- Panel Curtains
- Sewing Machine with zigzag stitch
- Thread
- Colored Fabric in coordinating colors
- Design template (or stencil) to trace
- Disappearing ink pen
- Pins
- Embroidery scissors or any small sewing scissors
- Ruler or Measuring Tape
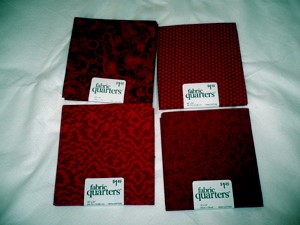
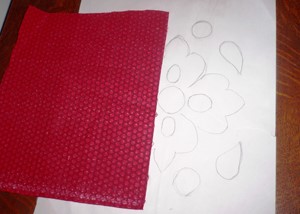
Begin by selecting a few coordinating fabrics to use for your design. I used four different red fabrics.
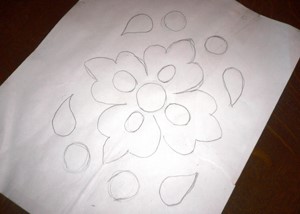
Create your design template. I really liked the pattern on this piece of fabric so I decided to copy a section of it for the design template for my curtain.
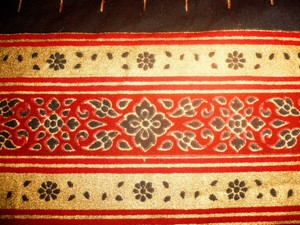
Using a pencil so I could erase (often!) I did a little freehand drawing, copying the center element of my inspiration design while adding two circles on each side to ‘make it my own.’
Variation
Instead of drawing your own design template, you can use a stencil to trace a design onto your fabric.
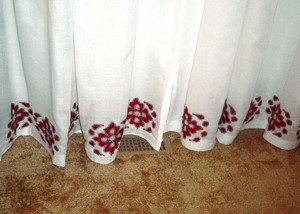
Determine how often you will be able to repeat your design across the bottom of your curtain panel. My design template ended up being 7.5″W X 5.5″H. At this point, I stopped and did the math to determine just how many designs I would be able to fit across the bottom of my curtain panel. The curtain panel was 57″ wide so I decided to leave a 2.5″ border on each edge and then repeat the design six times, leaving 1.5″ in between each design repeat. I placed the design 1.25″ from the bottom hem of the curtain.
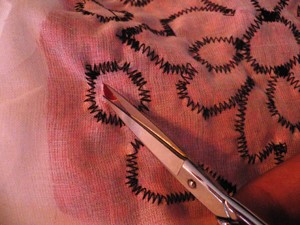
Copy your design onto your curtain using a disappearing ink fabric pen. Because I used a sheer curtain for my design, it was easy to place the curtain on top of the template and trace it with a disappearing ink fabric pen. I recommend doing one section at a time because, well, they don’t call it disappearing ink for nothing and you don’t want to have to come back and literally re-trace your steps. Again, if you feel more comfortable, use a stencil to make your design – just trace it on top of your fabric.

Cut out a rectangle of colored fabric slightly larger than the size of your design template. Since my design was 7.5″ X 5.5″, the fabric rectangles that I cut were at least 8.5″ X 6.5″, some larger.
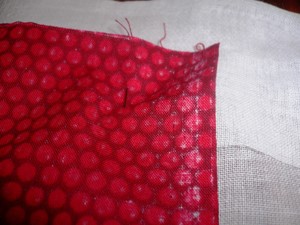
Pin the RIGHT SIDE of the colored fabric to the WRONG SIDE of the curtain fabric.
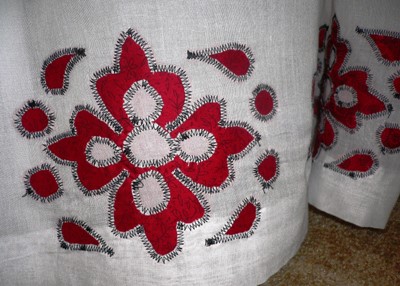
Using the zigzag stitch on your sewing machine, sew around your design. Cut away threads as you go.
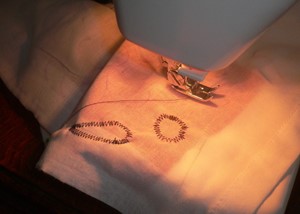
If your design has a lot of curved sections, you will need to sew slowly. Do a few slow stitches and stop. MAKING SURE THAT THE NEEDLE IS ‘DOWN’ IN YOUR FABRIC so it doesn’t move around, pick up the presser foot, turn the fabric a little to keep with the curve of your design, put the presser foot back down, and repeat. Continue until the whole design is finished.

Using embroidery scissors, CAREFULLY cut away the CURTAIN fabric to reveal the colored fabric behind it. Cut as close to the stitching as you can without cutting the thread. If you don’t have a pair of embroidery scissors (sometimes called thread scissors), use your pair with the smallest point so you are sure not to cut the colored fabric behind it.
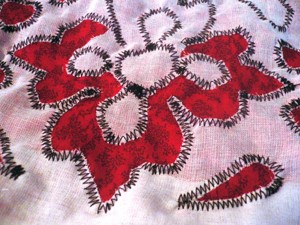
Honestly, this part of the process is somewhat tedious but the end result is worth it when the colored fabric design is revealed.
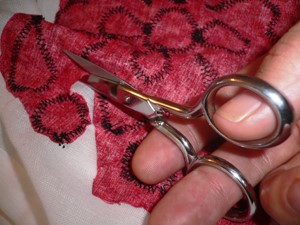
Cut away the excess colored fabric from the back of your curtain. Again, be careful not to cut the curtain fabric when you are cutting off the extra colored fabric.
Repeat steps 4-11 with a new fabric for each repeat of your design until you are done! I rotated through the four different fabrics that I had selected for my curtain.
But why stop with curtains? You can use this cut-out trick on throw pillows, aprons, dishtowels, or whatever floats your boat!