Steps of Making A Buttonhole
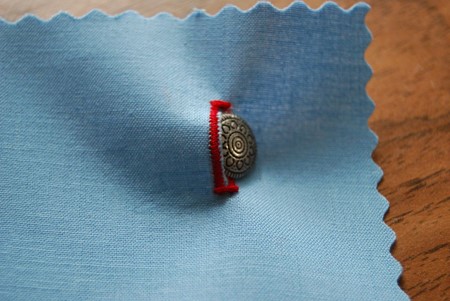
The first thing to do is measure the button, to know how big of a buttonhole you will need. The length of the buttonhole should be the diameter of the button PLUS the thickness of the button PLUS 1/8” for wiggle room.
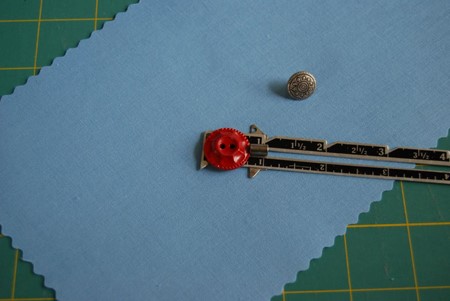
If you are using a shank button, measure the diameter and the shank plus 1/8” for wiggle room. If you use a ball button, wrap a ¼” strip of paper around the button, marking the circumference and add 1/8” to that length.
Now get your machine set up to sew a buttonhole. Be sure you are using a suitable needle. Regular weight cotton or polyester thread gives good results. Buttonhole twist is best suited to hand-sewn buttonholes and can add unnecessary bulk to your machine-sewn buttonhole.
Some machines have a hole in the finger of the bobbin case. Thread the bobbin regularly and then thread it through the hole in the finger. This will increase the bobbin tension, helping pull the thread to the underside and resulting in a more rounded appearance in the stitching on the right side.

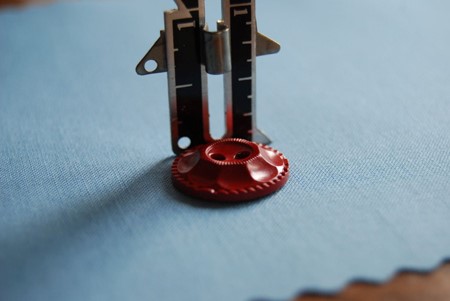
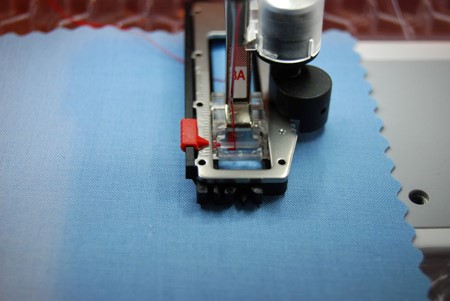
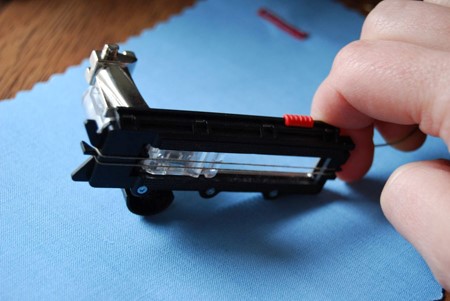
Be sure to use the correct foot. The foot should have two grooves on the bottom (or one extra-wide groove) to accommodate the two rows of satin stitches. An automatic buttonhole foot will have markings on the side to measure the length of the buttonhole.
I have set the red sliding arrow on the left of the foot to the measurement that equals diameter of my button plus button thickness plus 1/8”.
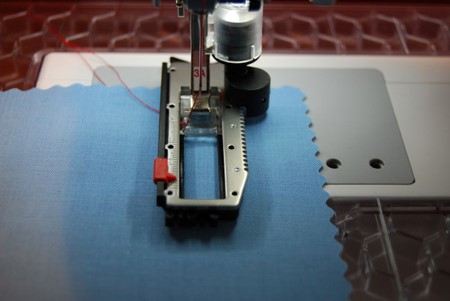
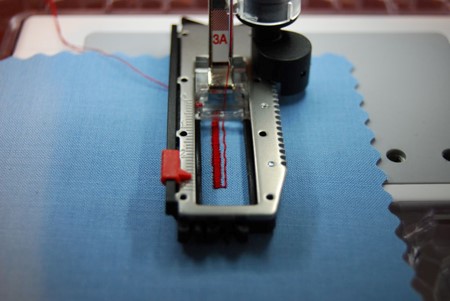
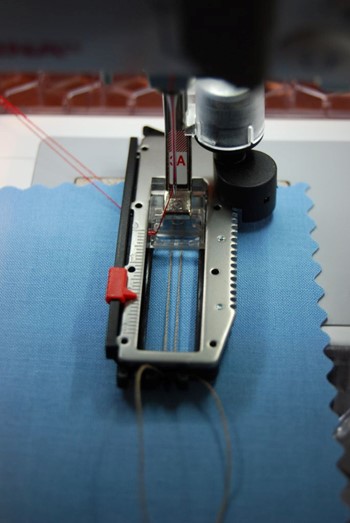
Begin Sewing
On my machine, I sew until the red arrow is pointing to a small red dot and then I push the reverse button. This tells the machine that the buttonhole is long enough. The left side of the buttonhole is complete.
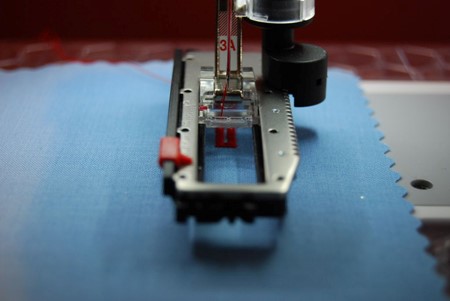
And then my machine sews back up to the top of the buttonhole, makes the bar tack at the top, sews the right side of the buttonhole, and then the bar tack at the bottom.
When I raise my presser foot, the automatic buttonhole foot slides back to the starting point and the machine is ready to make an identical buttonhole.
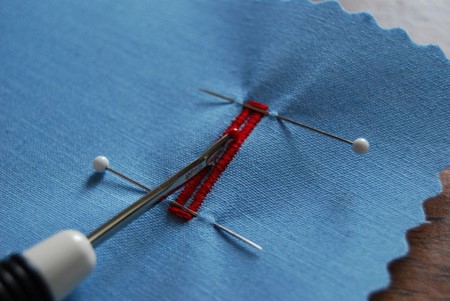
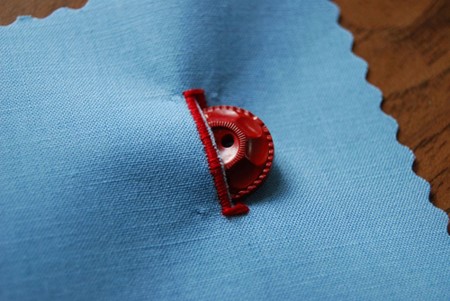
Now I’m ready to cut open the buttonhole. I place pins at each end, just inside the bar tacks. This keeps me from cutting through the bar tacks. I use a seam ripper, but small sharp scissors would work equally well. Start in the middle, cut toward one pin, then turn and cut toward the other pin.
Test to see if the button fits!
- Now you might be ready to make some adjustments
- Lower your top tension and the thread will get pulled down to the underneath side. Adjust about a half step at a time, testing at each adjustment.
- Adjust your stitch length if the zig zag is too dense or too far apart.
- Use interfacing or underlining to support the fabric and prevent distortion. Use dark interfacing on dark fabrics, as it may peek through at the cut edges of the buttonhole.
- Use the grain of the fabric to your advantage whenever possible, setting the buttonholes on the straight of grain and avoiding the bias.
- Use your slide-on extension table for better fabric control.
Ready to try a corded buttonhole?
Cording reduces the elasticity of a buttonhole, but adds strength, body, and durability. The cording is hidden between the fabric and the stitches, so gives a slight raised look to the buttonhole. Perle cotton or buttonhole twist are nice choices.
Check the slits on the back and the front of your buttonhole foot to see where the cording will fit.
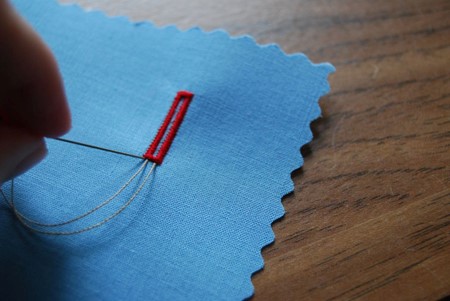
Once the cording is in place on the foot, you can sew the next buttonhole. Hold onto the tails of the cording, but not so tightly that the machine can’t feed the fabric properly.
Once the buttonhole is completed, you will have a loop of cording at the top of the buttonhole.
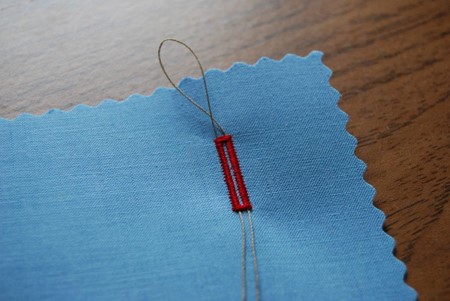
Gently pull the tails and the loop will disappear into the top bar tack. Thread the tails onto a hand sewing needle and pull the tails to the back.
Tie off the tails on the back side.
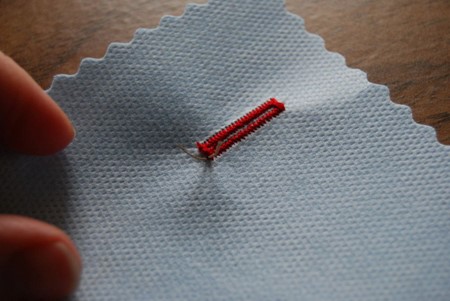
Test the buttonhole!