Once upon a time there was a darling little princess who was curious about everything. The queen wanted her princess to be happy and amused, so she gave her charming things with which to play–cloth blocks, handcrafted rattles and painted wooden toys (from Germany!) The princess was amused (for a minute.) Then she demanded new toys to shake and taste and bang.
So each day the queen would walk through the castle and collect items for the princess to explore–a silicone basting brush, a measuring tape, a sterling silver cuff bracelet (from the king!), velcro hair curlers.
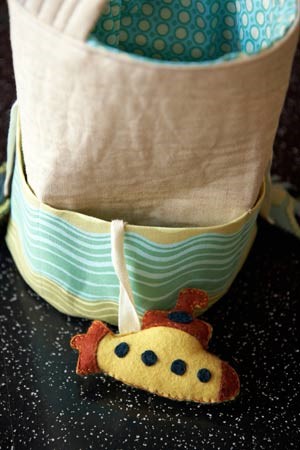
“I need something in which to gather all of this stuff,” thought the queen. “I will make a bucket, soft and cute. And because I love her so, I will make felt toys and hide them in pockets. This will amuse the princess.”
And the princess was amused (for a minute.)
Gather supplies
• 4 6” squares of felt for toy bodies. Additional colors for accent.
• Embroidery floss
• Cotton or poly fill
• 4 9″ pieces of non-fraying ribbon or twill tape
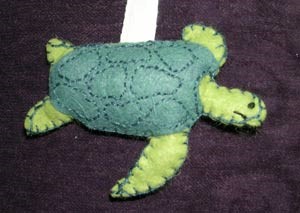
Embellish one side of each toy shape. You can cut small pieces of felt and stitch, or simply embroider. (If you use felt pieces, make sure they are sewn on well so they won’t come off in baby’s mouth.)
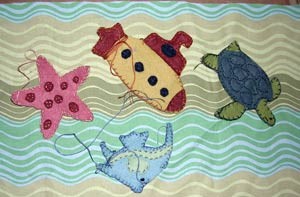
Using a blanket stitch, sew together the front and back pieces of each toy. Leave an opening of approximately ¾”. Lightly stuff the toy.
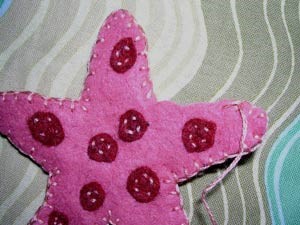
Insert about ¾” of the ribbon or twill tape into the opening on the toy. Using a backstitch, sew the opening closed with the ribbon in place. (Remember, this is a toy for a baby, so you want to make sure the ribbon is far in and it not fraying.)
Make the Bucket
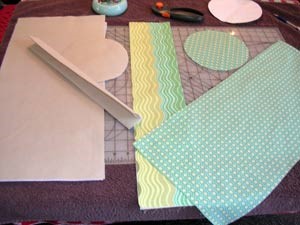
Gather supplies
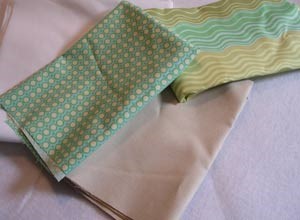
- 1 fat quarter linen or linen blend
- 1 fat quarter interior fabric
- 1 fat quarter exterior pocket fabric
- 1 yard medium weight fusible interfacing
- ½ yard heavy fusible fleece
Cut the pieces
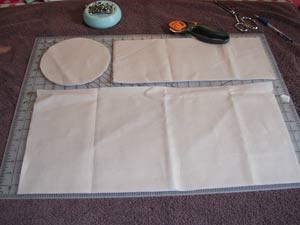
Linen (Lay it out as pictured. There is barely enough room!)
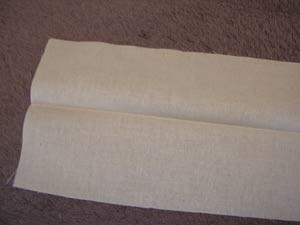
Body–10” x 21”
Bottom–6.5” diameter circle (pdf template)
Handle–15” x 6”
Interior fabric
- Body—10” x 21”
- Bottom—6.5” diameter circle
Exterior fabric
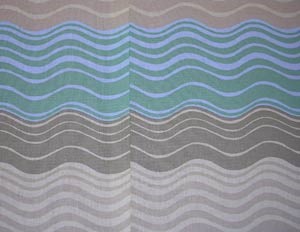
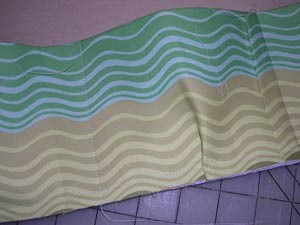
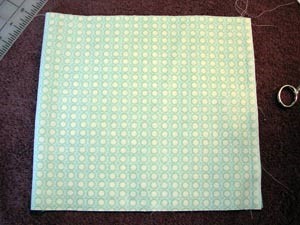
Pocket—9” x 22”
Fusible Fleece
Body—10” x 21”
Bottom—6.5” diameter circle
Handle—15” x 3”
Medium weight fusible interfacing
Body—10” x 21”
Pocket—9” x 22”
(I want to point out that I had to piece my pocket fabric because the “waves” were running the wrong direction. In case you decide to use the same or similar fabric, you would be wondering how I managed to get the stripes to go across, rather than up and down.)
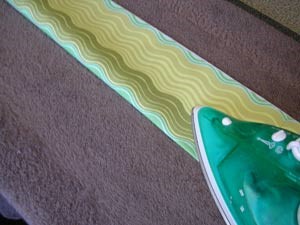
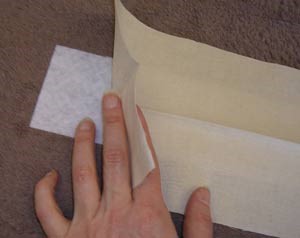
Iron the medium weight interfacing to the wrong side of the exterior pocket fabric. Fold the fabric in half long-ways and press.
Iron the heavy fusible fleece to the linen bottom.

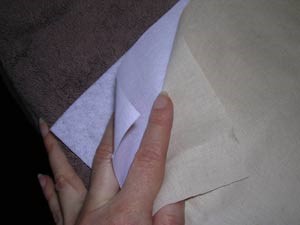
Layer your interfacing and linen body pieces. Put the fusible fleece on the bottom with the sticky side up. Put the medium weight interfacing on top of that, also with the sticky side up. Put the linen body piece on that, right side up. Iron the linen with high, dry heat. Give it a few passes to make sure the interfacing is fused to the linen and the fleece is fused to the interfacing.
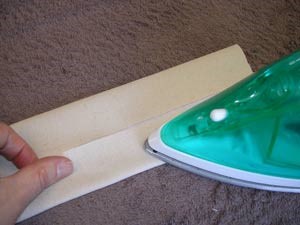
Fold your linen handle piece in half and press a crease. Open it back up.
Put your fleece handle piece down, sticky side up. Center the linen handle piece on top of the fleece, right side up. Iron the fleece to the handle.
Turn the handle over and press the linen on both sides of the fleece toward the center of the handle.
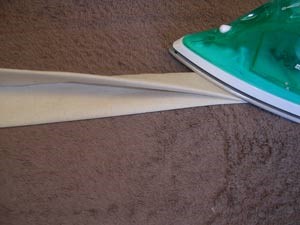
Fold the handle in half and press well.
You’re ready to sew!
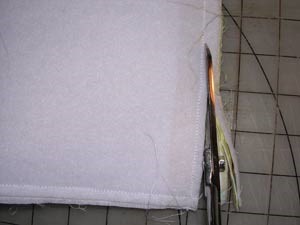
Using a very narrow seam allowance, sew the side of the handle.
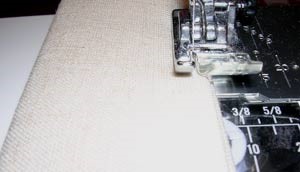
You may want to sew a couple of rows of stitches up the handle. (This is a slightly modified version of Lisa’s bag strap tutorial from Bag Month.)

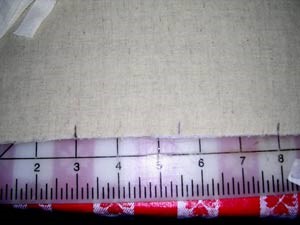
You need to mark the long bottom edge of the main body piece. The marks should be small so they’re concealed in the seam. In black ink make 4 marks where you’ll be pinning and sewing the ribbon from the toys: 3″, 8″, 13″ and 18″.In blue ink make 3 marks where you’ll be stitching the pocket to the body to make the different pocket compartments: 5.5″, 10.5″ and 15.5″.
Placing your toys face down, align the ribbons with the 4 black marks. Pin a couple of inches from the bottom edge.
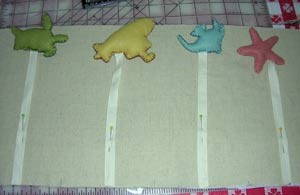
Place your pocket piece on top of the linen piece, lining up the bottoms and the left sides. (Your pocket is one inch longer than the body piece because you’re going to make one small pleat in each pocket compartment.
This will give the pocket a little fullness to accommodate the toys.) Directly over the black mark and the ribbon from the toy, pinch about 1/8″ and tuck it over. Pull the extra fabric from the right side. Pin in place, making sure that you’re also pinning through the ribbon and the main body piece.

Repeat the small pleat above each of the ribbons. Sew along the bottom edge using 1/4″ seam allowance.
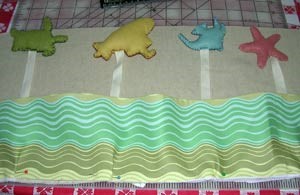
Your blue marks are hidden in your seam, but if you lift the pocket layer you can see them. You’re going to sew a line from the top of the pocket down to each of the blue marks. You can mark it with a pencil, use a pin to mark the top, or just eyeball it.
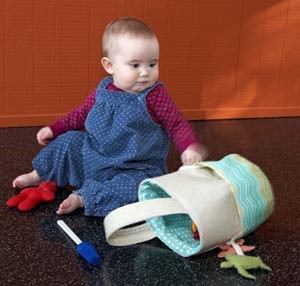
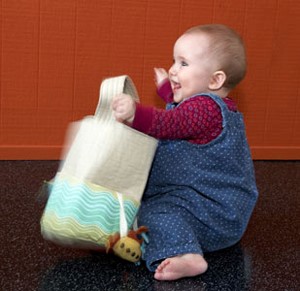
Tuck your toys into the pockets and out of the way for the rest of the construction. (I actually made 2 buckets–one with toys and one without, which will be apparent in some of the remaining images.)
Fold the body piece over and sew the side seam using a 1/2″ seam allowance. Carefully trim the excess seam allowance.
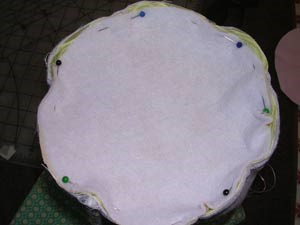
Pin the circle to the bottom of the body. (Wrong sides are out.) Ease in the fullness. Sew in place using 1/2″ seam allowance. Trim excess fabric.
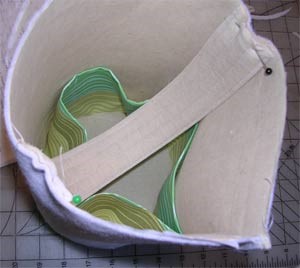
Stand the bucket up. Drape the handle inside the bucket and pin on both sides. Sew in place using 1/4″ seam allowance.
Construct the lining. Sew the side seam of the interior body piece using 5/8″ seam allowance. Pin the bottom on and sew in place also using 5/8″ seam allowance. Turn right side out.
Insert the lining into the bucket, right sides together. (The lining won’t go all the way to the bottom because the handle is in the way, but that’s ok. Trust me.) Leave an opening of about 5″. Back stitch at the begging and end.
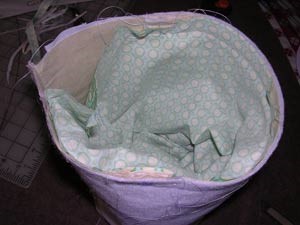
Stick your hand in the opening, grab the bottom of the bucket, and pull it out through the hole. Voila!

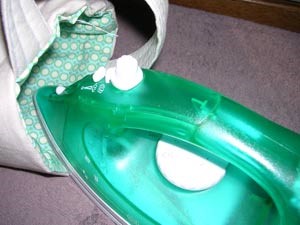
Fold the opening in and press all around the top edge.
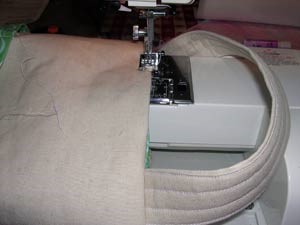
Top stitch around the rim.
A perfectly cute toy gathering bucket for your own prince or princess.