Pattern
Barcelona Skirts by Amy Butler
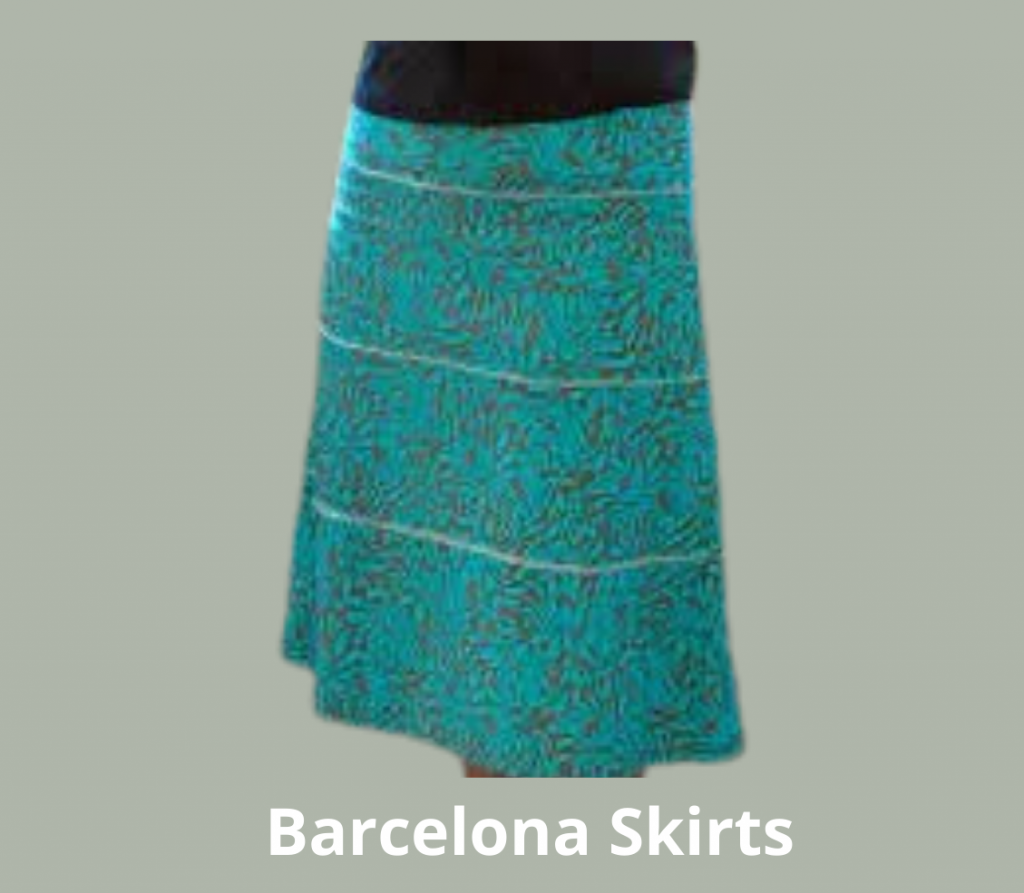
Barcelona Skirts Pattern Description
This includes patterns for a vintage-inspired layered skirt, an A-line skirt and an apron overlay.
Materials
Under the pattern picture, click “View Larger Images” to view the materials list for each of the three pattern options. For each skirt, in addition to your fabric, you’ll need a 7″ coordinating invisible zipper, thread and one small hook and eye. The apron requires interfacing. The pattern also suggests an invisible zipper foot and chalk pencil or fabric marker.
Overall Design
Both skirts look beautiful and drape in a very flattering way. I’m way too conservative when it comes to my skirts and thought, before I made it, that the layered skirt looked a little too unorthodox for me. I really love it now though because the layers and fraying are so subtle but add a unique touch.
Written Instructions
I’ve found Amy Butler’s patterns to be very comprehensive with easy-to-understand directions, and the skirt patterns further confirmed this impression. There were, however, several points along the way where I wished I had a little more information (especially related to sewing the zipper and finishing the fabric around the zipper).
I also wished I had more “tips” along the way noting important things to look out for (i.e. making sure each layer in the layered skirt lined up with its counterpart along the side seams… See “Modifications & Tips” for more of my ideas).
Diagrams / Images
Again, the diagrams and images were clear and gave detailed information; I just wished I had a bit more at several points along the way.
Pattern Pieces
There are two pattern pieces for the A-line which are also used for the lining on both the A-line and layered skirt. The layered skirt has five additional pieces. If you want to cut all of these out at once, along with the apron pieces, you have a good hour’s worth of work ahead of you!
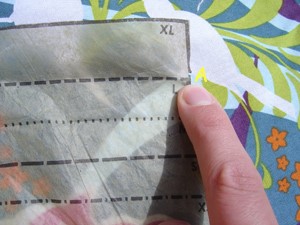
I used a tip noted in the Readers’ Best Sewing Tips and cut along the XL lines of the pattern pieces. I was then able to fold along the appropriate lines for different sizes for my sister and me.
Folding the pattern
I was also able to adjust the pattern easily for sizing in between two pattern sizes (i.e. a medium midriff with size small hips). The pattern tells how to adjust for different dimensions, but I found it easy to mark the right place on the midriff (A), mark the right place on the hip (B) and then use the closest size arc to connect the two.
I marked the midriff point on the fabric
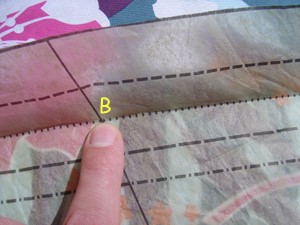
I marked the hip point
I connected the two points using the pattern arc for the closest size
Overall Level of Difficulty
The less experience you have the more motivation it requires but, no matter what, I think you could do it. I’d only ever made two or three children’s clothing items before doing these two skirts and was totally intimidated at first. It was the invisible zipper, really, that turned this from a beginner effort to an “Advanced beginner” project.
To be totally and completely honest the first zipper was incredibly tricky for me (and frustrating). The second one, however, was a breeze. If you’re motivated, you can do this skirt and if you have any level of skill as a seamstress you’ll likely fly through these patterns. As a clothing sewing novice it was a bit tricky but doable the first time and the second skirt was “easy.”
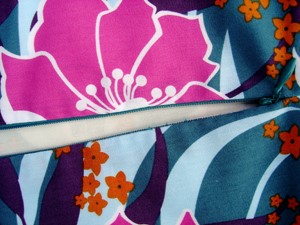
The invisible zipper open
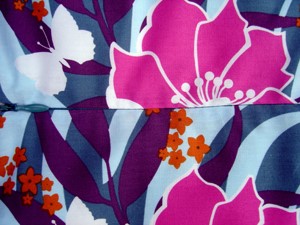
The invisible zipper closed. Invisible!
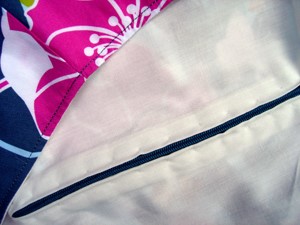
Inside view of the now infamous zipper
Modifications & Tips
Zippers: I was really happy with the professional look of the invisible zipper after it was all said and done but it was a big ordeal (at first) to make it happen. I worried too much about finding a good matching color because I didn’t realize how “invisible” it really is in the finished product.
I also thought I needed to find a 7″ zipper and, after looking in four stores, realized I could easily sew around the teeth of the zipper where I wanted it to stop and cut an inch below that (directions are on the Coats brand invisible zippers).
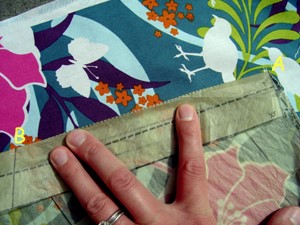
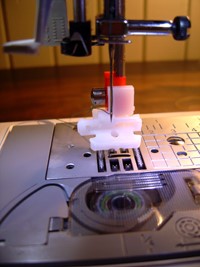
It also took the four stores to find an invisible zipper foot for my machine (Coats brand, $2 or so) and, once I got it home and tried to use it, I was completely baffled. There were no diagrams on the package and the directions were confusing and spelled wrong to boot! Save yourself a lot of grief and go immediately to this wonderful tutorial I found ’round about 1 a.m. to learn how to insert your invisible zipper.
Ali used a regular zipper foot for her Barcelona skirt with the help of this tutorial, so that’s an option as well. What I really needed was a quick photo of the foot on a machine, so here’s mine:
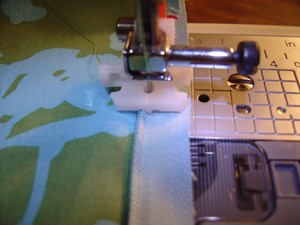
And here’s an action shot:
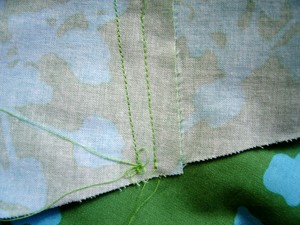
Sewing and lining up the layered seams: I thought it was a little difficult to sew the layers together with the given seam allowance so came up with what I thought was a great plan to sew from the back using each top layer as a guide. The arc of the two layers are so different and the way you combine the layers is such that this did not work.
Just to show you what a huge difference it made to sew it from the back and then along the curve of the front layer (as you should) I left both seams in place for this picture below. Yikes! Sew on the front of your skirt using the front curve as your guide (this’ll make sense as you have it in front of you) and you’ll be fine.
In retrospect I also wish I was more careful when lining up the different layers on side and back seams.
The waist: Likely due to my total lack of experience sewing skirts I made a mistake with both waist measurements. There was only a half inch difference between my measurements and one of the sizes listed (and the same went for my sister too) so I just followed that size as I cut out my pattern figuring it was good enough.
The waist on both skirts ended up a half inch too big for each of us (funny how that works) and I realized how important it is, if you’re going to the trouble to sew something really nice for yourself, to make sure you translate your measurements exactly as you cut and sew the pattern. In this skirt, without elastic, a half inch really made a difference in the look of the finished fit.
More tips: Look under “Fabric Recommendations” for a lining modification and things to look out for with your fabric.
Fabric Recommendations
Both skirt patterns note that any light to mid-weight fabric will work for the exterior, with cotton muslin for the lining. If you chose a heavier fabric you could easily skip the lining (which is what I intend to do with my next A-line).
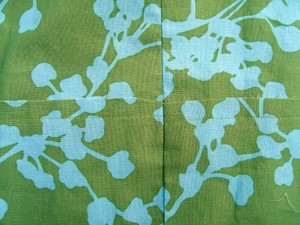
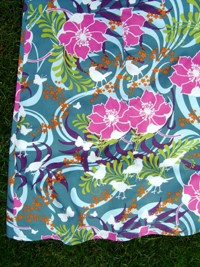
Your more important consideration should be the design on the fabric itself. I wanted the A-line skirt and offered to make the layered skirt for my sister. After looking and looking for the right thing I used a gift certificate for some fabric I really loved for my skirt. Once my sister and I really sat down with her chosen Robert Kaufman fabric we decided there was way too much going on for a layered skirt.
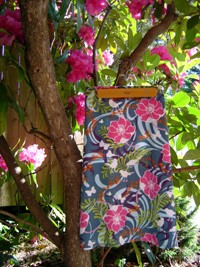
The layered skirt lends itself well to more open, abstract prints. Only as I sat down to make the skirts did I realize that my fabric was the exact same fabric used in the pattern picture and that I had to do the layered skirt with it! I was totally unoriginal without meaning for it to happen! Anyhow, abstract looks good with the layered skirt and I’d avoid really directionally-focused fabrics (stripes, etc.) too.
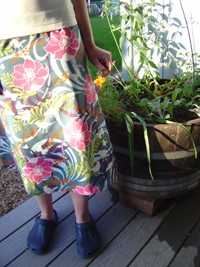
As it was I wish I’d paid more attention as I cut the two back pieces for the A-line skirt (that’s a little too much repetition for me to be truly happy with the skirt’s back view).
Repeating birdies and flowers on the back of the A-line
Conclusion
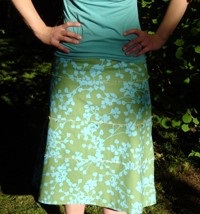
I can’t get over how funny it is that I ended up with the skirt on the pattern. So much for showing you what it looks like with a different print. I feel great wearing it, I think Britta likes hers too and I fully intend to make the apron at some point (though I’ll get radical and actually pick some unique fabric!).
My best advice with the skirts is not to be too intimidated by the zipper because it’s completely doable (especially with a link or two!).
The verdict is really, totally positive. Both of these skirts are beautiful, and the drape and dimensions are quite flattering. The pattern can be adjusted from a size four through a size twenty, and your choice in fabric can really change the finished product, giving it a range from sophisticated and professional to casual and “summery.” Barcelona’s are popping up all over and I’d love to hear your thoughts on your own efforts in the comments. I’m definitely making many more skirts with this pattern so do you have more modifications or tips for me?
Britta’s Barcelona A-line
I cannot find this pattern anywhere. Do you know where I can buy it?
Many thanks,