Wendy fills us in on some good tricks and potential modifications to make this Oliver + S dress as bubbly and fun as can be! Enjoy her review below.
Pattern
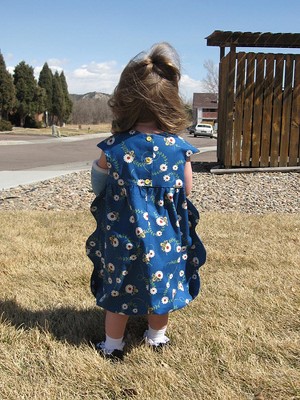
Oliver + S Bubble Dress
Description
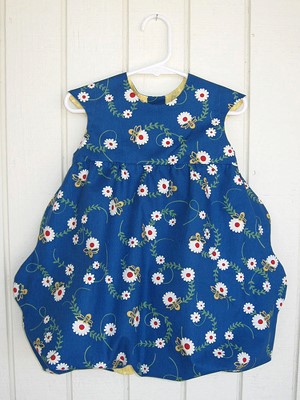
The Oliver + S Bubble Dress is a cute little summer dress with cap sleeves and bubble skirt. It is fully lined. The skirt can be made with or without unique scalloped sides.
Fabric Recommendations
Definitely use a high quality, heavy weight fabric for the outer fabric. I think anything stiffer than a light weight cotton would help the skirt to hold its bubble shape more.
Materials
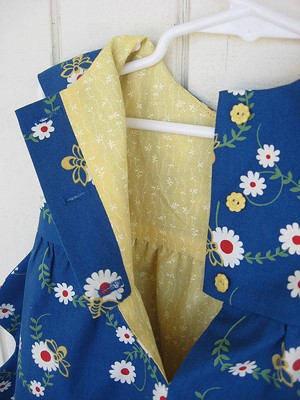
I used 100% cotton, Bees on Blue from Glenna Hailey’s Bee’s Knees collection. You also need a lightweight cotton for the lining, elastic for the skirt hem, and buttons.
Overall Design
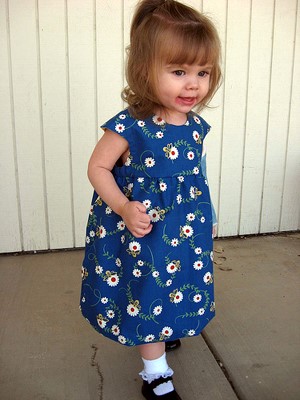
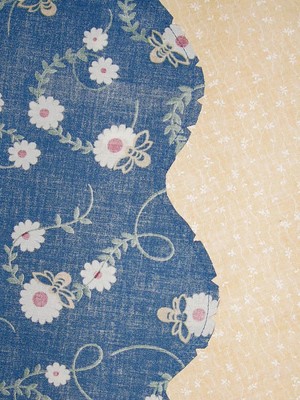
I thought this was really cute in the picture, but it just doesn’t look the same on. It does not “bubble” on its own. If I made it again I would somehow add a layer of maybe tulle inside the skirt to give it more body. Shortening the elastic around the skirt hem would probably also help with that. I decided to make the skirt with the scalloped sides. It was a bit of extra work, but because of having to fold them towards the back (per instructions) they lay flat against the skirt. If I made it again, I would skip the scallops.
Written Instructions
Instructions were pretty clear. I thought there could be a little more explanation about clipping or notching curves since there are many on this pattern and getting curves to lay flat once turned may be a little difficult for beginners.
Diagrams / Images
Diagrams were very clear and helpful. There were a couple of places where the instructions indicated to sew to a certain mark which was not actually on the pattern piece. But the diagrams were clear enough that one could make a good estimate of where the dot or star was suppose to be.
Pattern Pieces
Pattern pieces were on white paper, which is nice for durability. I ended up tracing all the patterns to tissue. I don’t use my patterns more than a couple times usually, and I prefer working with tissue for its manageability.
Overall Level of Difficulty
I found this to be fairly simple, but have a bit of experience with sewing. I think getting smooth curves around the cap sleeves and the scallops could be a challenge for beginners. The elastic around the skirt hem is sewn directly to the seam allowance, which requires you to stretch the elastic while you sew.
Modifications & Tips
I stuck to the pattern, so no modifications.
- When sewing curves go slow. Take your time so that you get a smooth curve. Stop occasionally with your needle down and rotate the fabric if needed.
- If you cut small notches on outer curves, and just clip inner curves, it will help reduce bulk in the seam once the piece is turned right side out. Clip right to the stitching, but be careful not to cut your stitching.
- A couple markings were missing from the pattern pieces, but mentioned in the directions. On Step 7 under “Prepare the Bodice” there is not a dot indicated on the pattern piece. Instead, referring to the picture, I sewed just a 1/2″ line of stitching where indicated. On Step 1 under “Attach the Bodice to the Skirt” there are no stars indicated on the pattern piece. This is just to mark the starting and ending points of your gathering stitch. Starting and stopping approx. 1/4″ from the fabric edge works fine.
Conclusion
I think this is a nice, well done pattern. I was a bit disappointed with the end product, that it did not look as good on as it did in the picture or on the hanger. I would be more likely to use this pattern again only if I made several modifications. On the plus side, the arm holes are big enough to fit over my daughter’s cast, which can not be said for most her other clothes!