Felt sewist Delilah, loves to create magical creatures. Through her pattern design Delilah helps you turn felt into something wonderful too Delilah showed us how to make Owl Masks, with a matching Woodland Bear mask on her site.
This adorable felt turkey is a perfect introduction to making stuffed animals! Just in time for the holidays, this turkey would make a perfect autumn gift, ornament or table decoration.
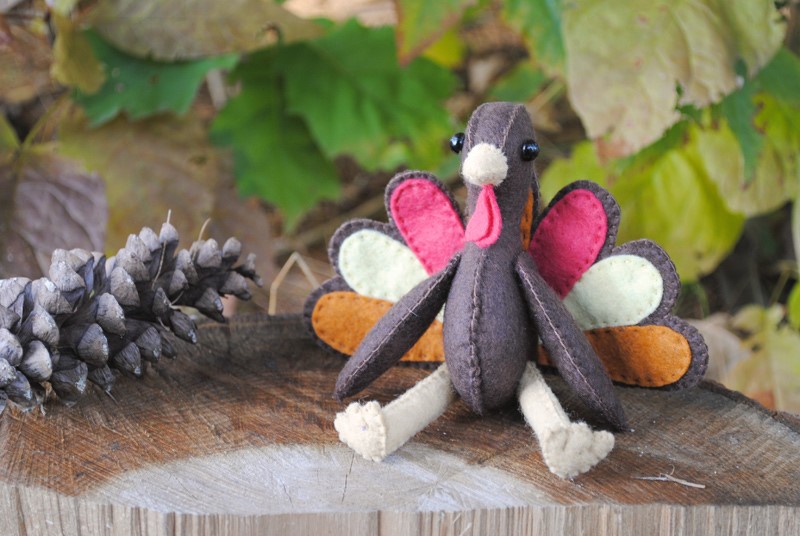
Like most of my pieces, this feltie is completely hand stitched. It’s a fantastic project to practice your hand stitching skills.
Sew your own turkey stuffie!
Begin by printing the Felt Turkey sewing pattern printable PDF file. Use the pattern as a reference to cut all of the pattern pieces from your felt.
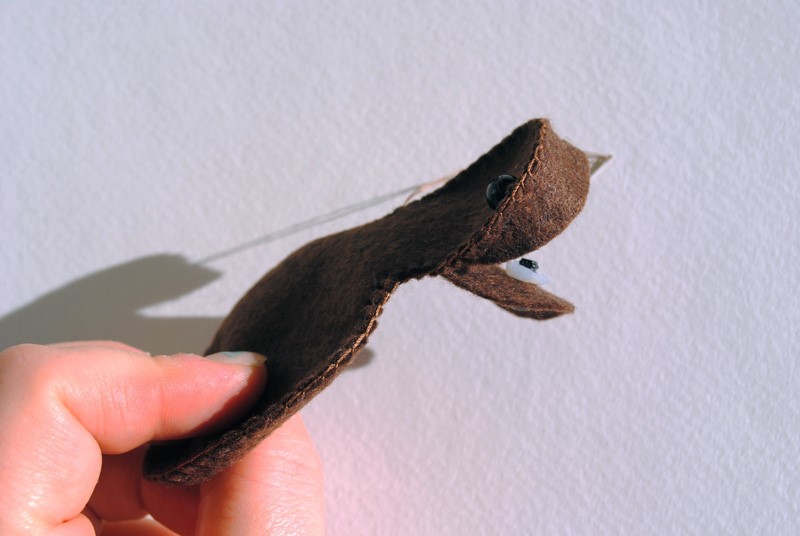
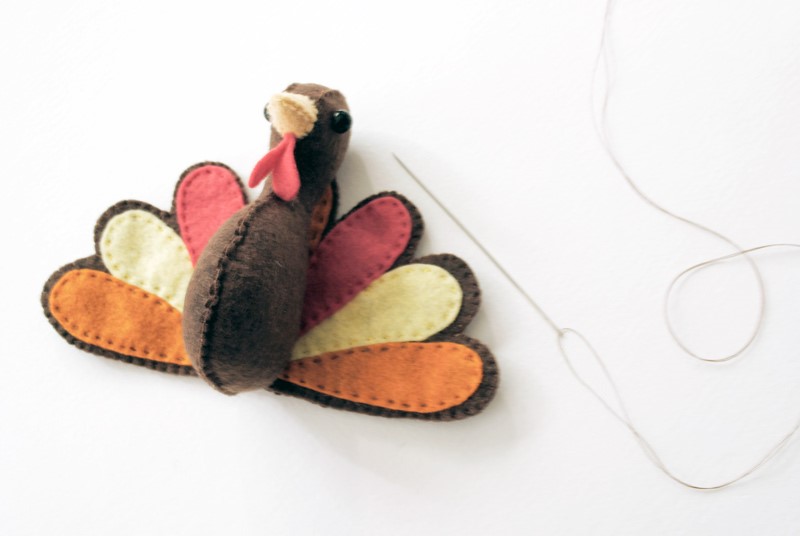
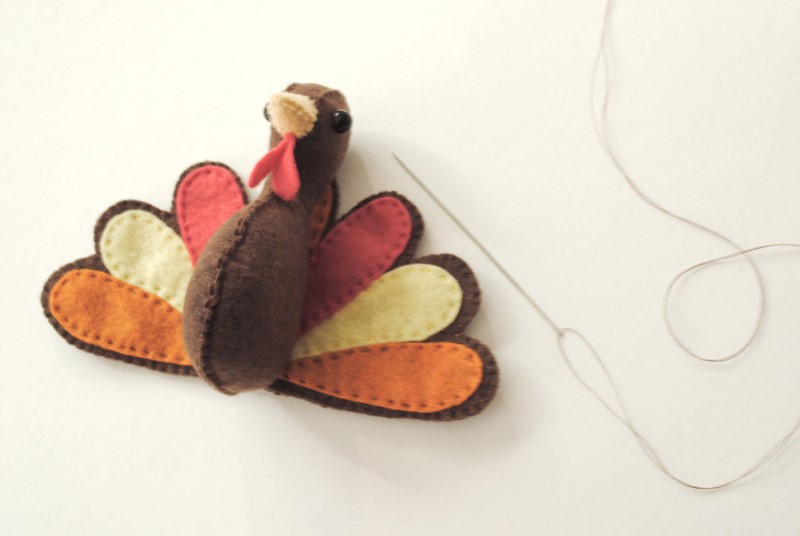
Start by sewing the turkey’s body. I chose to install some 6 mm doll eyes. If you’d rather, you could easily embroider some eyes, sew on some black felt or even use beads for eyes.
To install safety eyes, I made a hole on either side of the head with the end of some sharp scissors, inserted the post of the doll eye and used a small set of pliers to press the washer on over the post.

Match the two main body pieces together and begin sewing at the back about half way down from the head, moving forwards toward the front of the head.

When you reach the spot marked with a dot on the pattern, attach the Head Gussett and continue sewing along attaching it to one side of the main Turkey Body piece.

When you reach the end of the Head Gussett tie off you thread and go back to sew the opposite side of the head together starting at the front
Sew until you have a small opening left (about 1 1/2 – 2 inches). Use the opening to stuff the Turkey Body full.
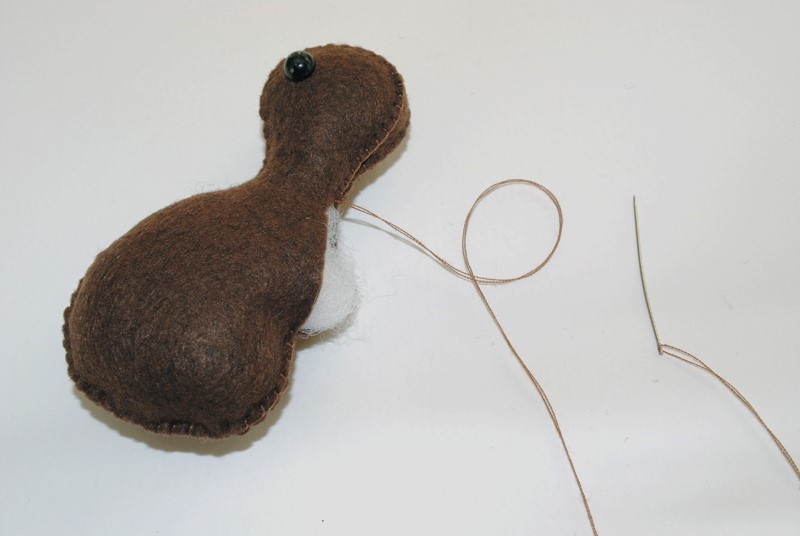
Once the body is fully stuffed sew the opening shut.
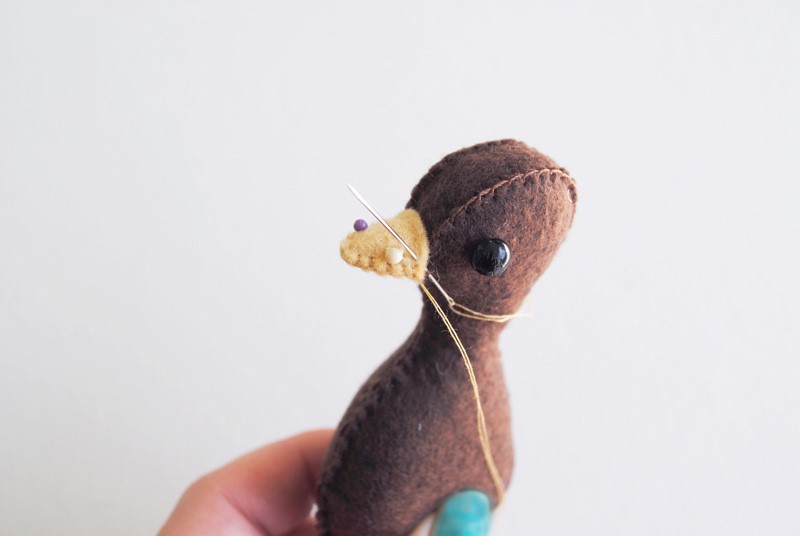
Sew together the Beak pieces by stitching along the front (around the curve) but leaving the back open. Stuff the beak gently and then pin it in place onto the front of the Turkey Body. Sew the beak in place onto the head.
Next we’ll create the feathers/plummage. When I cut the feather pieces for the Turkey’s plummage, I like to choose three different colored felts. In this case I chose fall colors– orange, red and yellow.
Begin by pinning three of the Feather pieces in place on one of the Plummage pieces. Stitch the feathers in place.
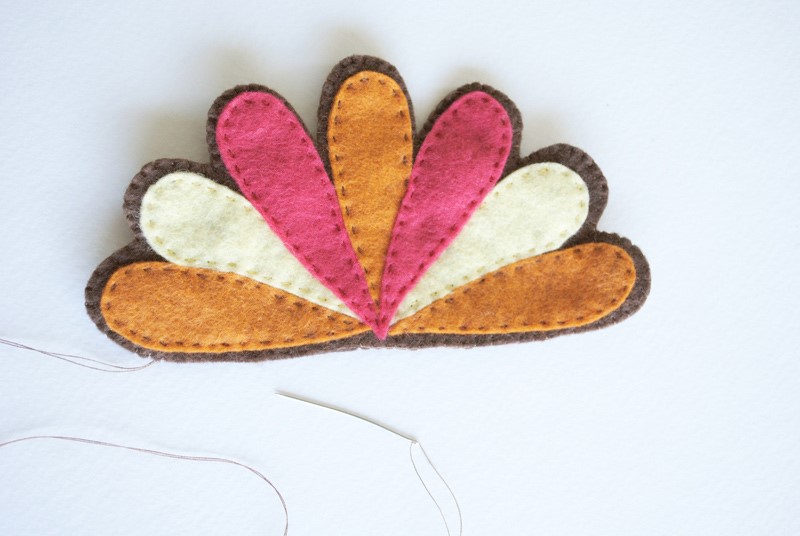
Next you’ll attach two more feathers– the outer most feathers. Pin and stitch those in place. If you aren’t a fan of all the felt overlapping you can trim the excess as you go along.
Pin and stitch the last two feathers in place. Match the piece to the second Plummage piece and stitch these together.

Thread a doll making needle with a long piece of thread and knot it in the back of the turkey’s body. Sew the Body to the plummage.
Match the wing pieces together and sew along the edges leaving a space open for stuffing. Stuff the wings full and stitch shut.

Now we’ll sew on the turkey wings with a string joint. String jointing is basically sewing over and over in one place to hold the pieces on but in a way that they are still moveable/jointed.
Make a small knot on one side of the Turkey right where the wing would sit and cover the knot. Hold or pin the wing in place on the opposite side of the turkey. Send the doll needle through the body, out the other side and through the wing.
Once again hold the wing in place on the opposite side. Send the needle back through the wing making a very small neat stitch, through the body again and out the opposite wing. Continue sewing back and forth like this leaving each stitch directly on top of the last. After you’ve passed back and forth three or four times, train the needle to come out just under the wing again and knot in place (so that the knot will be hidden under the wing).
Next we’ll move on to the legs. Match two Leg pieces together and sew from the bottom edge up and over the top and back down again leaving the bottom open for stuffing. Repeat this for each leg and stuff full. I do like to leave the very tops stuffed only lightly, but fill the rest of the leg all the way full.
Match two Foot pieces together. Stitch the outer edges leaving a small opening for stuffing. Fill the feet lightly with stuffing and sew the opening shut. I like to add some extra decorative stitches at the toes for added detail.
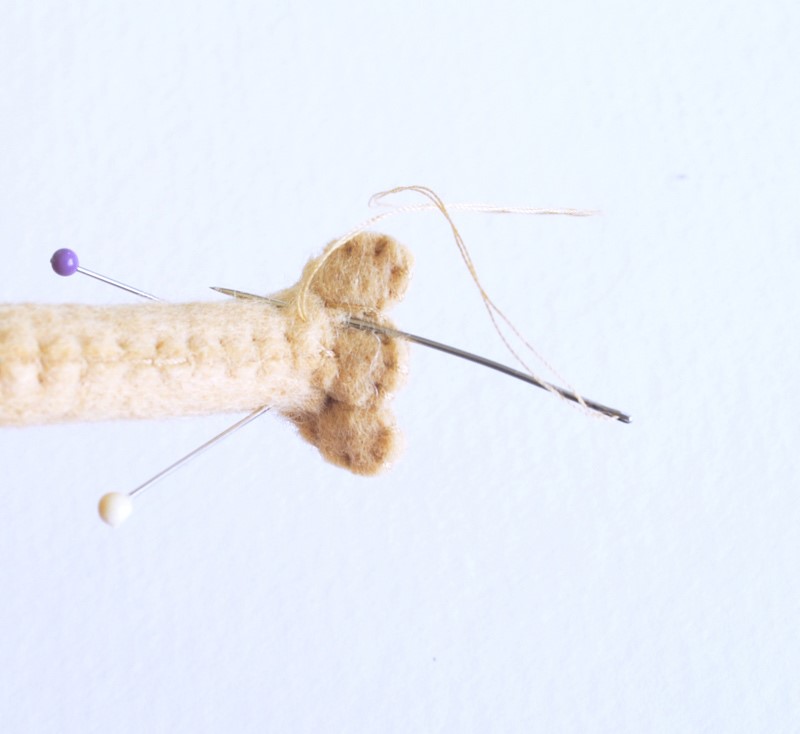
Match the leg to the back part of the foot and pin in place. Stitch the foot to the leg.
Attach the legs to the bottom part of the bird using string joints and a doll making needle.
