Jill Myslinski uses her time away from her busy restaurant to sew and create outside of the kitchen. She designed this cute and functional Kimono Dog Harness Tutorial for her dog, and wanted to share it with you and your dog too.
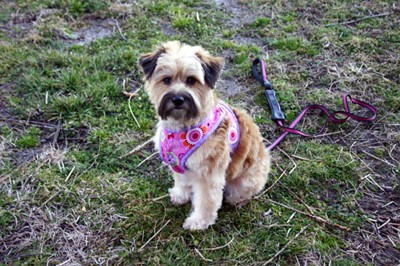
My poodle/pommeranian mix Coco enjoys going for walks. Even though she is only 10lbs, she pulls when on a leash. I purchased a small nylon webbing style harness and it helped. But it wasn’t cute. So I looked at how it was made and tried to replicate it using soft, cuddly cloth. simply slip your dog’s front paws through the loops and wrap it across his/her back. Velcro will keep it snug. Set aside an hour and develop a best friend for yourself as soon as possible.
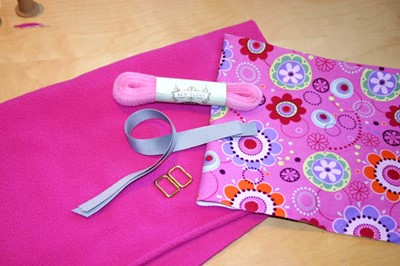
You will need:
- Pattern
- Tape measure
- 1/3 – 1/2yd. cotton fabric (corduroy and cotton duck are fine as well)
- 1/3 – 1/2yd. polar fleece
- 1 package of bias binding (or make your own)
- 2 small D-rings (brass or stainless steel)
- 1 package of Velcro (hook and loop tape)
- 1/2yd. 5/8” grosgrain ribbon
- Thread
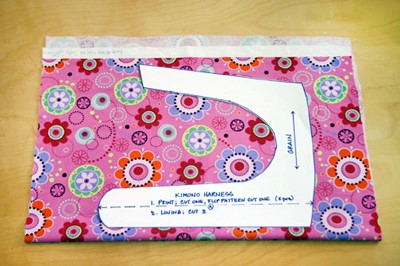
1. Measure your dog carefully. Place the tape measure just behind the front paws. Now divide that measurement by 2. Then add 2 ½.” Your final measurement is what you’ll need to make the pattern smaller or larger Reduce or increase the design at the copy center until the dashed line at the bottom is the same number.
Example: Coco measures 18”. Divide by two = 9. Add 2 1/2” = 11 ½”. I used this number.
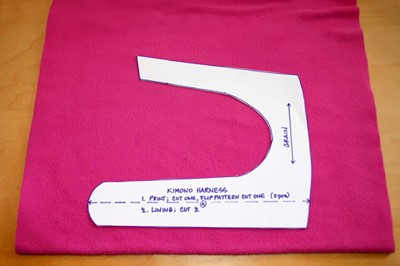
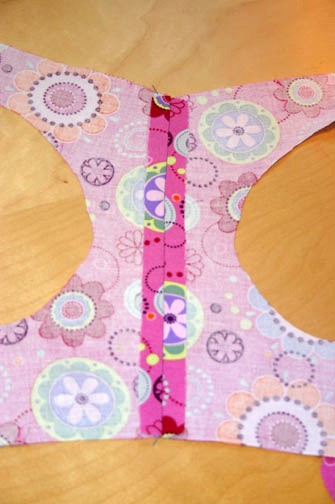
2. Layout your fabric. Fold fabric (both print and fleece) with selvages at the top. This will ensure that the grain is perpendicular to the tummy band and will keep it from stretching out as you sew. Cut through the folded fabric once for each fabric giving you two mirror image pieces.
3. With right sides together, sew each piece to its partner. Use a 3/8” seam allowance. Press seams open. Repeat with fleece.
4. With WRONG sides together, pin the cotton fabric to the fleece. You’ll need to line everything up quite well because there’s a small amount of excess fabric at your seam line (for puppy tummies). Stay stitch around the entire piece. Maintain a close proximity to the edge and trim any sloppy edges.
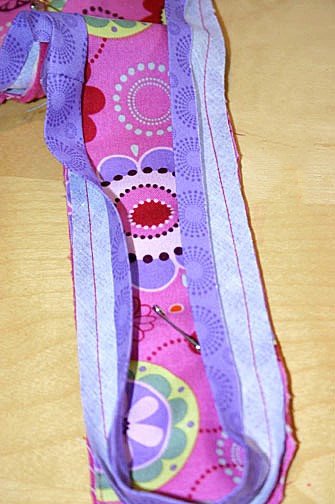
5. Binding. I make my own, but commercial food also works nicely. There are plenty of good tutorials out there so read up if you are a beginner. Remember, if it’s a little sloppy, your dog won’t mind. I like to start by opening the binding and sewing it on the top with a 3/8″ allowance. Then wrap the folded edge around the back and press, press, press. Carefully stitch in the ditch from the front and you should catch the folded edge around the back.
6. With the fleece side facing you, pull the straps toward you and pin to the closure flaps. There is a mark on the pattern for reference. The strap on the left will go under the flap, the strap on the right will lay on top. Pin and sew across at the binding, hiding the stitches in the ditch. Do not trim excess. Repeat for the right side.
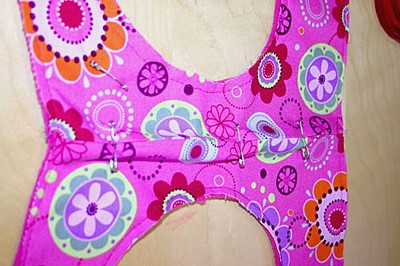
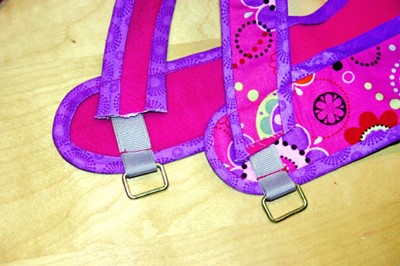
7. Now cut your ribbon into 4 equal pieces. Using two pieces, catch the D-ring and pull the ends together. Place the ribbon at the bottom of the flap on the same side as the strap. Safety Pin it in place. Do the other side the same way? Pin.
* This is a good time to fit the harness on your dog. Make sure the rings line up. Make sure it is snug, but not tight. Wrap the left side flap over the right and line up the rings. The shoulder straps should just meet in the middle. Adjust if necessary and stitch them down just as before in the binding ditch. Refer to the pattern for a reference mark.
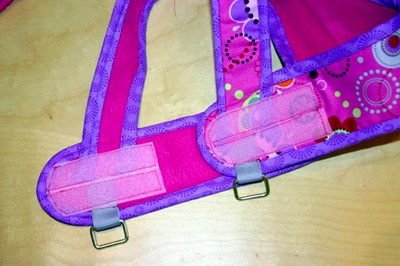
8. Cut four pieces of ¾” hook and loop tape about 3” long. Two hook and two loop. Clip the corners off of each one if desired as in photo. Pin the loopy side to the inside of the left band encasing the raw ends of the strap and the ribbon. Stitch the two close together, making sure to go all the way around. Repeat on the right side.
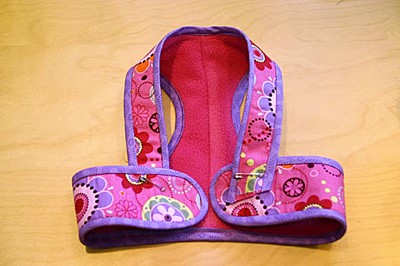
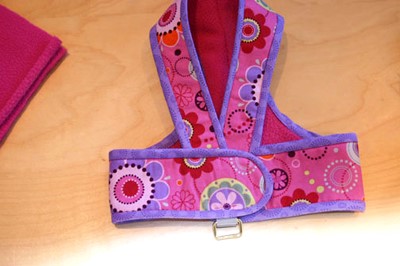
9. Now your Kimono Harness is complete!
If you want to make the harness for your dog more unique, you can also add your own sign on the harness, such as custom embroidered patches with your own designs and colors. You can create them with your favorite theme or your dog’s name and patterns, and sew them on the harness. It will not only make this handmade gift more personal but also can find your dog’s best features.

Slip your dog’s paws through the straps, wrap the bands over his/her back and secure. Clip in your leash and you are off. I promise your dog will love it.
It’s available for free. Please check the post again, a download link is added.
hi there
Hi! Cute pattern! I’d like to try it, but I don’t know what you mean by “measure behind his front paws.” Does that mean we should measure the distance between the two front paws when he’s standing in order to get an idea of his chest measurement? Thanks!
I’m assuming she means measure your dog round it’s rib cage just behind front legs as coat wraps round it’s body. I was confused at first as it didn’t make sense but looking at the pattern it’s the only thing I can think of 👍
Hello. I just love this harness dress. I cannot install as it request. Would it be possible to send your pattern to my email. I would be willing to buy it from you.
My email is , if you can send it to me is: [email protected]
I look forward to your reply.
Cordially
Gwen Cline
Please check your email
Is there a video tutorial for this. I sew but it sounds compliated.
I don’t see a Download link for the pattern, just a link to download another program hat I neither want or need.
It’s just below the first paragraph and what you will need to make it. It’s in blue print…..
I still don’t see a pattern
My dog is 8months, 5 lbs.
Girth/chest 12″
Neck 10″
12 ÷2=6+2.5 = 8.25
I’m confused how to reduce the piece