Beth N. shares this easy tutorial for upholstered headboards… Just the thing creates a focal point for any bedroom in the house!

How to Raise Headboard
Other than my son’s crib, all the beds in our house have one of these upholstered headboards. They’re easy to make and they have a high visual impact. Make sure you have everything ready to go when you start to avoid annoying your helper (in my case, my hubby!!).
Supplies Needed
• 4’x8′ piece of plywood or OSB, cut to size
• High–density foam, 3″ or 4″ thick x 24″ x width of bed
• Batting, about 12″ larger in width and height than foam
• Fabric (see notes)
• 1.25″ long bolts, flat washers and nuts
Notes on Supplies: Your plywood should be at least 1/2″ thick. I used 19/32″ composite board or OSB (chips of wood are molded into sheets with resin) instead of plywood because it tends to be straighter and sturdier, and costs less than $15. I am making a headboard for a king size bed, so the plywood needed to be cut to 76″ (for more on sizing, or just measure the width of your bed). Your local “big box” hardware store will cut this to size for you, up to two cuts for free at most stores.
The high–density foam may be the most expensive part of the project. Locally, I get mine at JoAnn, and I always wait for a sale or use a coupon. Again, most stores will cut this to length for you.
I recommend upholstery–weight fabric for this project because it will wear better over time. Although I have used quilting–weight fabrics in the past, there are so many beautiful upholstery–weight lines out there you should have no problem finding a great fabric. Most upholstery–weight fabrics come in 54″–60″ widths, which is more than enough for this project.
Purchase enough to cover the plywood and its sides as well as the sides of the foam and give yourself plenty to staple on the back. I am doing a king size bed, so I need 76″ + 1″ (both sides of 1/2″ plywood) + 8″ (both sides of foam) = 85″ + 12″ of play for stapling = 97″. I would purchase 2.75 yards of fabric to be safe.
The width of the fabric is important only if you don’t have a bed skirt that will conceal the edges of the headboard. If you don’t, you will need to make sure you have enough fabric to cover the 4′ of plywood, 8″ of foam (4″ top and 4″ bottom) and enough play to staple along the back. If you are using a directional print that runs selvedge to selvedge, you’ll need to piece your fabric to get the width.
I used a king–size quilt to upholster my headboard, so I have plenty of fabric. This is a great way to show off a quilt, but keep in mind you will be stapling through it. Another idea is to upholster a headboard in muslin or a solid and then drape a quilt over it, adding ties on the side. Then you can also remove it for laundering!
Tools Required
• Measuring tape
• Marker
• Drill with bit larger than your bolts
• Straightedge
• Scissors
• Hot glue gun and glue sticks
• Staple gun and staples (I used 5/8″ staples)
• Hammer
• A helper – many of the steps require two people
As always, when using power tools, you should wear safety glasses!
Instructions
Prepare the plywood
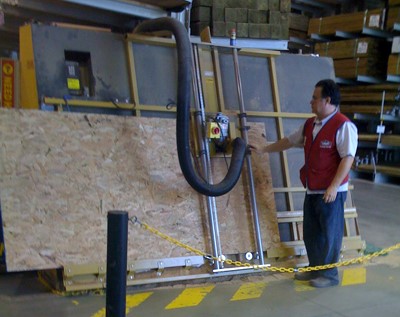
George, our handy hardware associate, has already cut our plywood to length; we need to mark where the plywood will be bolted to the bed frame. Have your helper hold the plywood against the head of the bed and mark the two openings through the bed frame and onto your plywood. Make sure the plywood is centered!
This bed frame has two slots on each side to make it easy to center the headboard (you can slide the headboard a couple of inches to the left or right before tightening the bolts). Some frames have a hole and slot at each side or two holes.
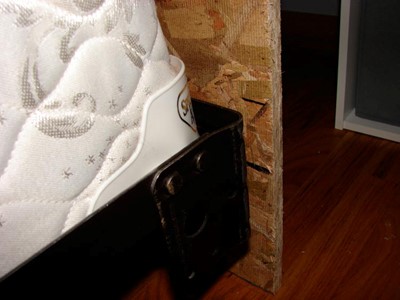
Measure the bed height
The top of my bed is 24.5″ above the ground. I want my mattress to fit under the foam on my headboard, so I need to do a little math. My plywood is 48″ tall, and my foam is 24″.
24″ (foam) + height of top of mattress = X
X – 48″ = amount headboard must be raised
So in my case, 24″ + 24.5″ = 48.5″, 48.5″ – 48″ = .5″
My headboard needs to be raised .5″ off the ground. You do have some play here, especially with pillow top mattresses, and you want to be careful not to raise your headboard too high or you run the risk off breaking the headboard at the mounting point.
I would recommend raising the plywood at least .5″ no matter what, so that the plywood will not scrape your floors.
Drill the mounting holes
Lay your plywood on its back and measure down from your original marker lines by the amount you found in step two. I measured down .5″ and marked accordingly. Drill the mounting holes for your headboard. (Make sure you don’t drill into your flooring!)
Size your foam
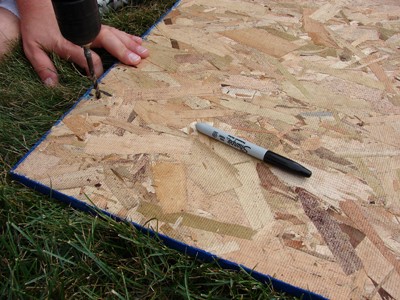
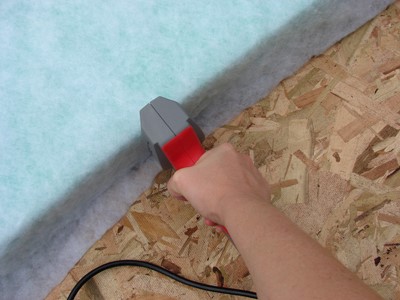
If your foam was not cut to size when you purchased it, do that now. I recommend an electric knife for this (that’s what they use in the stores!) and you can find one fairly cheaply after the holidays (I paid less than $10). If you don’t have an electric knife, a fine–tooth saw will do the job. Measure and mark your foam toward the top and bottom and then use your straightedge to draw a line between your measurements. Saw along the line.

Measure twice and cut once! You can see here a double line: the first measurement was taken on uneven ground so we had to remeasure.
Adhere the foam
Lay your foam on the plywood so that both sides and the top are flush with the wood. Starting at one side put small dollops of hot glue every few inches between the foam and the wood. You just need enough glue to tack the foam in place while you work. Let it dry for a few minutes before proceeding.
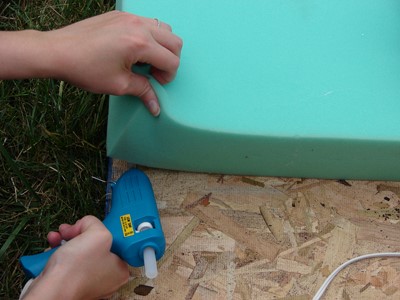
Don’t try to glue too much at once or the glue will dry before you have a chance to press the foam into it.
Staple the batting in place
The batting softens the hard edges of the foam. If you are using quilting–weight fabric, I would recommend a couple layers of batting. Because I am using a quilt (and folding it for two layers!) I don’t need as much padding to soften my foam.
Center your batting over the foam. Starting in the center front (always start in the center so you won’t get wrinkles!!), staple the batting closely (push the staple gun slightly into the foam so you get right under it) to the bottom of the foam. Work your way out alternating left of center and right of center pulling the batting tight as you go. For batting, I like a staple every 4–5″ or so.
If you attempt to start at an end instead of the center you will not be able to pull your batting and fabric tight enough to avoid wrinkles.
Once the bottom is stapled, stand the headboard up and have your helper support the front. Now working along the back, pull the batting tight and staple in the center, about 3–4″ down from the top. Continue, alternating left and right and pulling tight.

You want everything nice and tight but make sure you don’t pull tight enough to rip the batting from the staples.
On each side, fold the corner like you are wrapping a present and cut any bulk away. Starting at the center of each side, continue the process until the batting is stapled all the way around.
If your staples aren’t going all the way into the wood, tap them with the hammer until they are flush.
Staple the fabric in place
Don’t worry; you’re almost there! Lay the plywood down on its back and place the fabric over the foam and batting. If you notice any wrinkles in your fabric, now is the time to iron. You won’t be able to fix those wrinkles once the fabric is stapled in place! Once again, starting in the center of the front, below the foam, begin stapling into place.
You want to push that staple gun slightly into the foam to make sure your staples are right up there against it, or you will see the staples when you are finished. Work once again to the left and right, alternating, but this time staple every 2–3″ to get the fabric even. If you have a stripe or other linear motif make sure you are pulling at the same tension so it doesn’t look skewed.
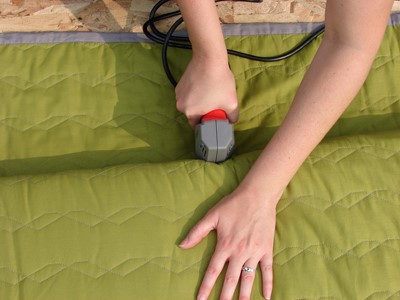
See how the staple gun is pressing in on the foam? If you don’t get it firmly in there you’ll be able to see staples. Your bedding will hide a lot of flaws so don’t stress too much.
Stand the headboard back up and have your helper support the front. Now working along the back, pull the fabric tight and staple in the center, about 3–4″ down from the top. Continue, alternating left and right and pulling tight, stapling every 2–3″. Remember to stop and check your work so that you are getting the fabric tight and it looks good!
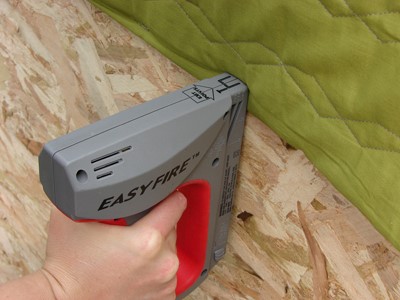
To keep the fabric nice and tight staple closer to the top. I like to also staple close to the edge of the fabric to reinforce it.
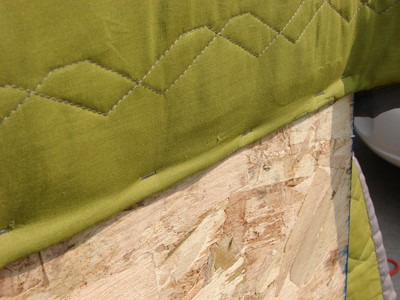
Working from the center out, I check the front periodically to make sure everything looks good. On each side, pull the back of the side panel into a triangle and flatten across the back of the plywood, stapling into place (see photo). Then pull the front of the side panel into a triangle forming a nice crease and staple over top of the last layer (see photo). This should look similar to wrapping a gift. Make sure you pull very tight without warping the fabric! Now staple all the way down each side pulling very (!) tight as you work.

Pull the fabric down from the top tightly, and then fold it sharply across the back. Hold it in place while your helper staples it.
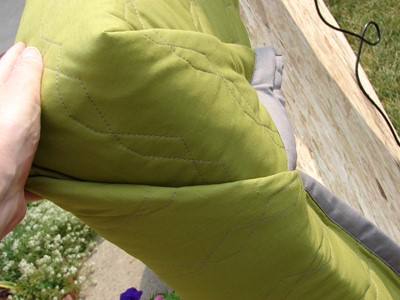
You should have a corner turned on the back and on the side when completed. Make sure to pull that side as tight as possible so it doesn’t loosen over time. If your staples haven’t gone all the way into the wood, tap them with the hammer until they are flush.
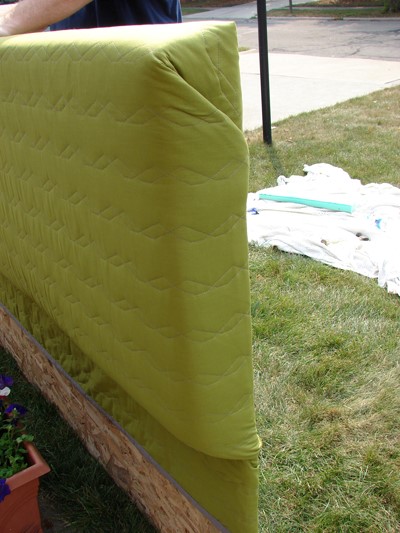
Stand back and admire your handiwork!
Accommodating the fabric length
If your fabric extends all the way to the bottom of your headboard, fold it over and staple along the back. Then cut holes in the fabric where you drilled the holes for mounting so you can easily pass your bolts through.
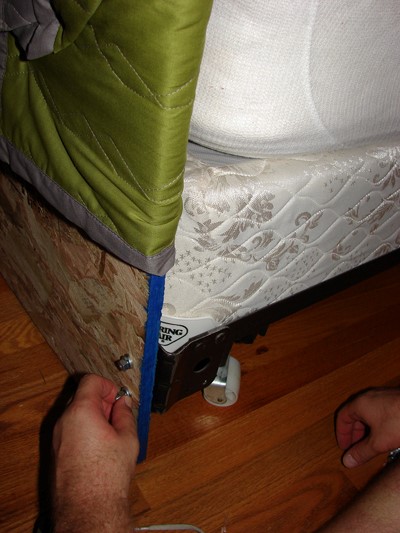
Mount the headboard
Center the headboard at the head of your bed. With your helper holding the headboard in place, slide a bolt through the headboard and bed frame, and then add a washer and finger tighten the nut (on the back). Repeat for all bolts and then make sure the headboard is centered. Once you’re happy tighten all bolts. If your headboard will be under a lot of…umm…stress, make sure the nuts and bolts are very tight.
A beautiful headboard for under $100!